Cover of a Magazine! A Dream Come True!

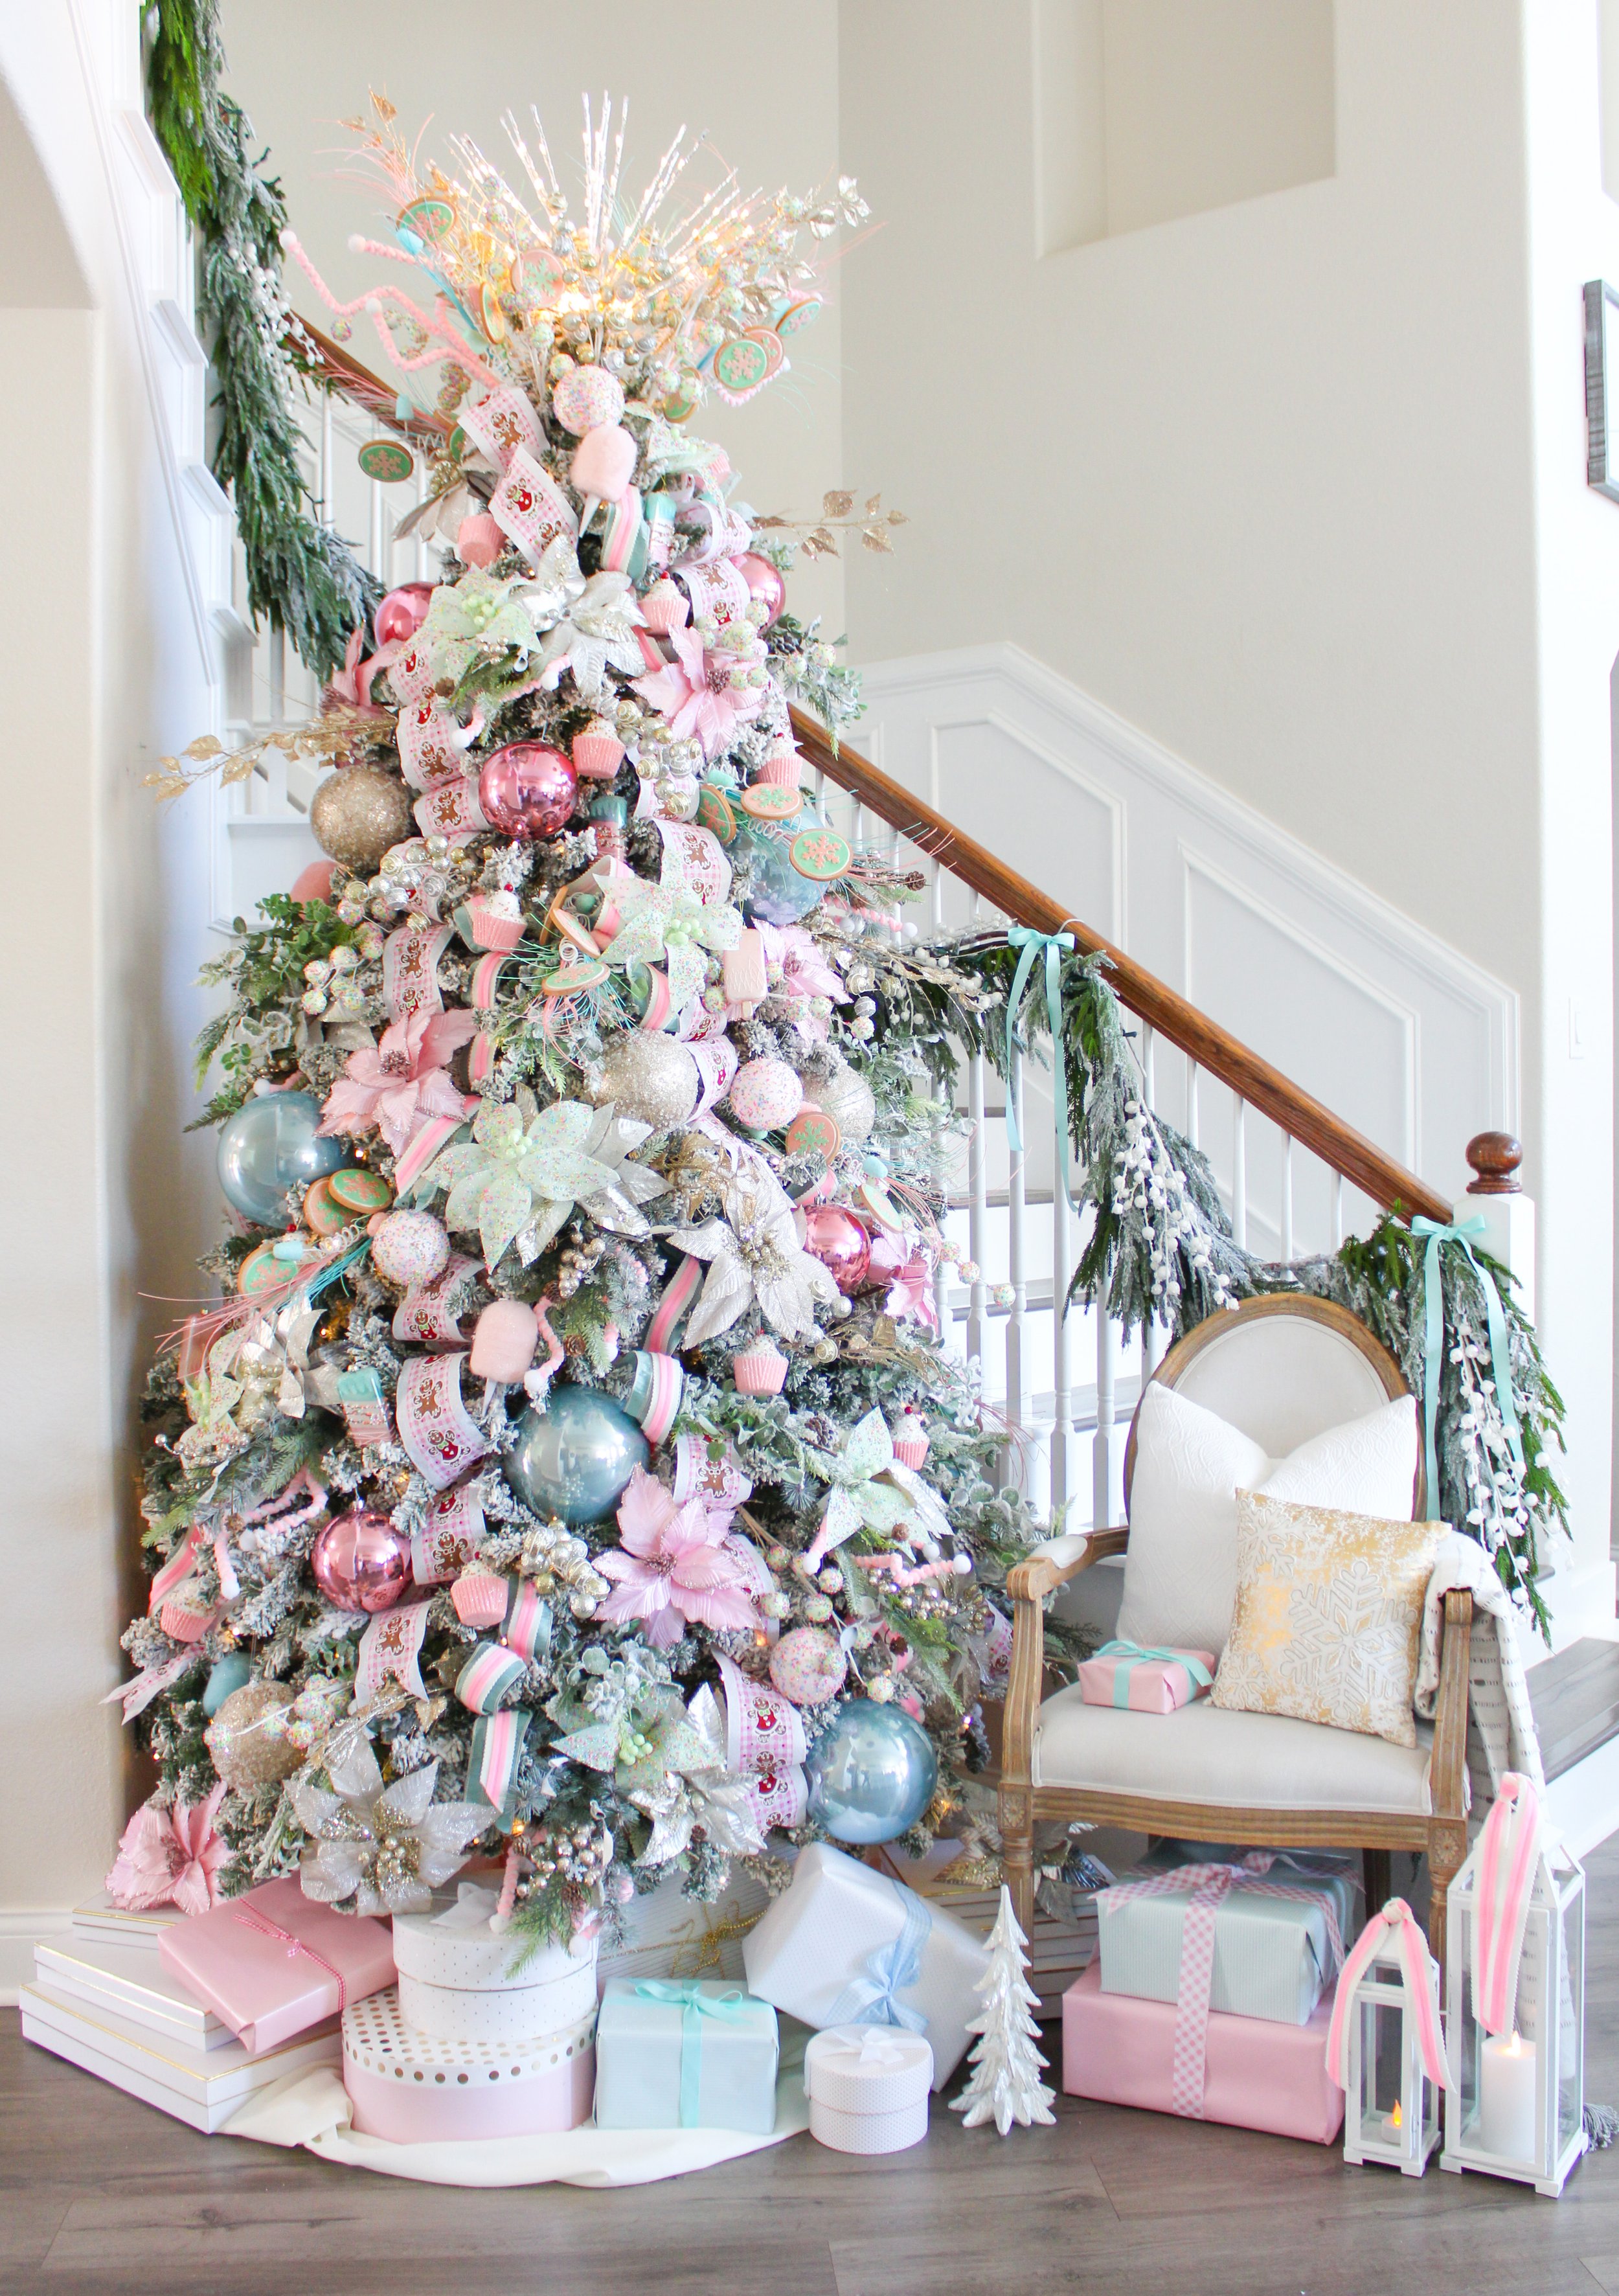
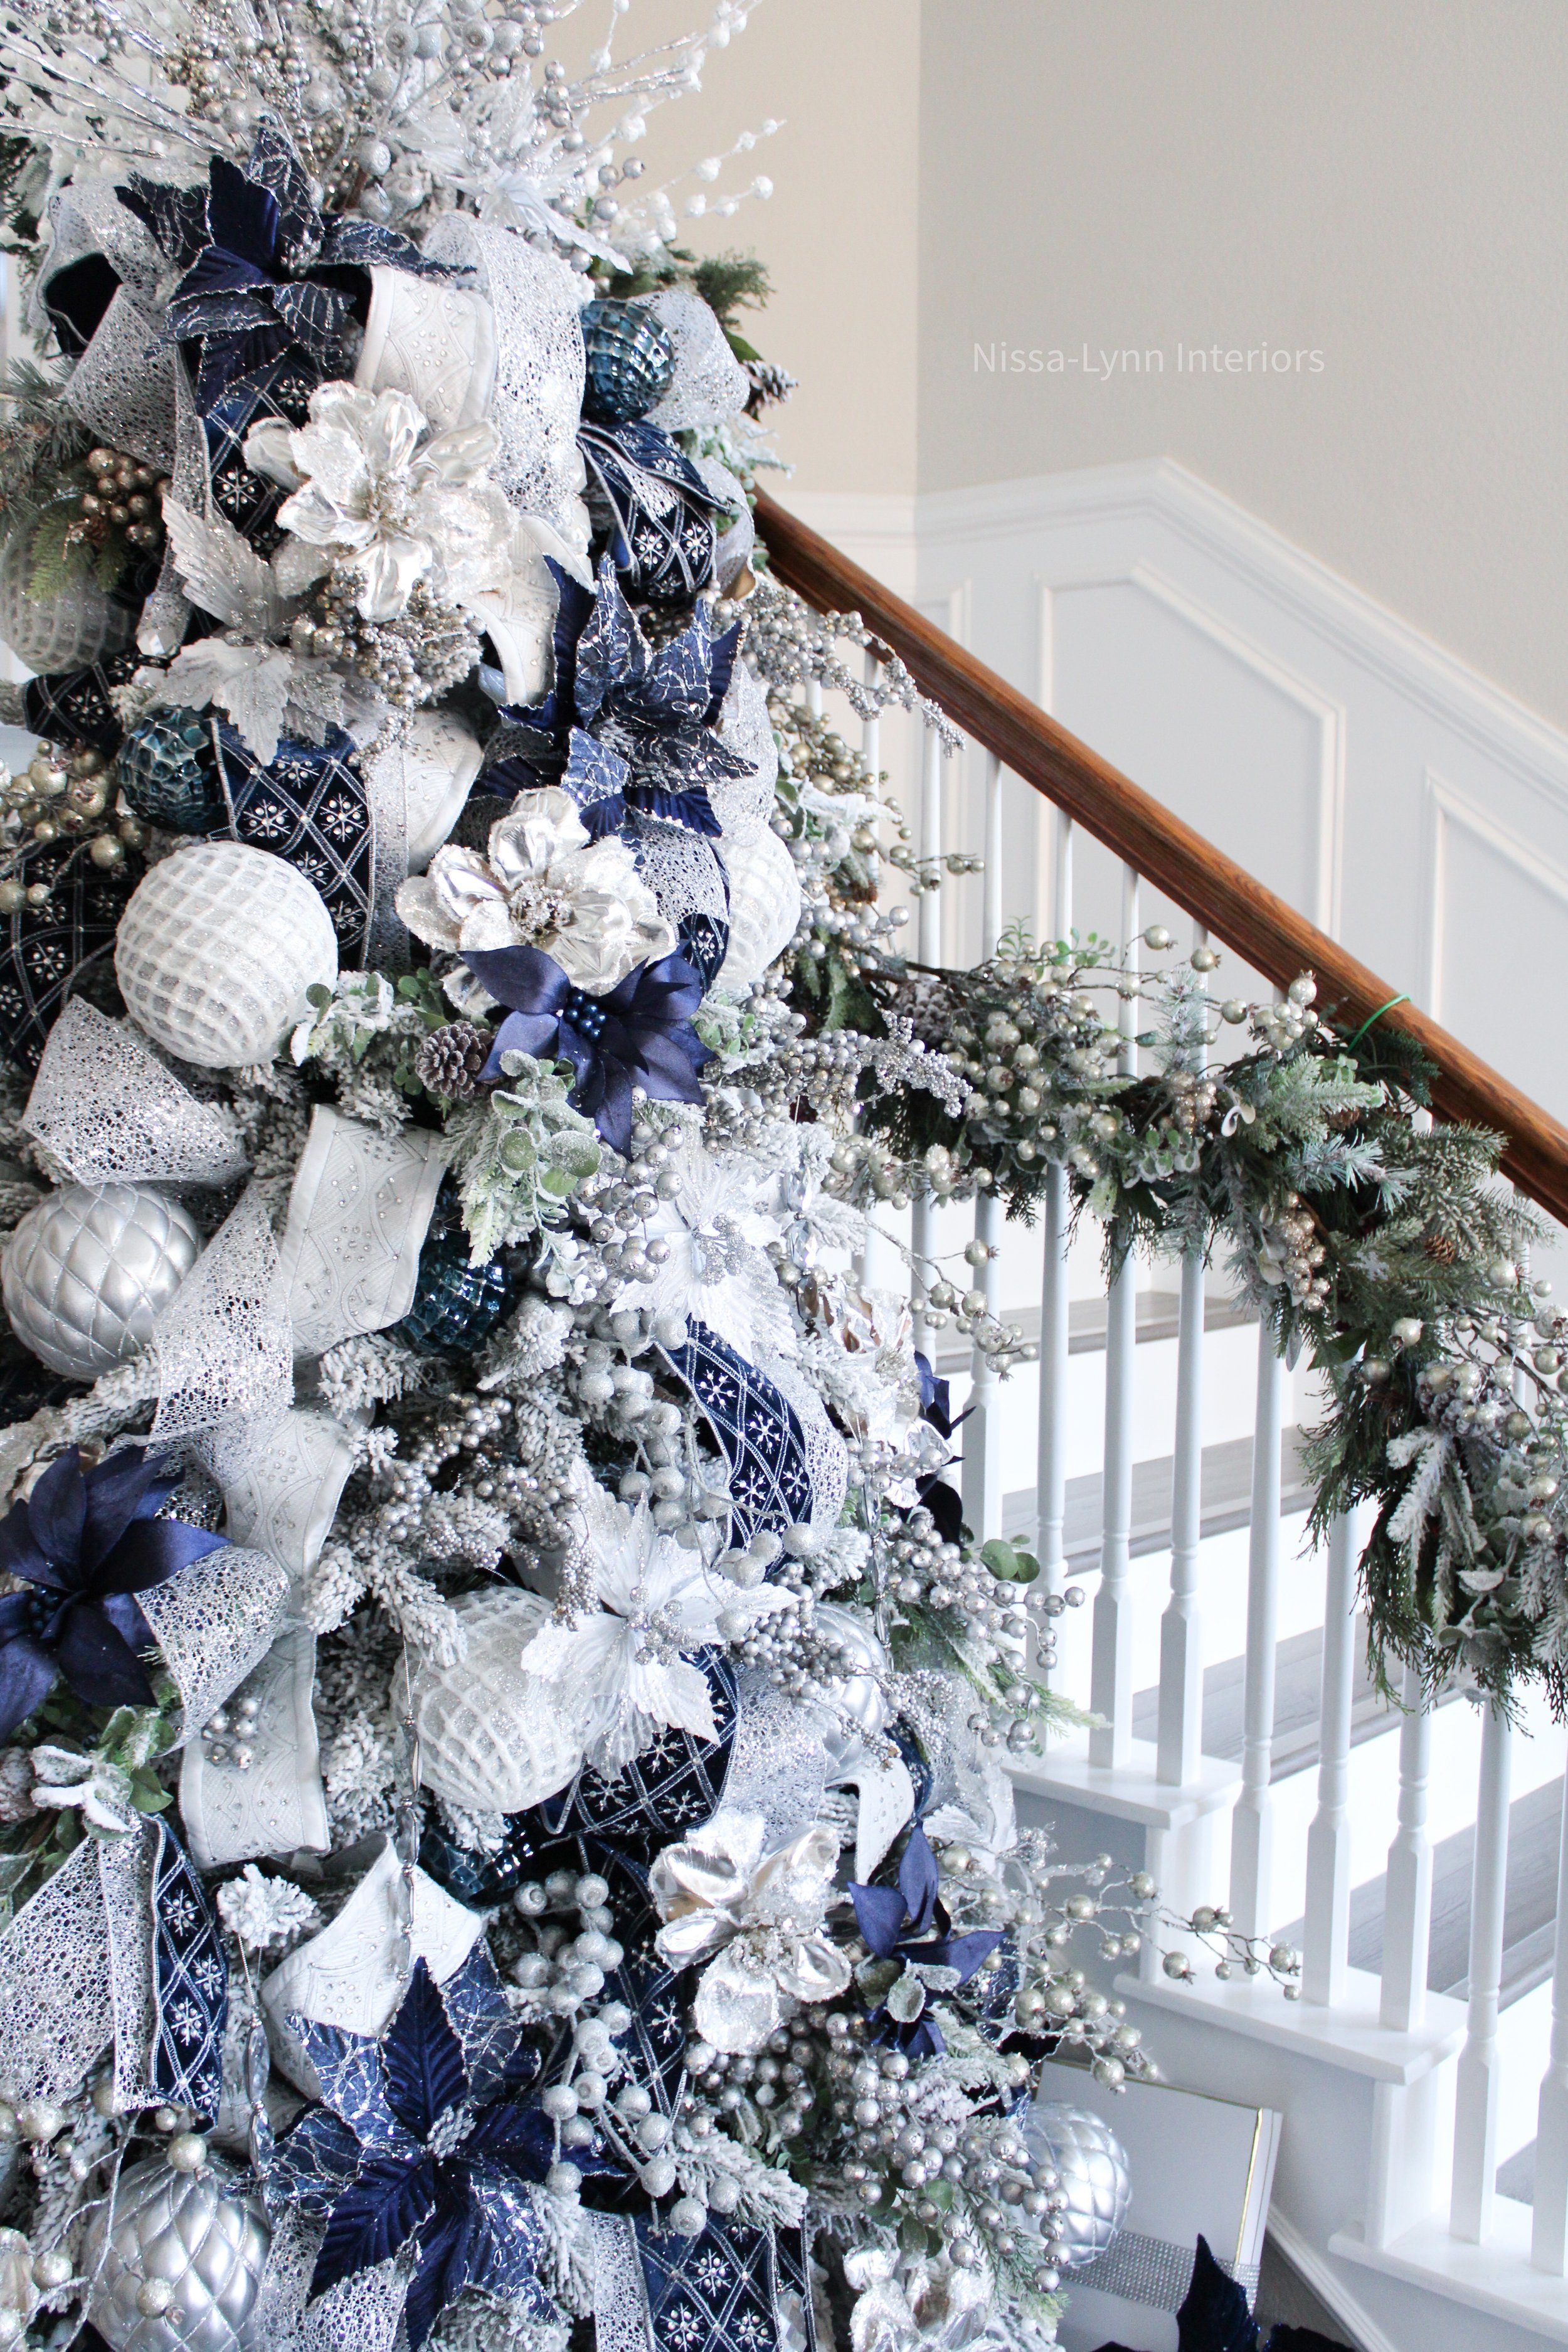
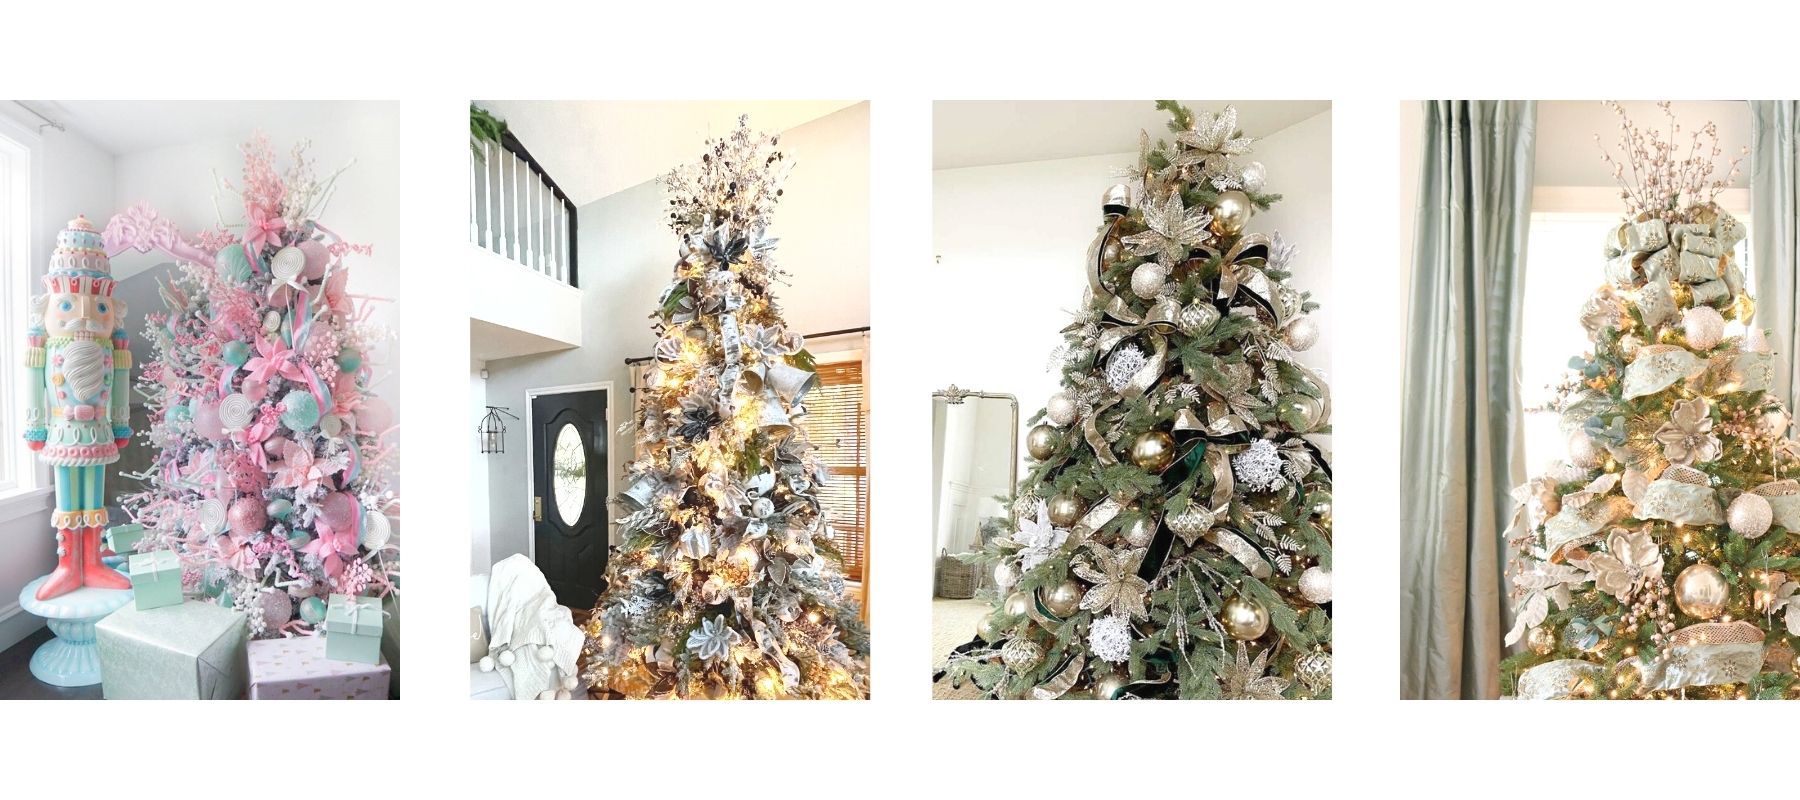
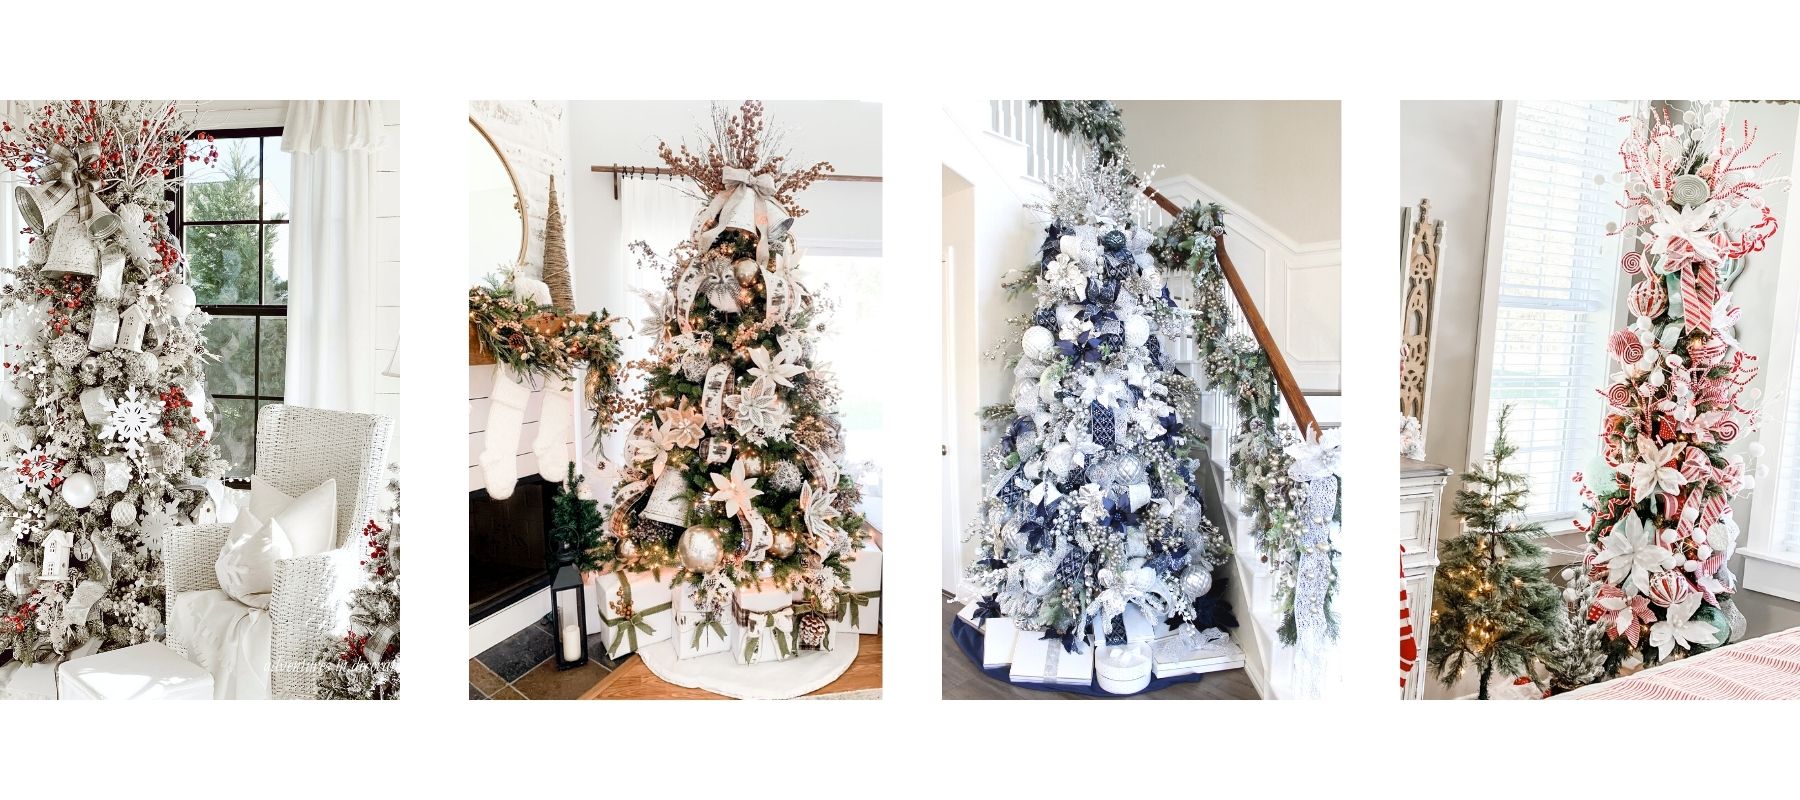
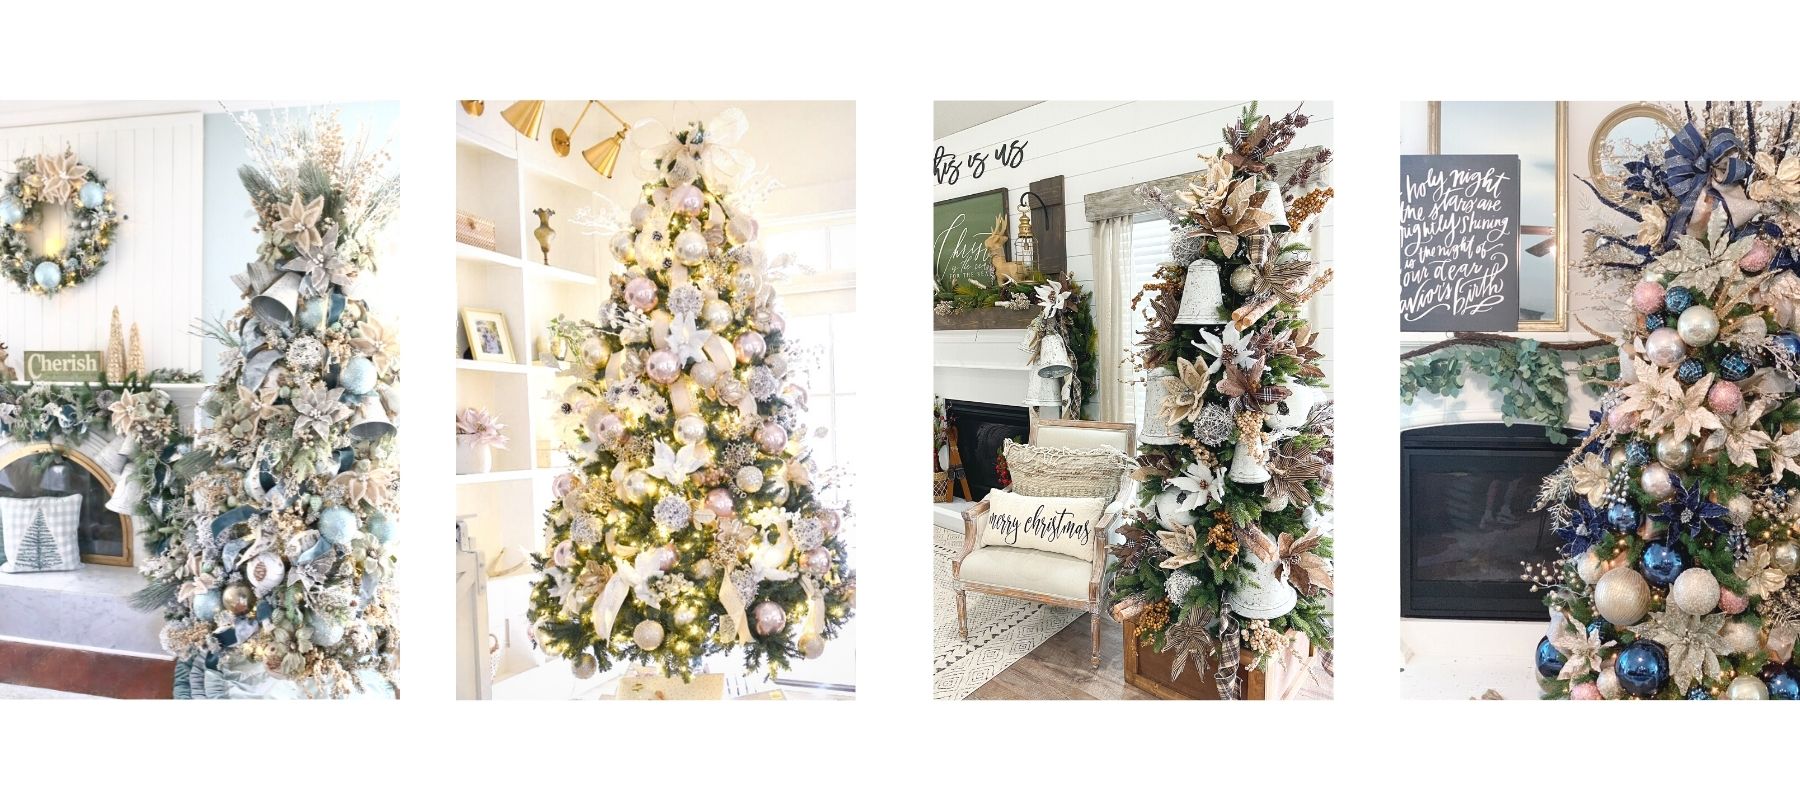
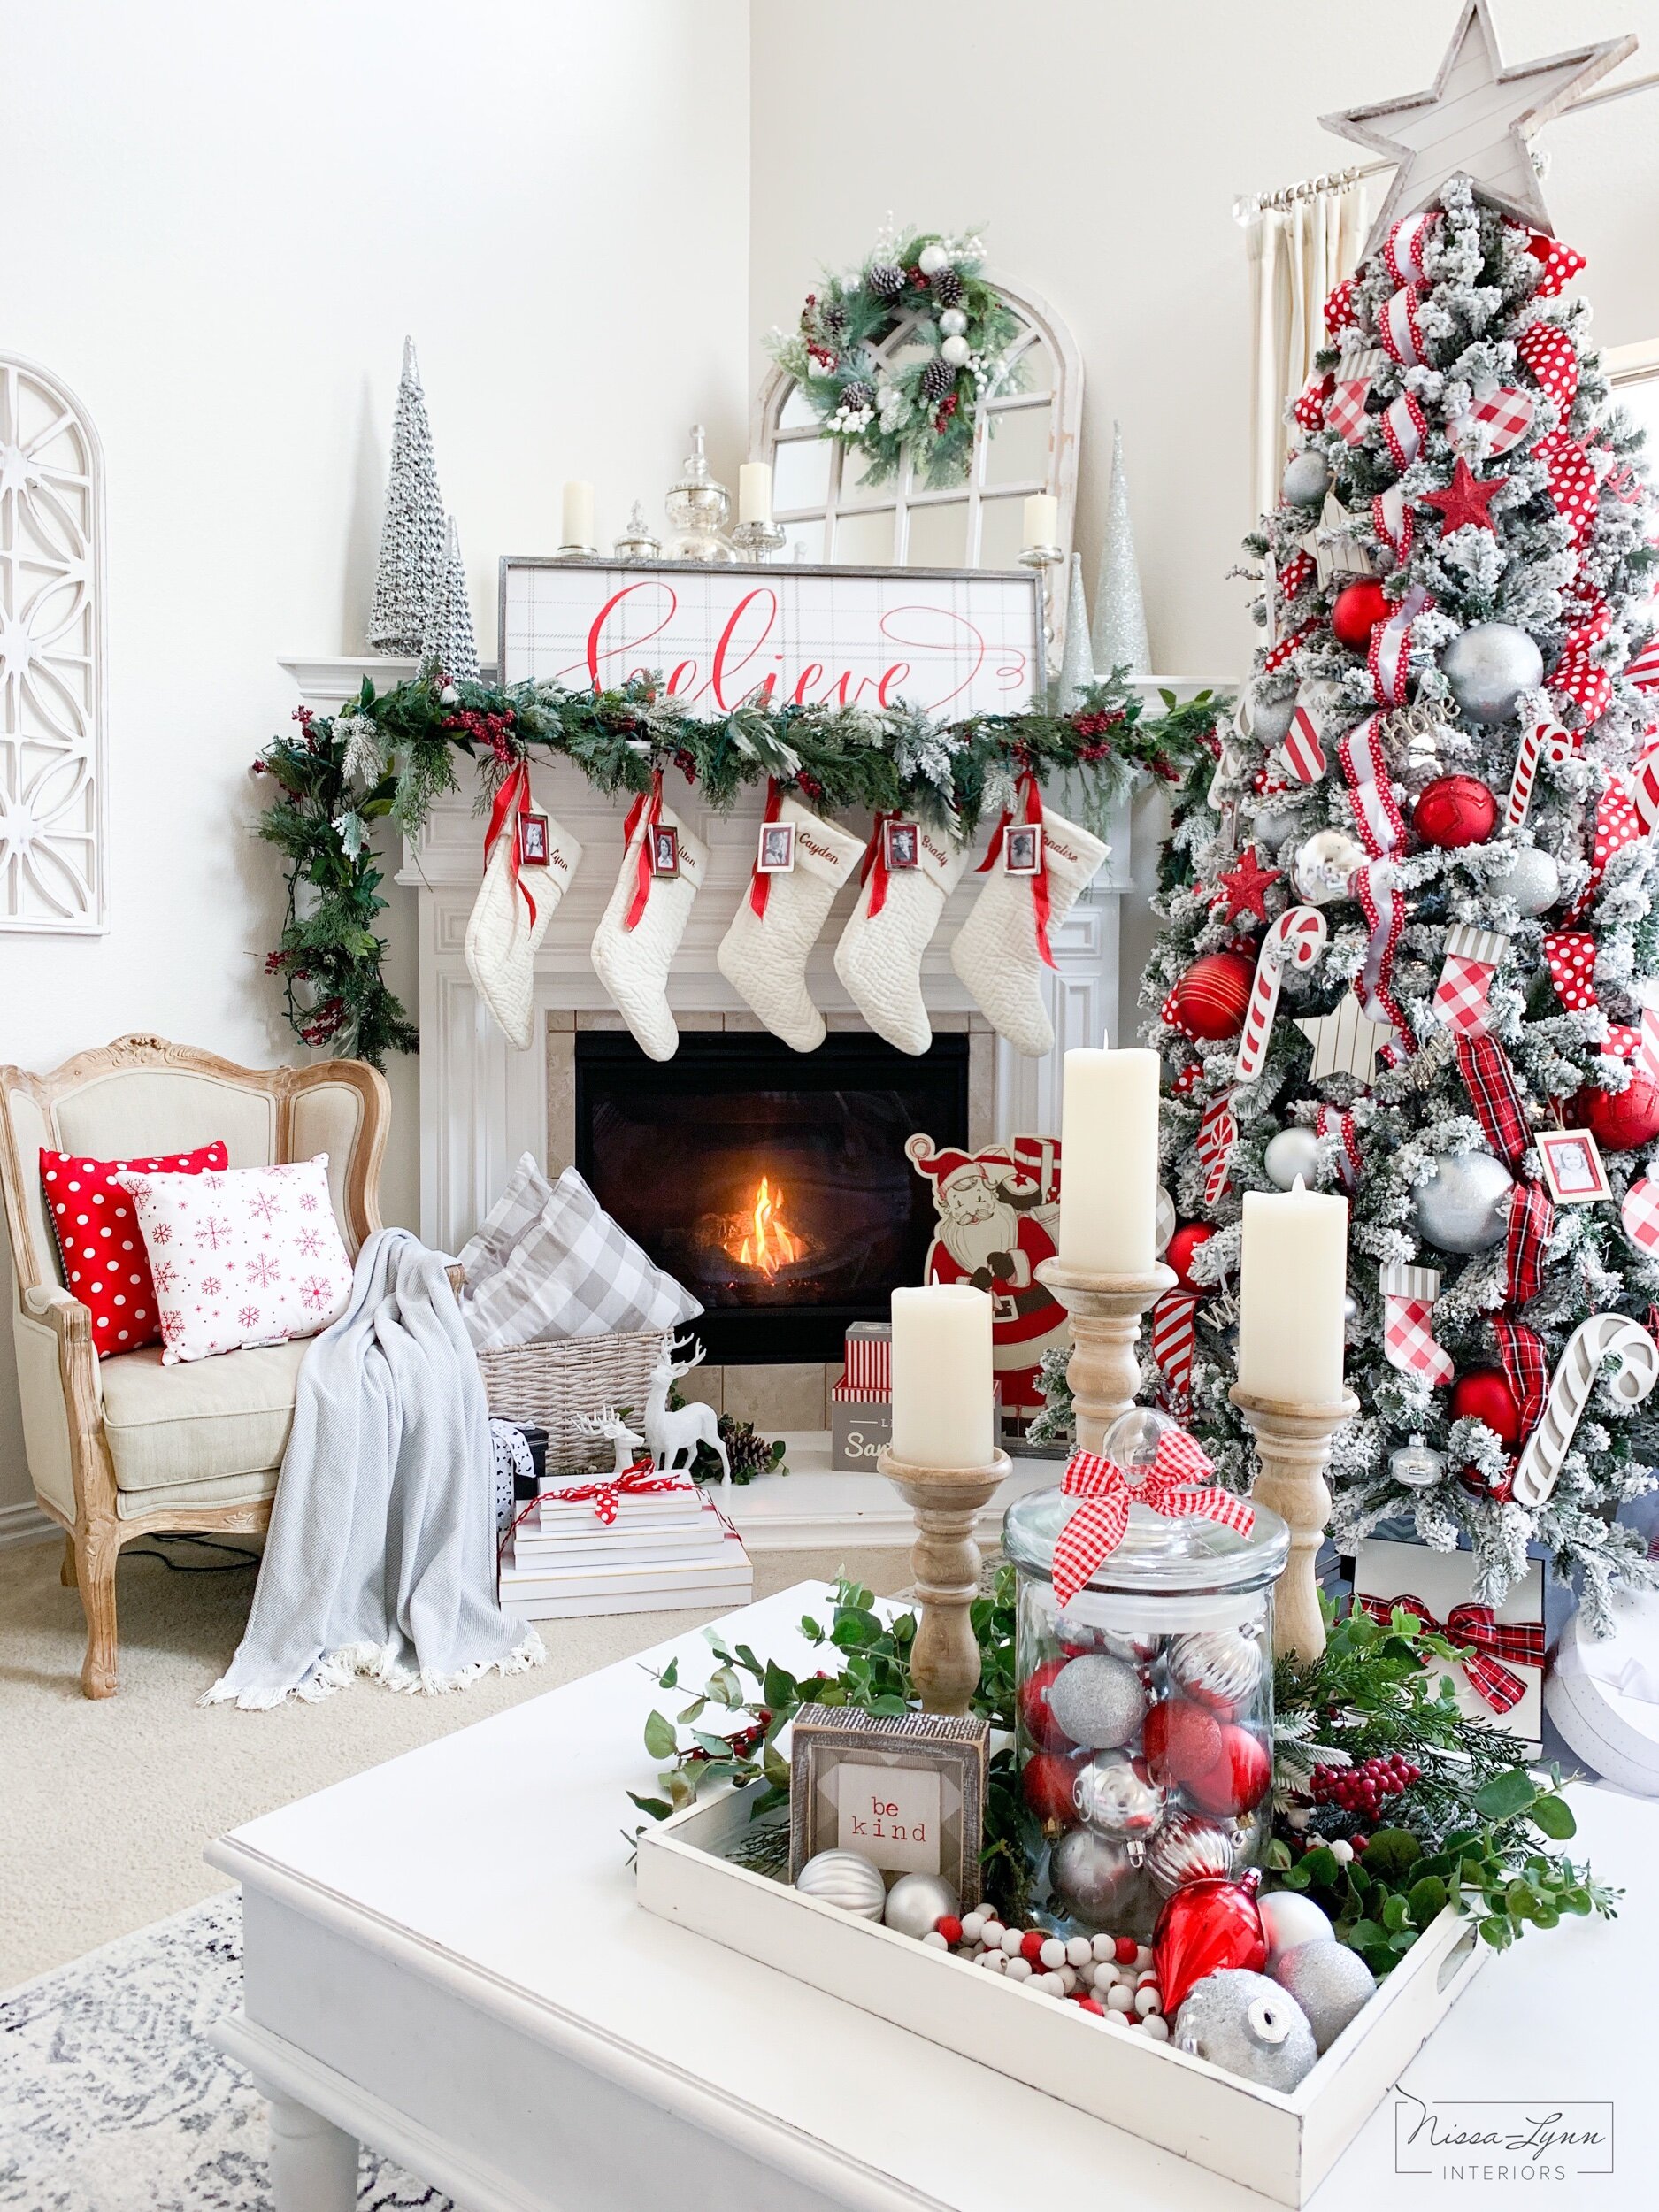
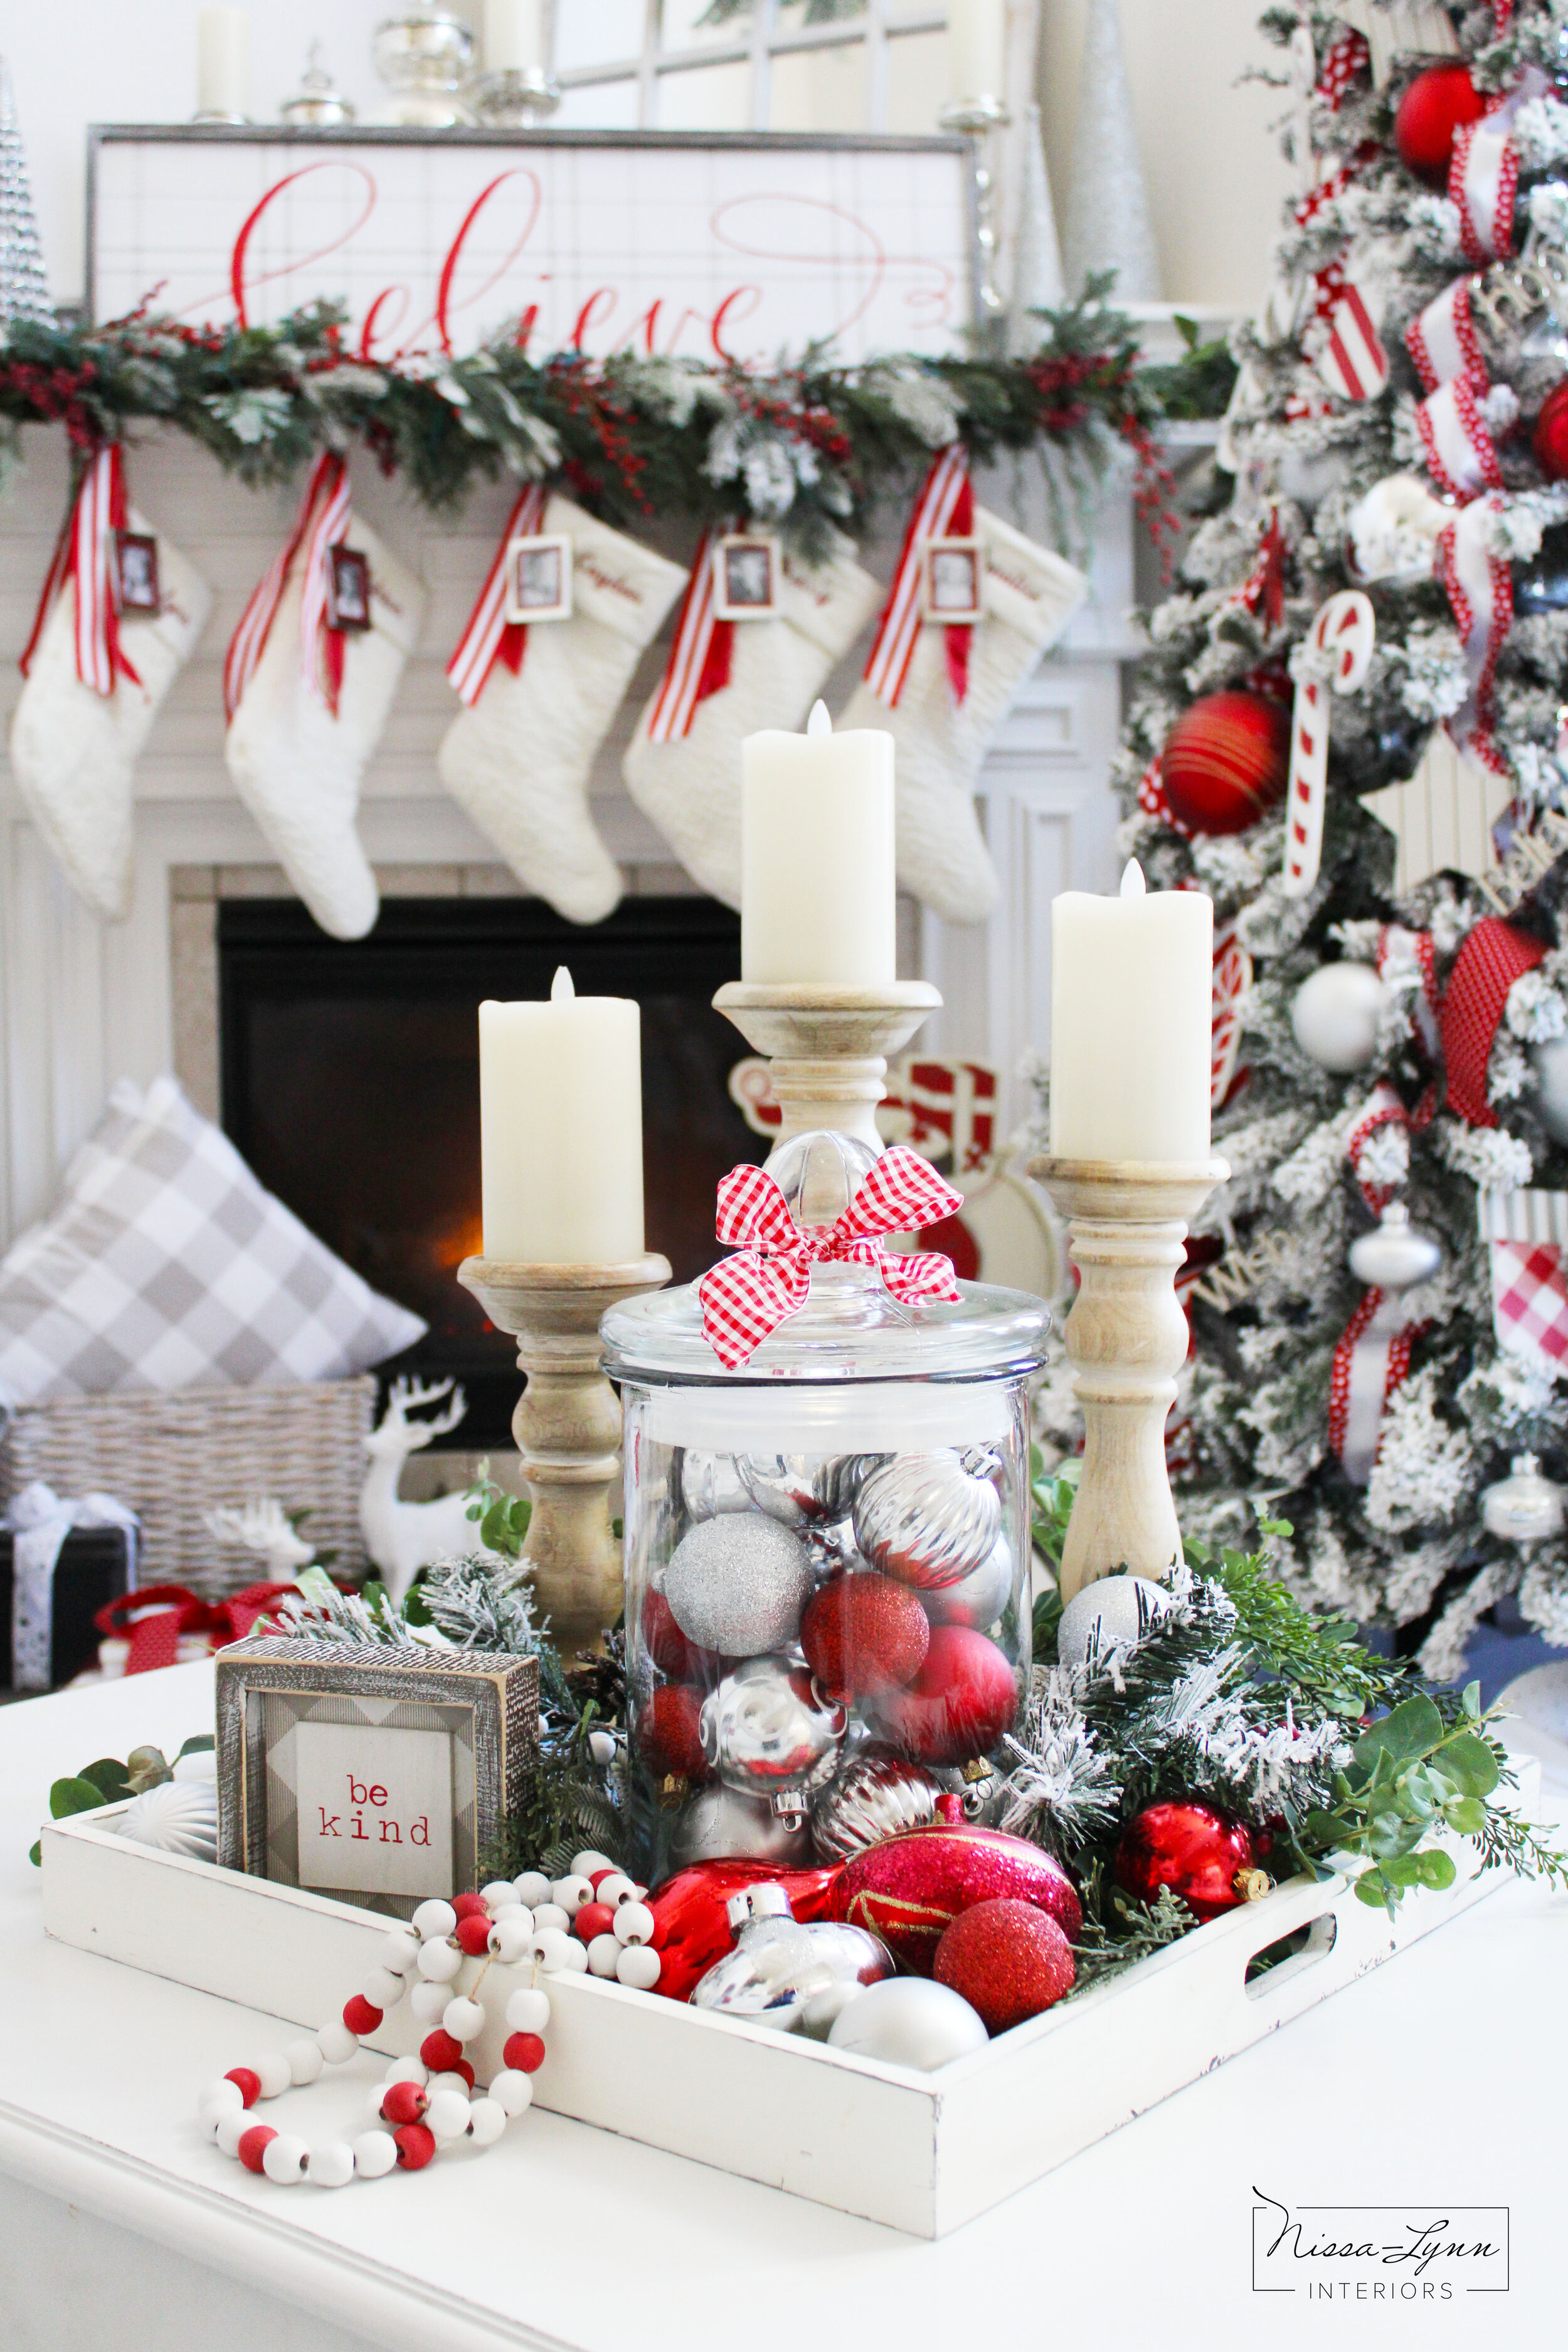
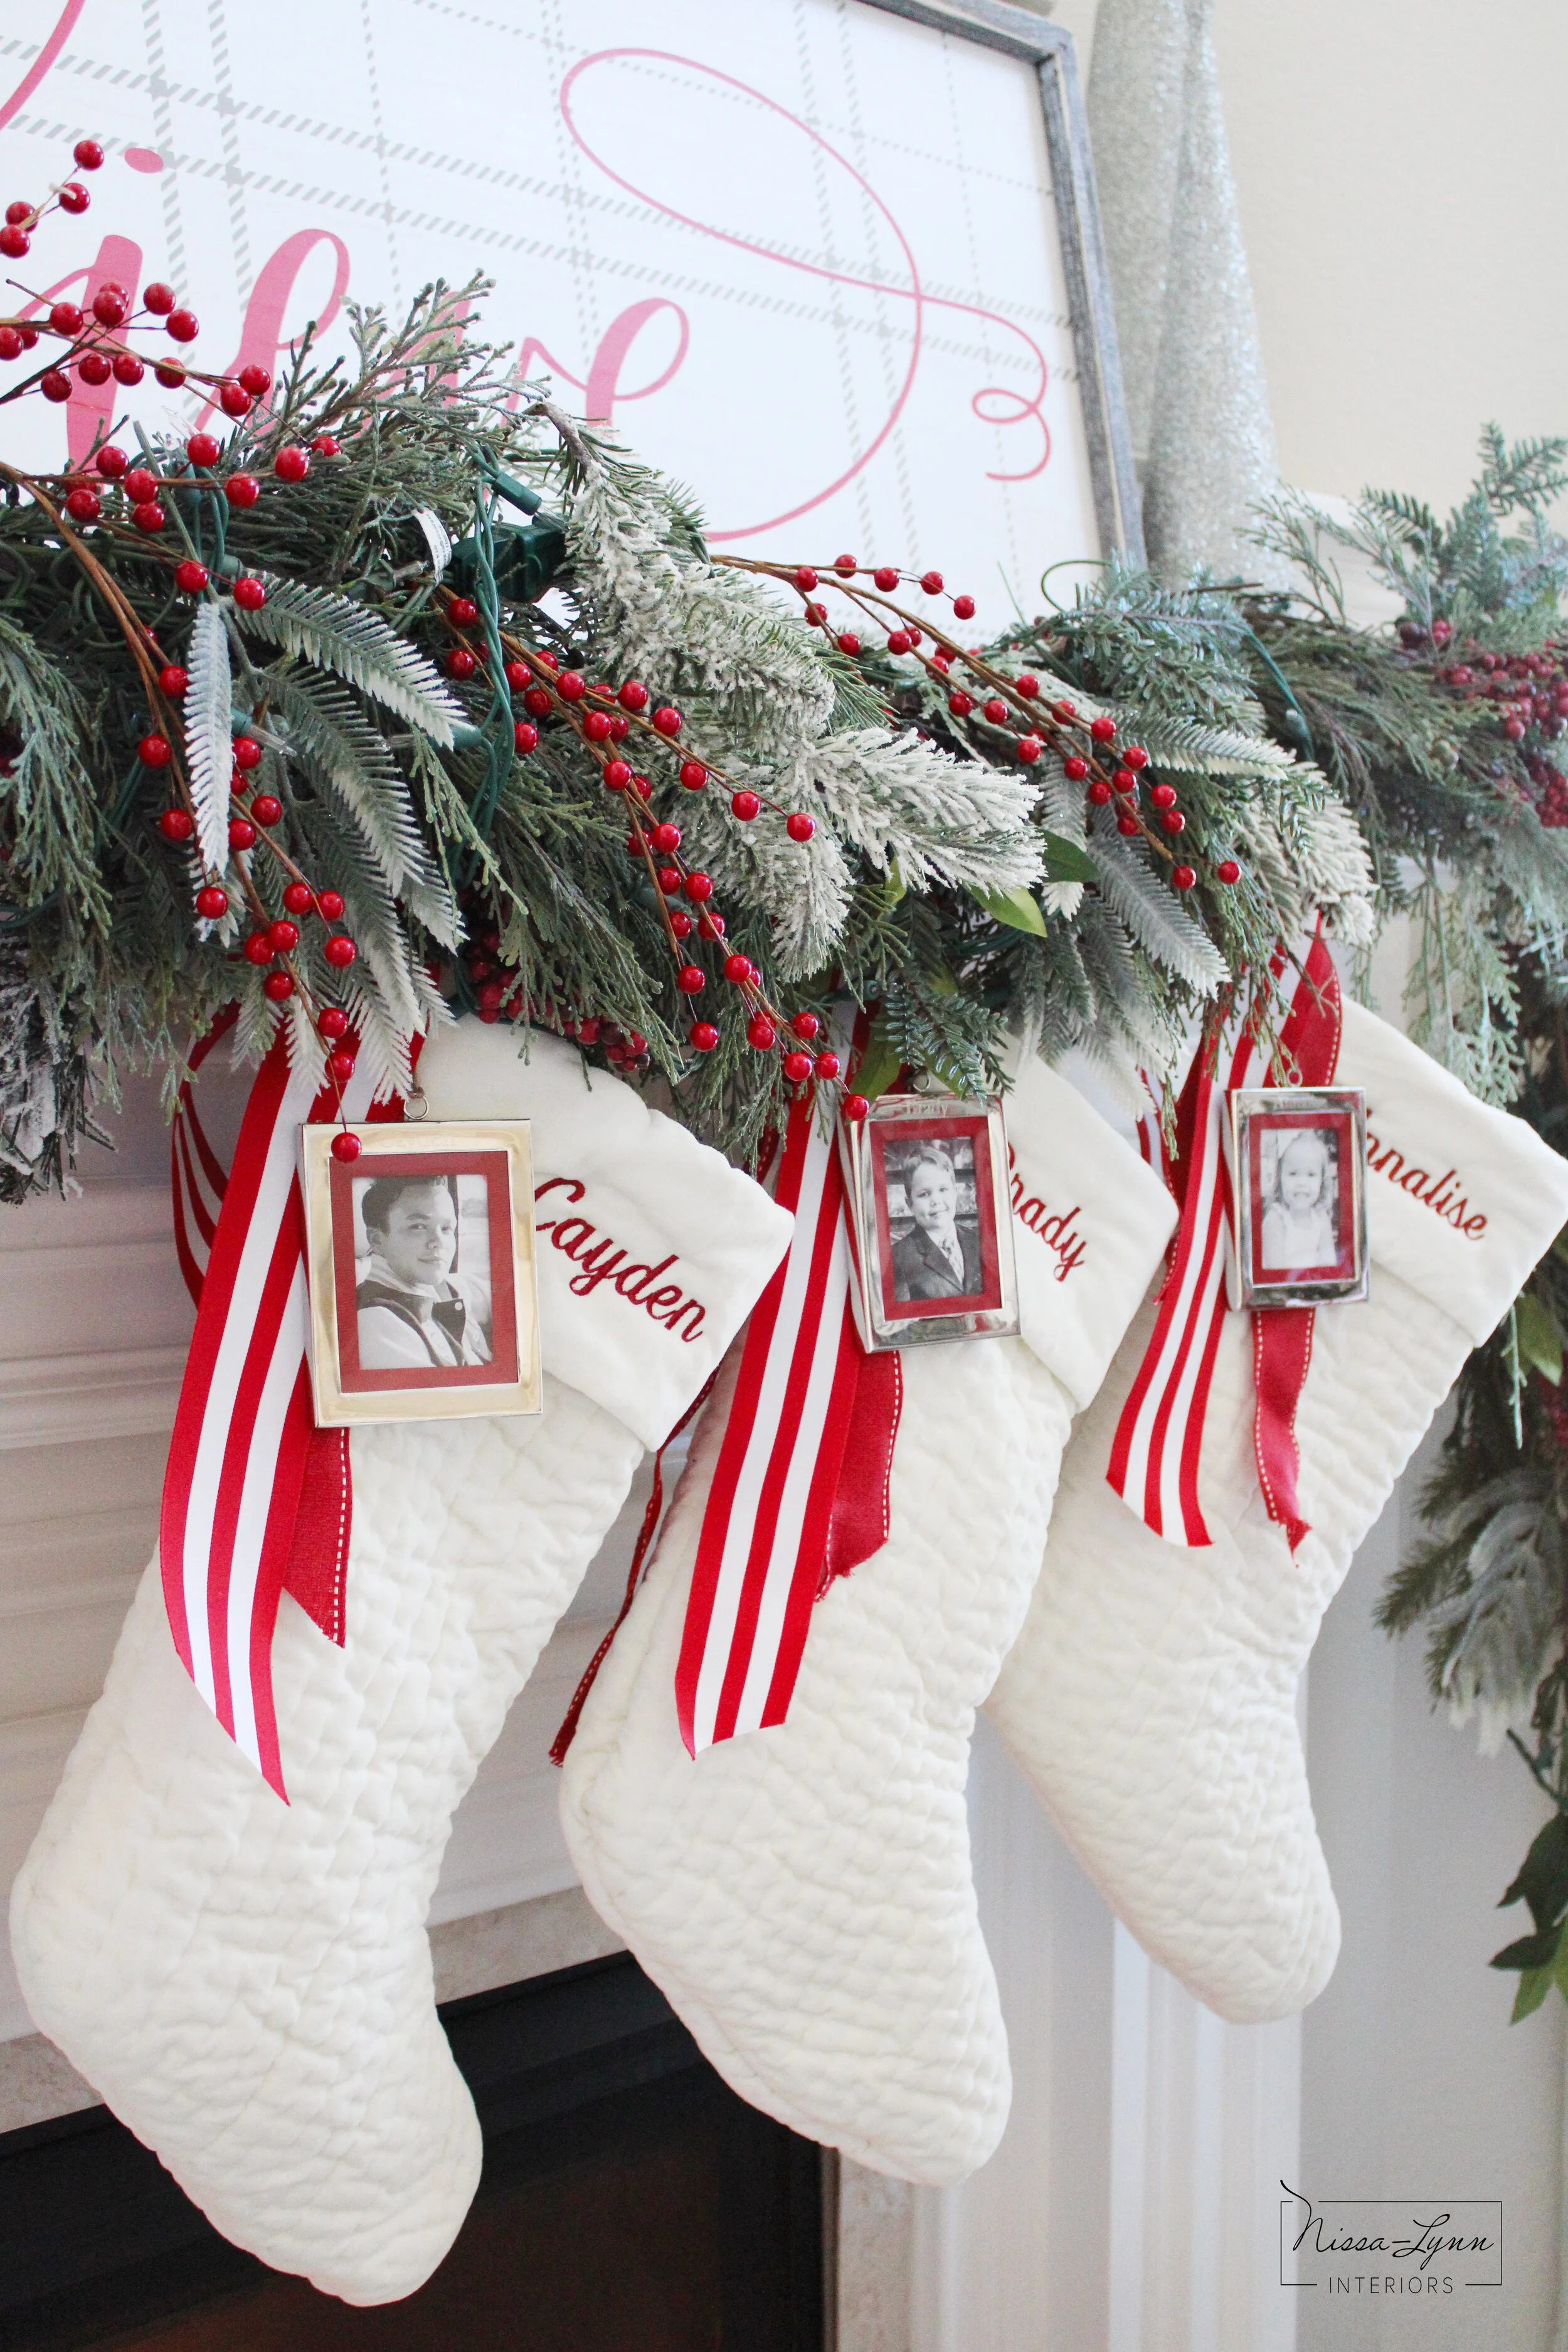
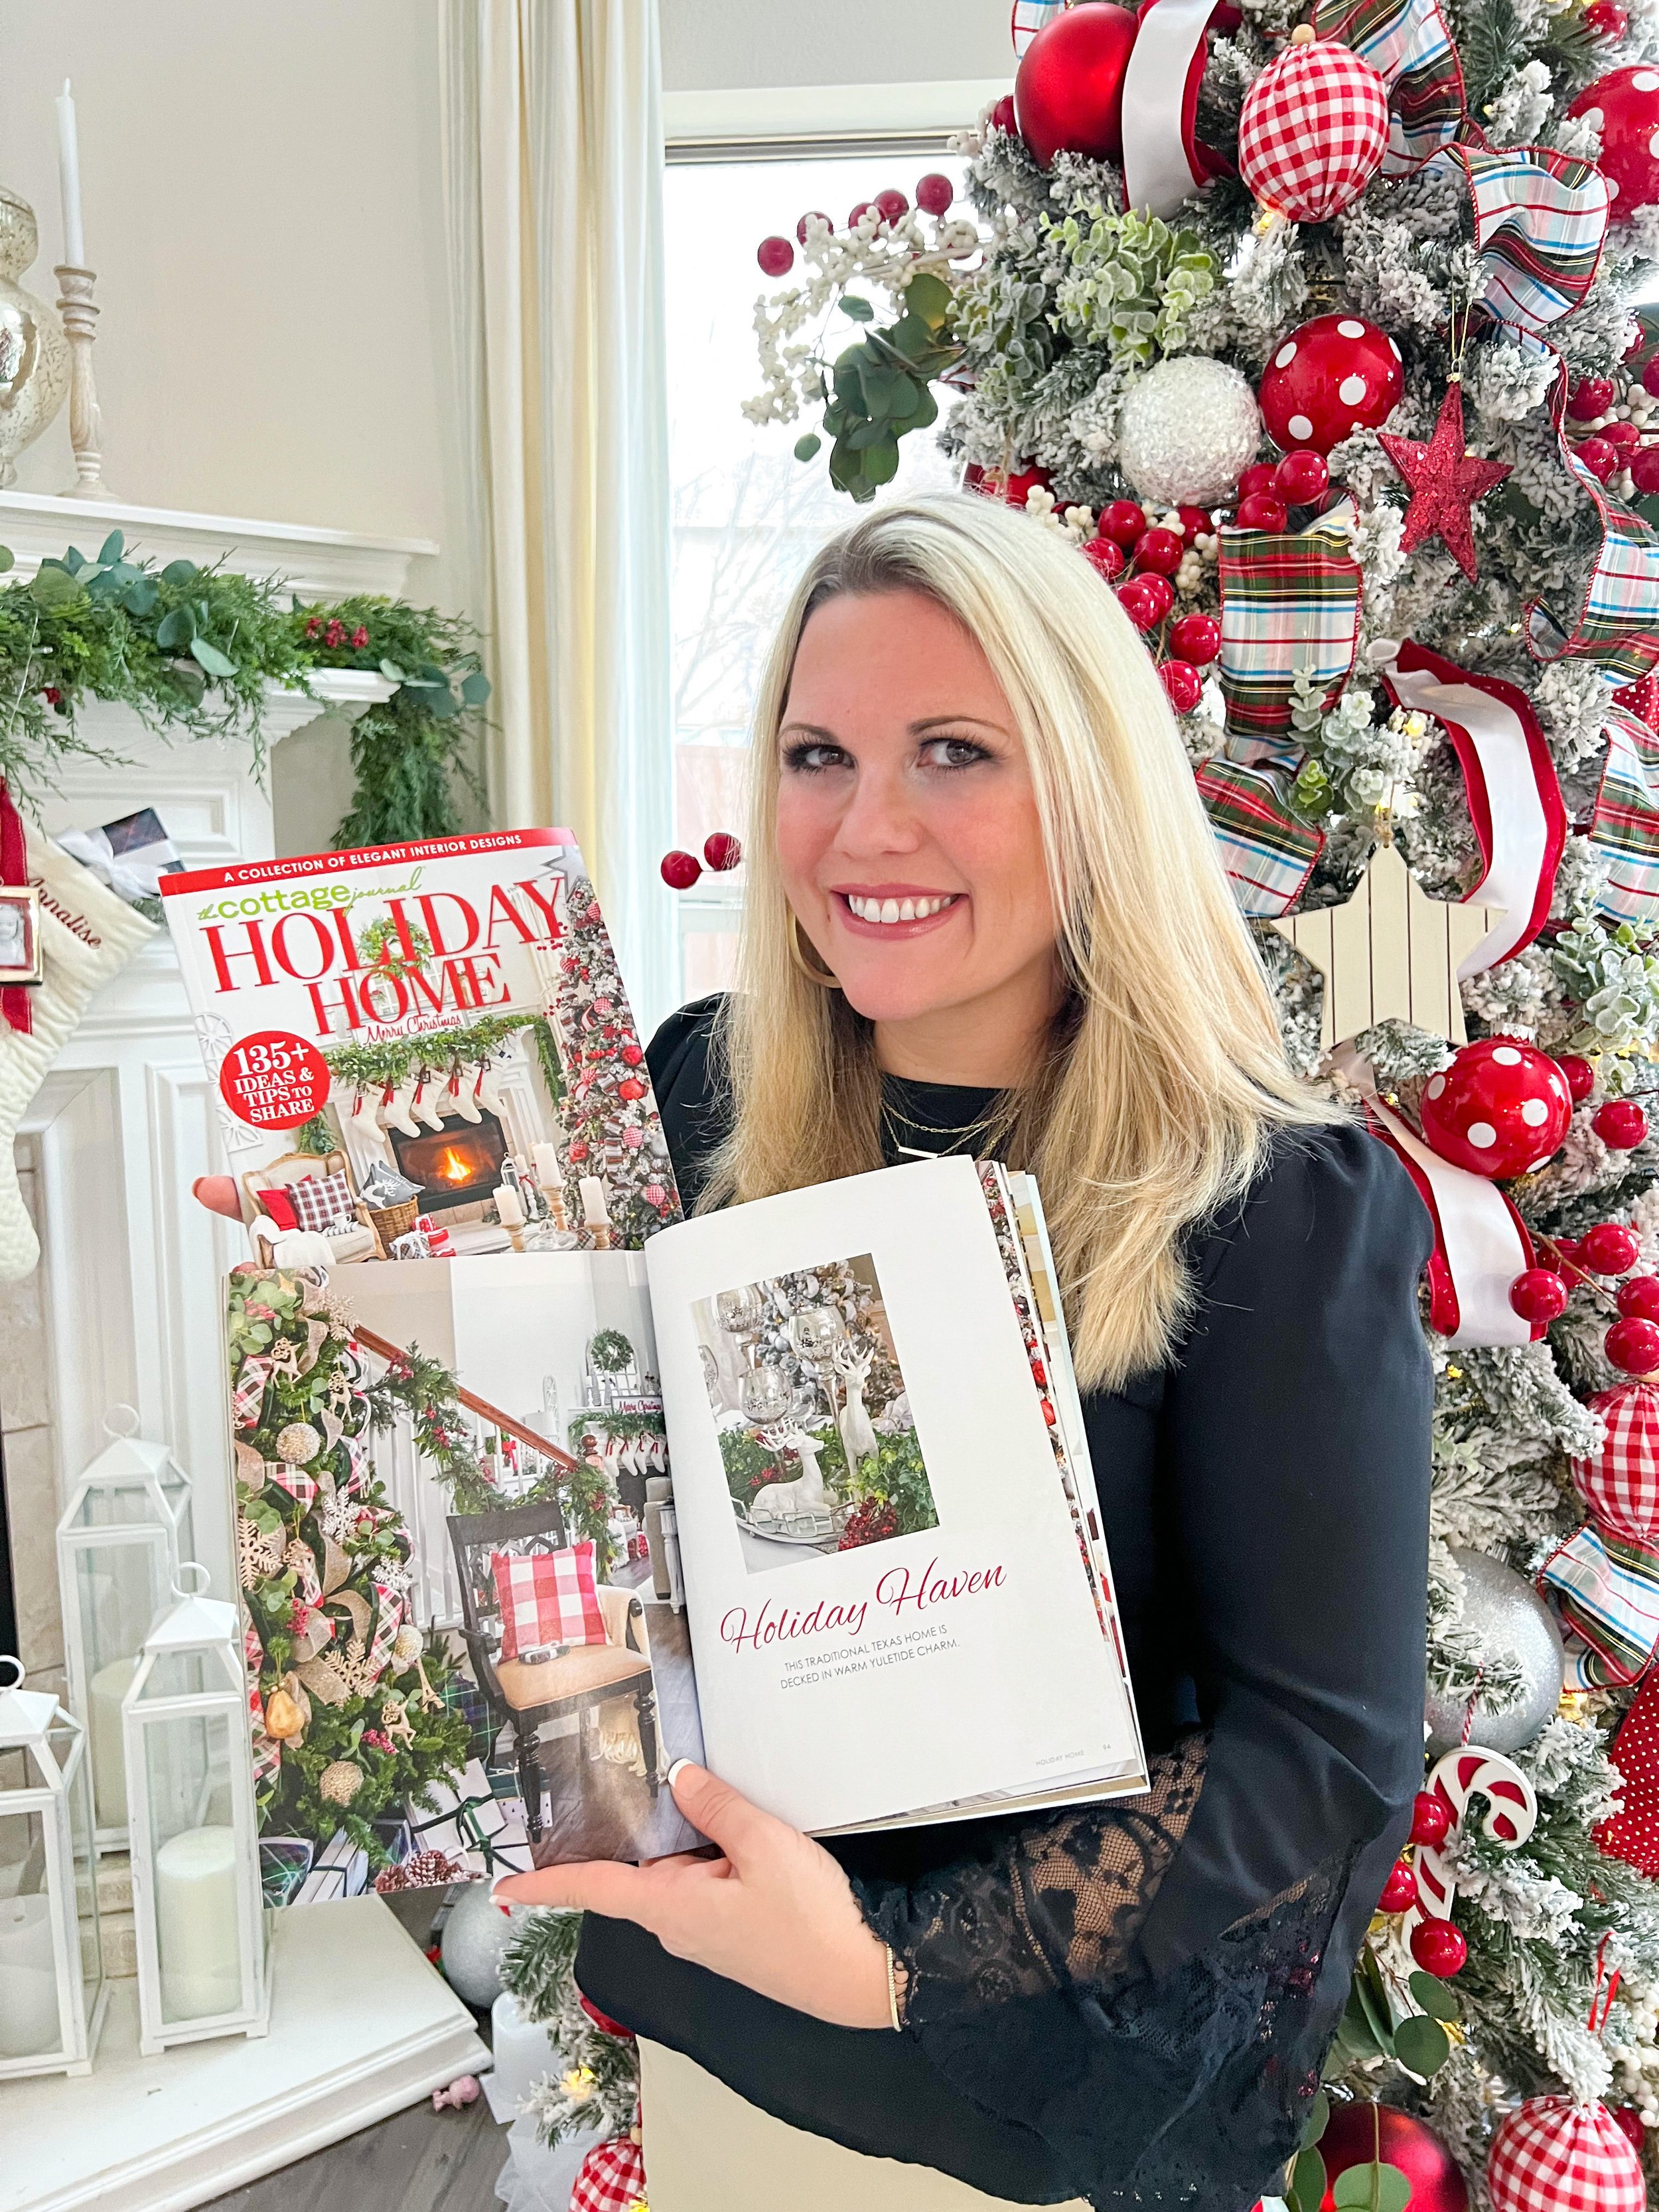
✨DREAMS COME TRUE!!✨That’s my home on the COVER! I’m so honored to have had the opportunity to have my Christmas home on the cover, the inside cover, and a ten page feature in the 2021 The Cottage Journal Holiday Home magazine!

I was so busy last holiday season with the magazine and my daughter’s wedding I never had a chance to write a blog post about this extraordinary experience!

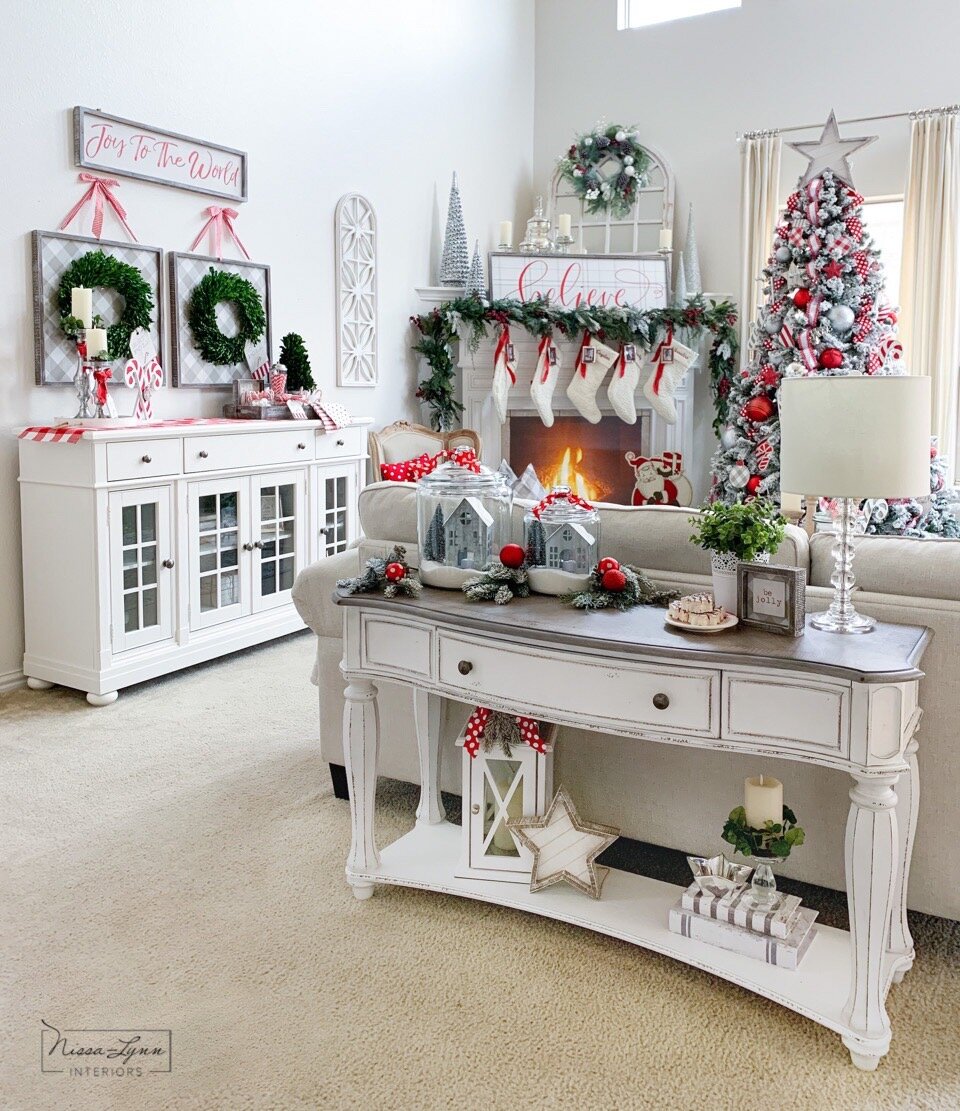
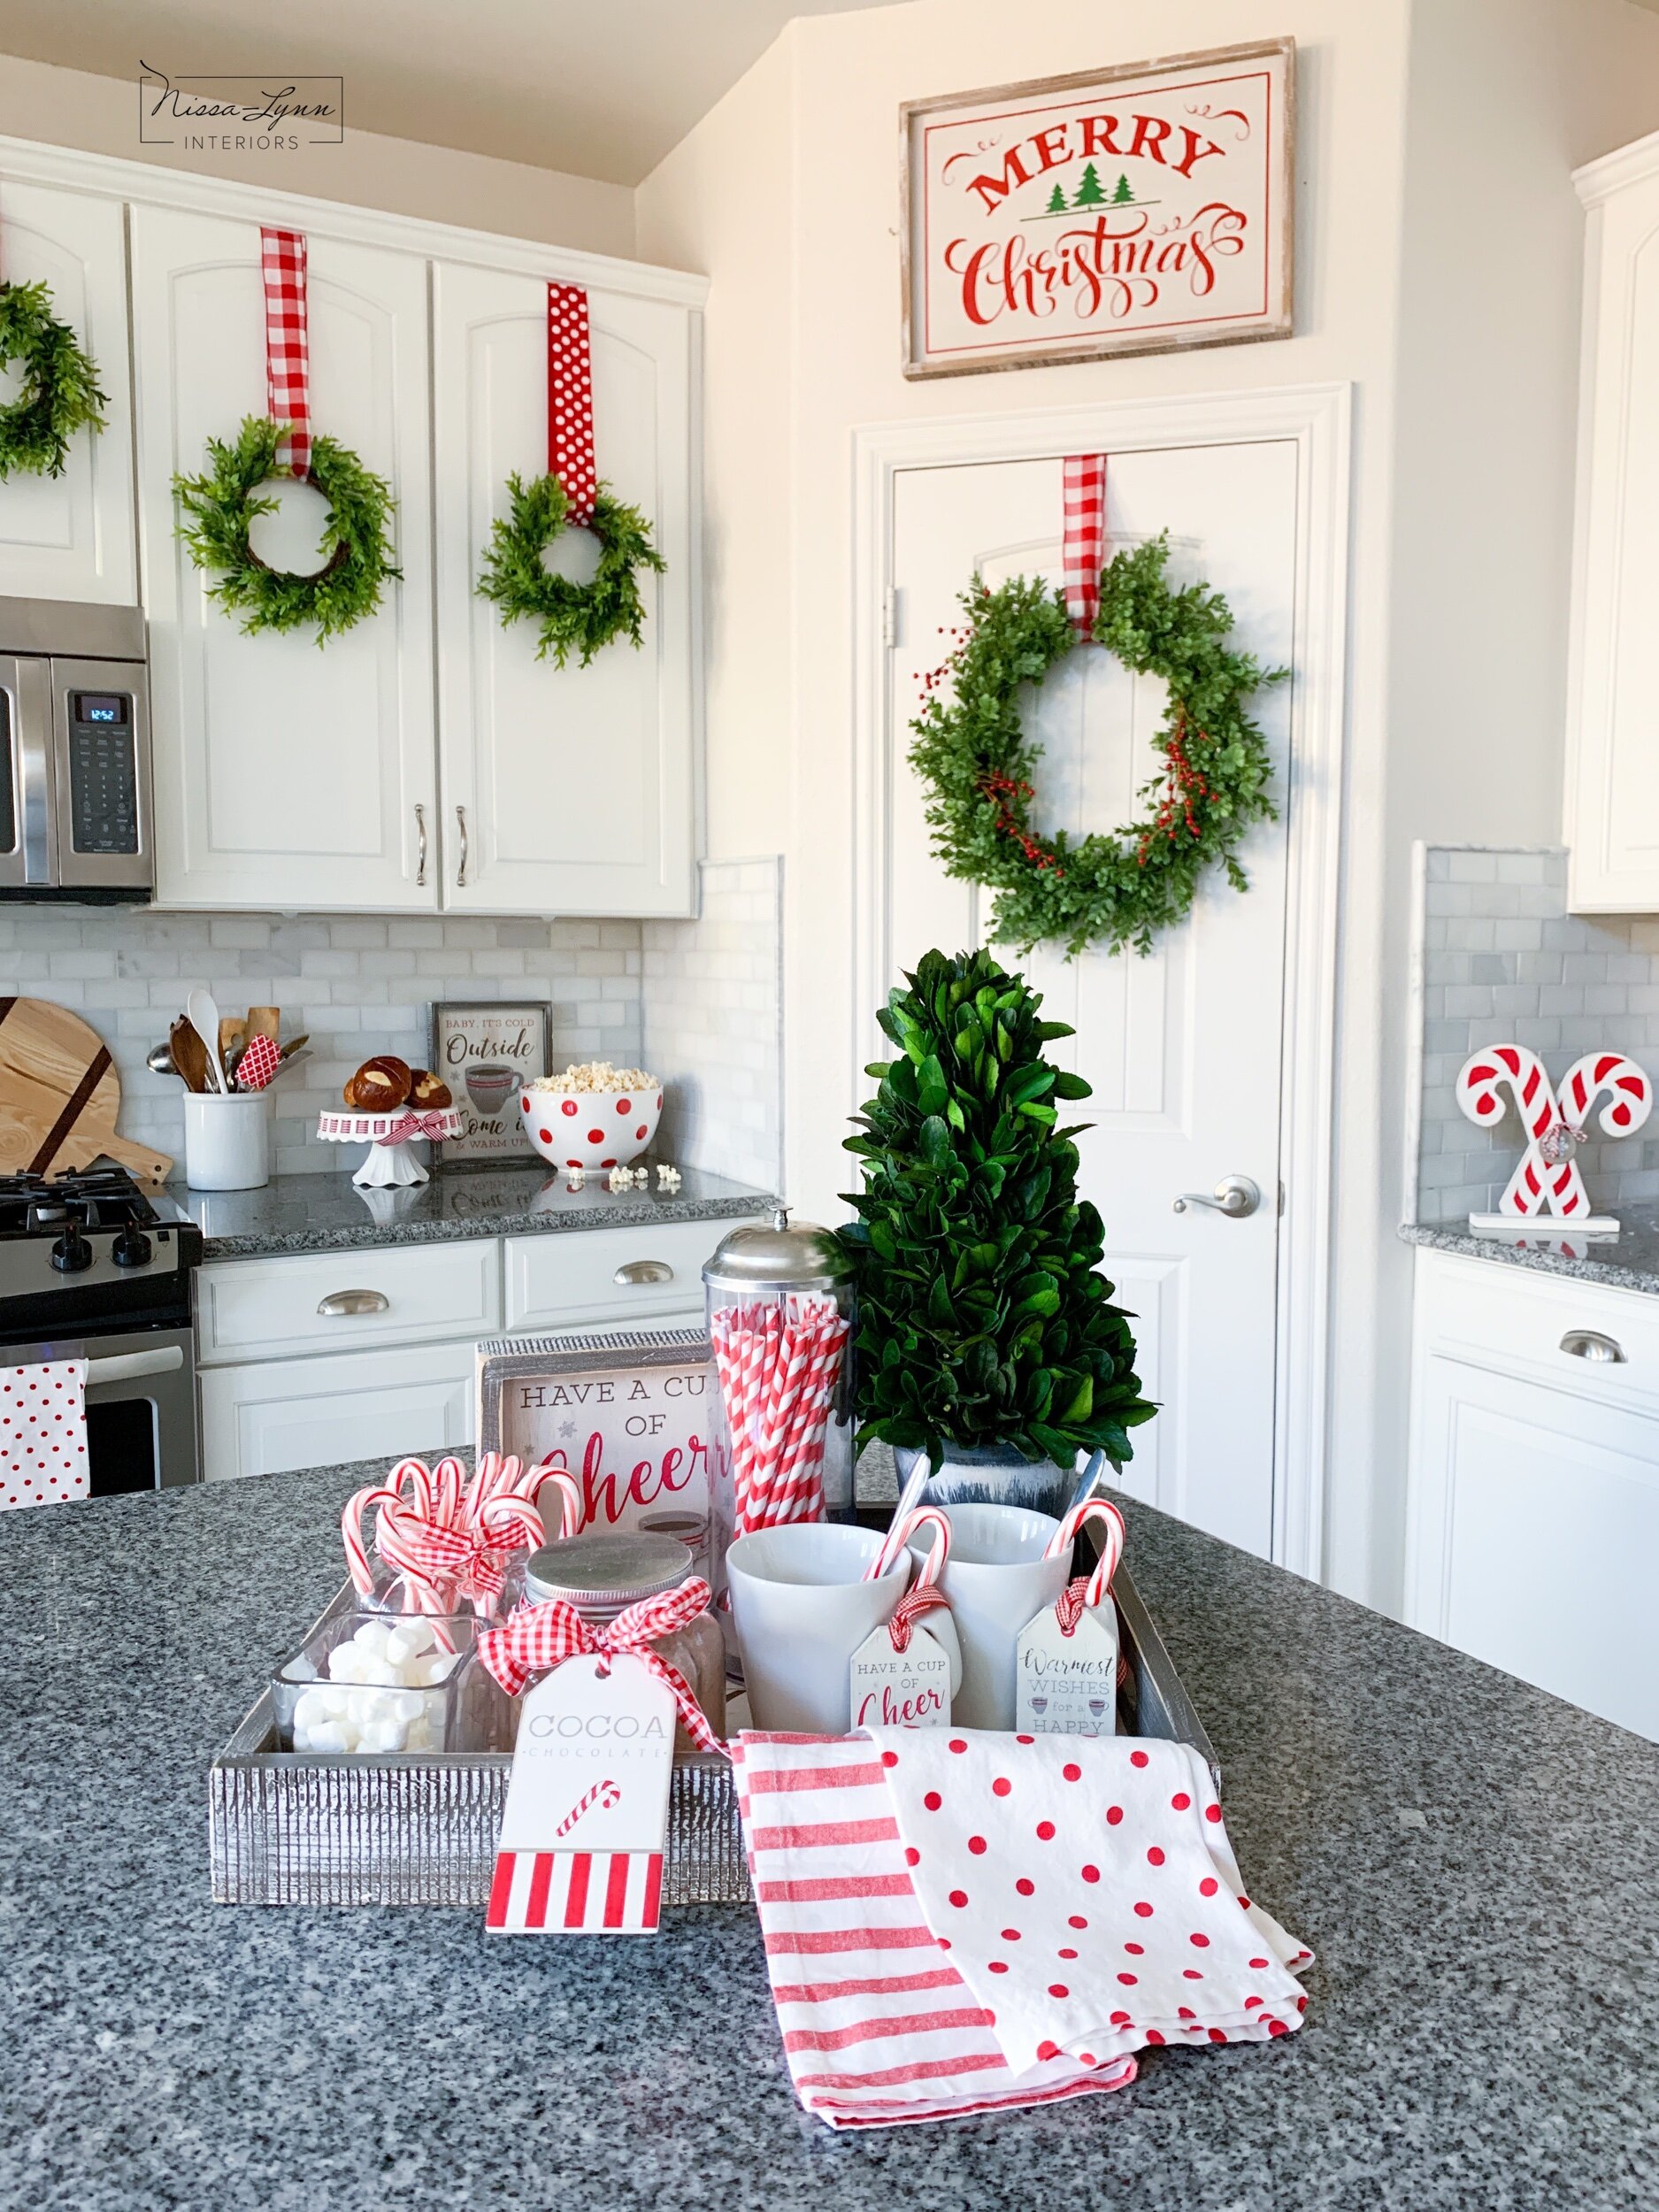
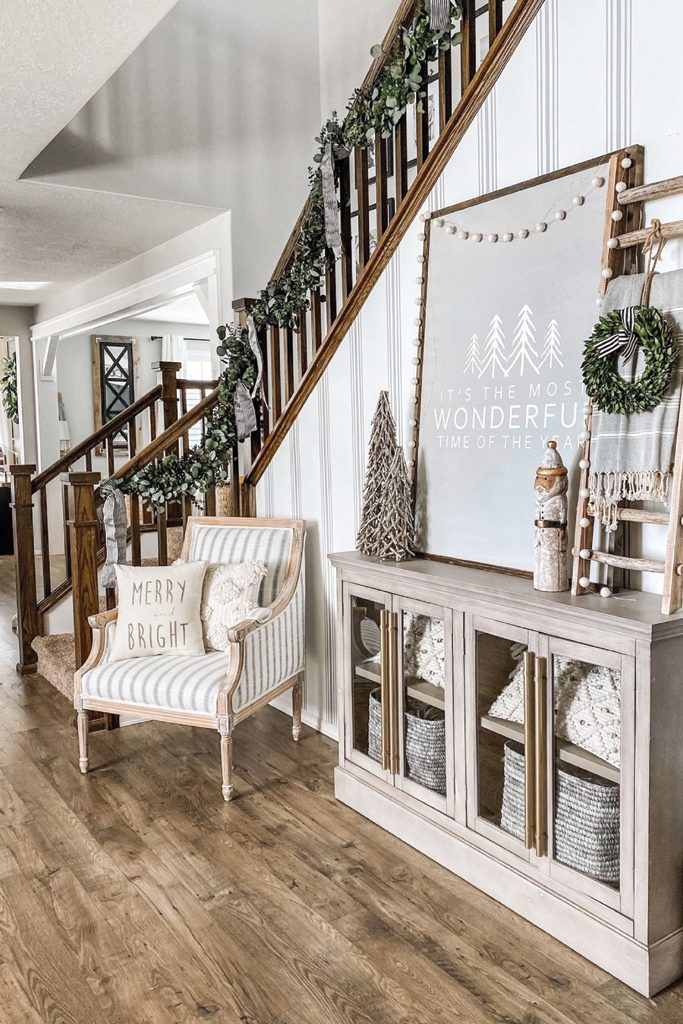
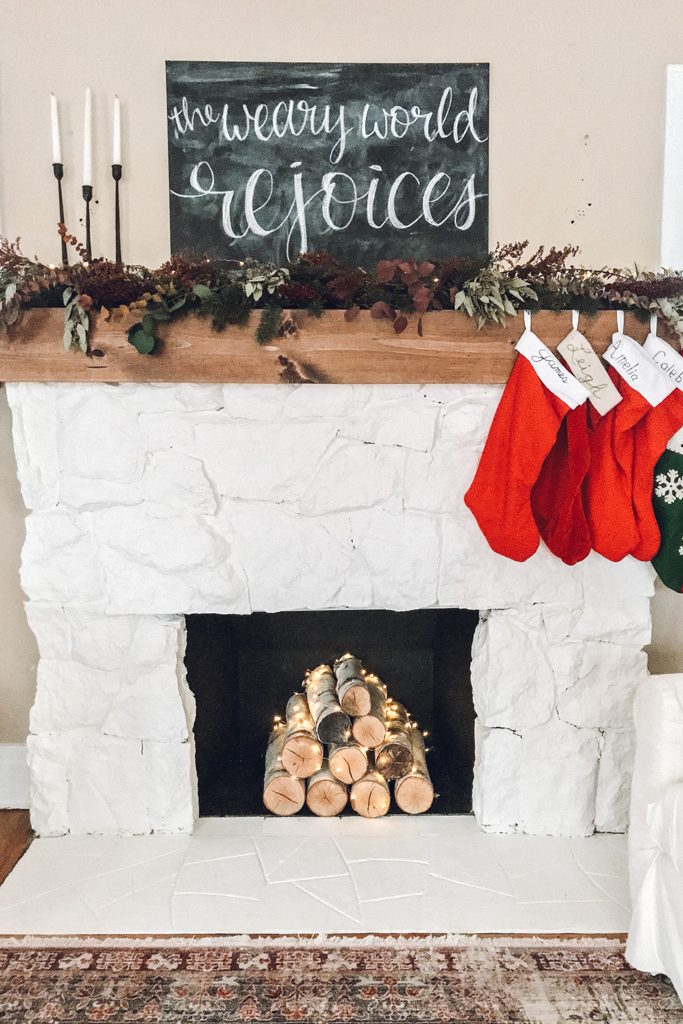
The Cottage Journal contacted me Fall 2020, asked if I would like to be featured in one of their 2021 Christmas magazines. I was thrilled!! I couldn’t believe it! I immediately got to work planning, designing, and styling each room before the photo shoots. I worried so much about every little detail - every little ornament, every ribbon, and every piece of greenery. My husband Justin and I did all the photography since we have our own light kit, tripod, and DSLR camera. This worked out well because we were able to shoot one room at a time - especially with having five kids at home.

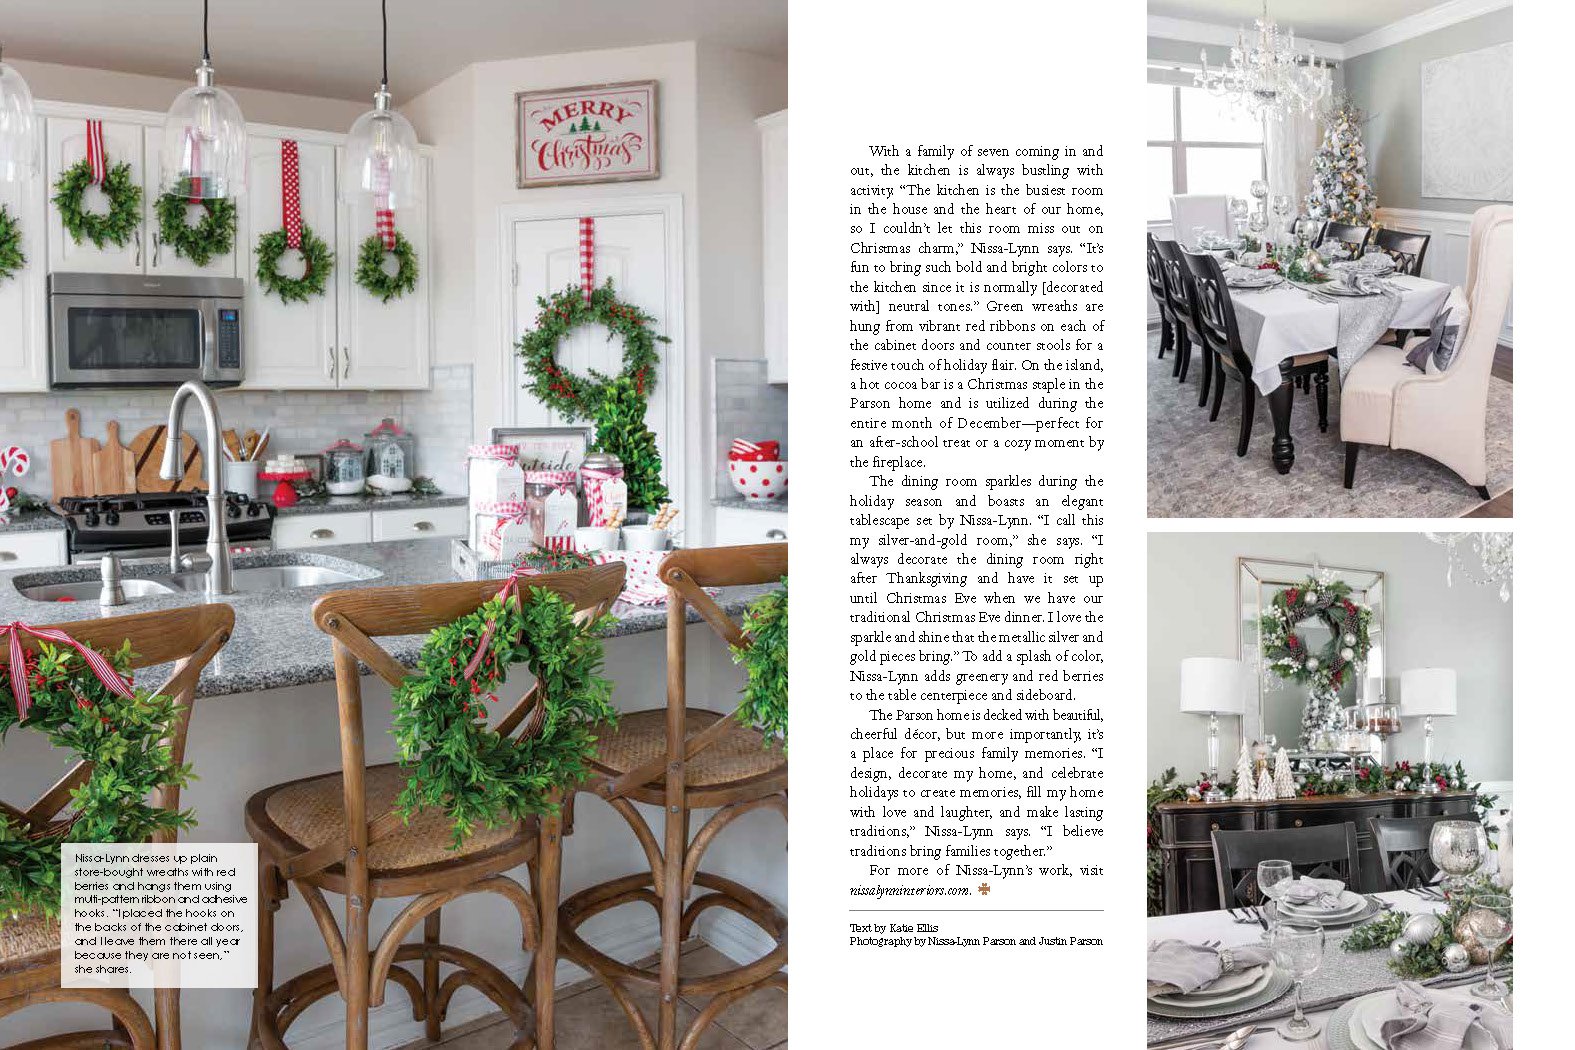
I wanted everything to be perfect, and have as much natural light as possible,  so we ended up reshooting the dining room and living room three times. After I sent the raw photos to The Cottage Journal team during January of 2021.

Then in July, amazing writer Katie reached out to me with questions to answer for the article. Katie did an outstanding job! The article was like a window to my heart.

In September Katie conveyed to me the most exciting new ever - that my home, my photography, was going to be on their cover story! I couldn’t believe it - my home was going to be on the cover of a prestigious interiors design magazine!!

The magazine hit newsstands on October 12th, 2021. I received two complimentary copies a few weeks before that. When I first opened the package with the publication I sobbed with joy. It was an incredible feeling!

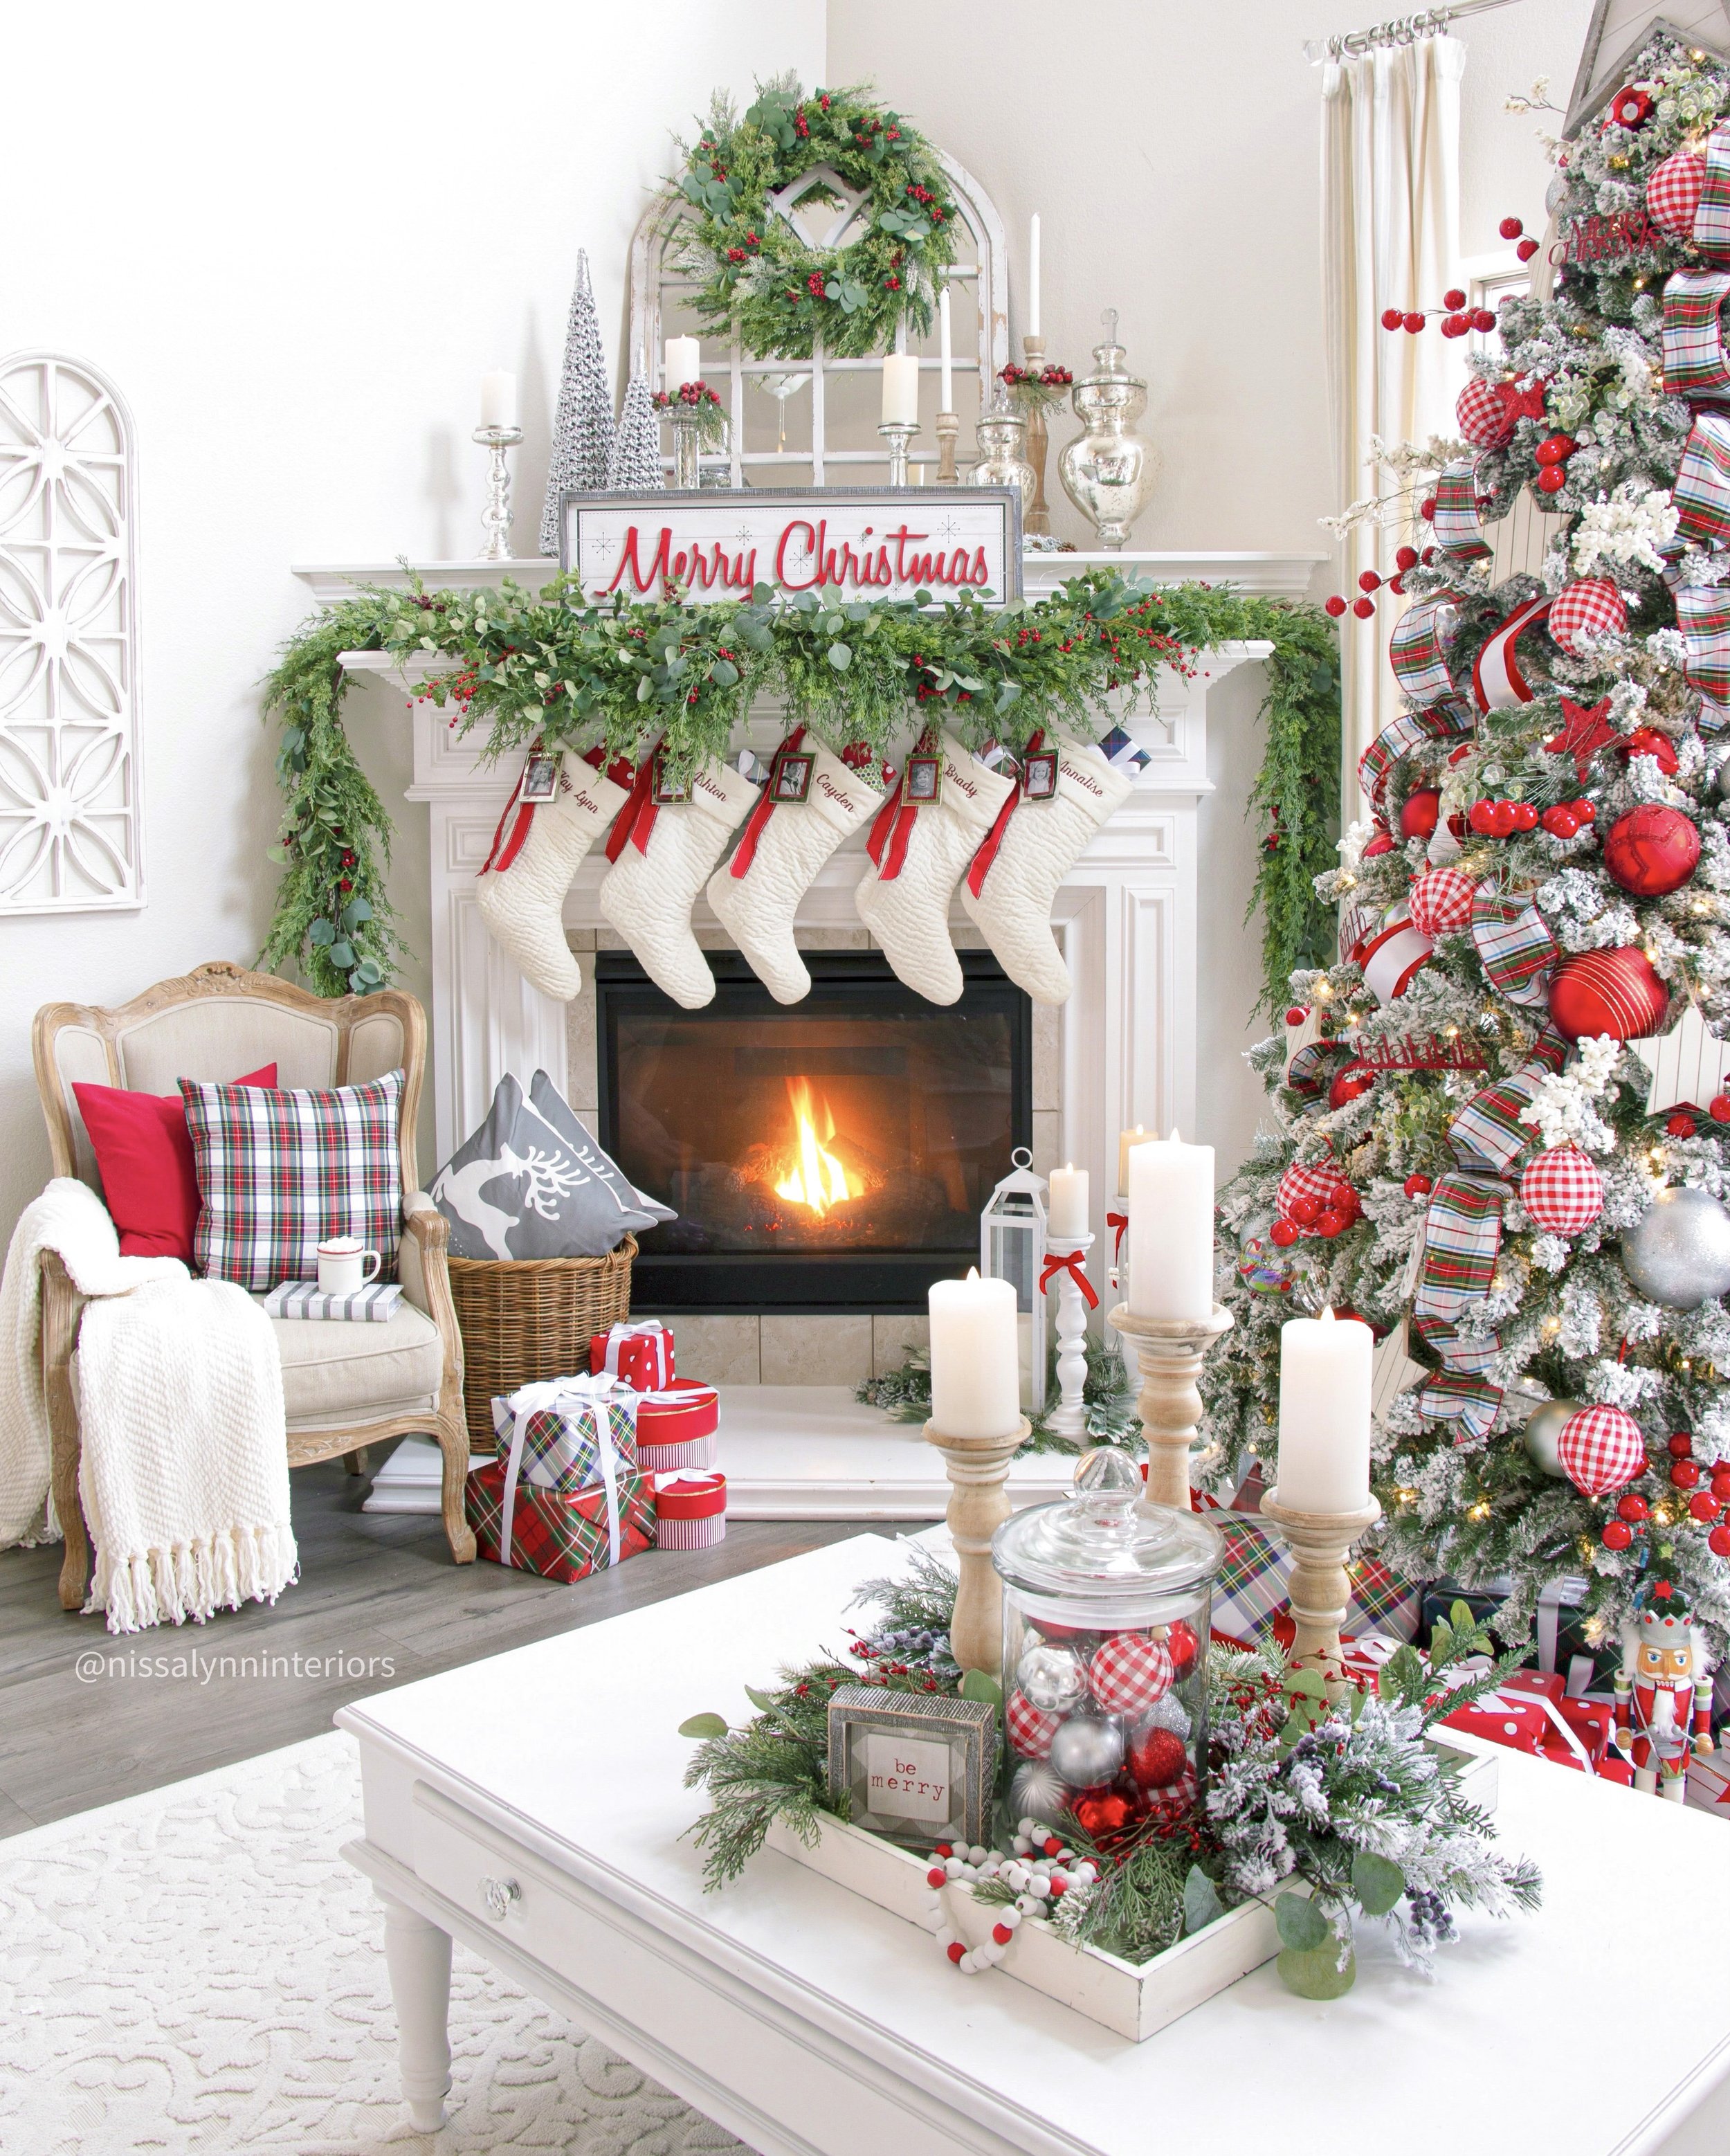
The next several weeks were magical as my family and I would go around to different stores to find the magazine. It was fun to be at the check out counters at places like Albertsons or Lowes, and to look over and see my Christmas living room while I’m purchasing our items.

Thank you from the bottom of my heart to the wonderful The Cottage Journal team for choosing me! It was an extraordinary experience!

To see the article in its entirety you can find it online - Google The Cottage Journal Holiday Home 2021.

Christmas Magic with a Sweet Treats Tree!

Christmas magic is here! I’m excited to reveal my whimsical “Sweet Treats Tree!” I’ve paired with Decorators Warehouse as part of their Home for the Holidays Christmas Tree Challenge to come up with a unique Christmas tree design! This tree was inspired by the visions of sugar plum fairies, pastel colors, and the elegant holiday sparkle of silver and gold. It’s adorned with tasty treats like gumdrops, popsicles, cookies, cotton candy, and cake pops with rainbow sprinkles. (Click on the bold words for links.)

I had the wonderful experience of going to Decorators Warehouse in September and being transported into a Christmas wonderland. Lights were twinkling from every inch of the ceiling and dreamy themed Christmas trees were everywhere you looked. The trees were beyond beautiful with ornaments, ribbon, and every detail one would need to create the tree of their dreams.

Before going to the store, I had originally thought of decorating my christmas tree in traditional christmas colors of red and white, possibly a candy cane theme. But that all changed when my eyes beheld the magic and enchantment of the sugar plum fairy tree dressed up in pastel colors! It reminded me of the sugar plum fairy costumes from the Nutcracker Ballet that my mom took my sister and I to when we were little girls. (I love the Nutcracker Ballet! I have the entire collection of Nutcracker Ballet Barbie dolls - each one dressed from different parts of the exquisite Ballet.)

After falling in love with pieces from the sugar plum fairy tree, I came across the cutest gingerbread ribbon ever! Then I saw the most darling treat ornaments, and I knew I wanted to combine these three pieces. I still loved the look of a whimiscal fairy tree, but once I saw the adorable Christmas goodie ornaments, I decided to focus on happy colored Christmas treats. I decided to also incorporate elements like; glitter cupcakes ornaments, snowflake cookie gumdrop sprays, sprinkle balls, glass popsicles, and fuzzy cotton candy ornaments. From there the Sweet Treats Tree was born!

I was in love with the direction this tree was going - but it wasn’t finished yet. I wanted to make it elegant and give it bit more of grown up presence. To do that, I brought in the traditional Christmas colors of silver and gold with leaf sprays. I also added extra sparkle with pink and gold poinsettia stems edged with glitter. But my favorite item was the light up topper. To have lights at the top of the tree helps set the magical look!

My Christmas tree decorating guide:

  1. Make clusters of greenery with two different sprays and wrap the stems around each other to secure in place. I used 12 clusters throughout my nine 9 ft tree. 

  2. Add two types of ribbon. I cut them in 2-3 ft strips and placed them evenly around the tree going in a downward motion.

  3. Add two different types of large ornaments - I added pink and blue shatterproof ormaments.

  4. Add two different types of medium ornaments - I added pink and gold ormaments.

  5. Add four types of flowers/stems and small ornaments - I added my candy ornaments and gold and pink poinsettia stems.

  6. Add sprays to fill in any gaps or holes - I used Snowflake cookie gumdrop, cake pop and gold leaf sprays.   

My favorite ornaments on the tree are the glass pink and blue popsicles. They’re so pretty and shiny - they make me smile. Do you see a favorite ornament on the Sweet Treats Tree? My little ones are obsessed with all the darling food ornaments on this tree. What types of Christmas decor do you love?

No matter what your holiday decor preference, Christmas is a magical time of year full of tradition and spending time with family and friends. Decorate your home with the pieces, colors, and themes that speak to you and make you happy. 

Click here for all the sources for my Christmas tree! Plus you can use code NISSALYNN at checkout for 10% off your purchase at Decorator’s Warehouse! #DWChristmasAtHome #sponsored

Source: https://nissalynninteriors.squarespace.com...

A Royal Christmas Tree

A few months ago I had the amazing opportunity to visit the Decorator's Warehouse in Arlington, TX. It was truly like stepping into a Christmas wonderland! Lights were twinkling everywhere, and themed Christmas trees were decorated to perfection!

B5460E58-4E9E-408F-8ECA-8196C941872B.jpeg

I met with Kristen, whose family has owned Decorator’s Warehouse for years, to pick out items to decorate a themed Christmas tree as part of the Home for the Holidays Christmas Tree Challenge with Decorator's Warehouse. #DWChristmasAtHome.

I knew I wanted to go for a regal look with luxurious Christmas ribbon and Christmas flowers adorned with silver and gold ornaments. I have always loved silver and gold trees and when I saw the navy flowers at the Decorator’s Warehouse store, I knew instantly I wanted to combine the two looks of silver and gold with navy accents to create an elegant Christmas tree with lots of sparkle and shine!

My love for elegant Christmas trees started when I was a little girl and frequently visited Macy’s department store on 33rd street in Manhattan, NYC. I remember being in awe of all the large shining Christmas ornaments, lights, and stunning ribbon. The department store felt like a palace.
Drawing upon those memories, I used silver, gold, and navy to bring my regal Christmas tree to life!✨

To  get started, I made fourteen clusters (groupings) with one flocked and champagne crabapple spray, a poinsettia stem and white Christmas flower. I then wrapped the stems around each other to secure them. Next I applied my navy blue velet Chrstimas ribbon in 2 ½ feet strips throughout the tree and added the larger balls. I placed in two different types: The Silver/White Christmas ornament and the 15 CM Glitter ball. After that I added tree different types of flowers - two white and one navy blue, along with a small navy blue ornament for an addition pop of the navy blue color. I also added the crystals to give the Christmas tree an extra dose of glam! The final step was to add several different sparkle sprays.

To simply:

  1. Make clusters.

  2. Add ribbon to Christmas tree. 

  3. Add two different types of large ornaments.

  4. Add four types of flowers and small ornaments.

  5. Add sprays to fill in any gaps or holes.

Click here for all the sources for my Christmas tree! Plus you can use code NISSALYNNINTERIORS at checkout for 10% off your purchase at Decorator’s Warehouse

 I hope you enjoyed my new regal tree. Check some of my friends’ beautiful Decorator’s Warehouse Christmas trees below!

New Floors Make the Best Christmas Gift!

Christmas came early with this new flooring from Select Surfaces! I keep looking around and can’t believe this is my home! ❤️ This new laminate flooring is a game changer! Everything went so smoothly from receiving the planks, to the removal of the carpet and final installation. (Sponsored)

F80626B3-4867-4DBB-8C77-4BA66F70D53C.jpeg

After living in our home for nine years, the builder grade carpet had definitely lived its life and needed to go! We planned on replacing the carpet in the dining room, living room, and master bedroom with wood flooring. But first I needed to explore options. I did a lot of research on different flooring types and materials.

We had some specific things we were looking for in new floors: 

-It had to be durable - because we have five children and lots of traffic. 

-It also needed be be waterproof/water resistant to protect against spills.

-We needed to be able to install it ourselves. 

-And I wanted a beautiful, timeless shade of laminate wood color. 


Select Surfaces met all of these requirements hands down, plus they offer a limited lifetime residential warranty!

7449C5DA-15C3-4263-AB16-931B481A9972.jpeg

You can purchase the flooring from your local Sam’s Club or order it online, and then pick it up at Sam’s Club.

We installed this over a concrete subfloor so after we removed the old carpet and pad, we put down a plastic moisture barrier to protect the laminate from any moisture that may transfer from the concrete. You can learn more about prepping your subfloor at here.

DE7311A7-56EF-4BB6-9706-6AEFF4136DA5.jpeg

Once we started installing we were amazed at how great it was. Select Surfaces flooring uses their Speedloc™ installation system which makes this laminate flooring extremely easy to install. The Speedloc™ system uses a tongue and groove joint that fits right together. Sometimes you need to wiggle the planks a bit to get them seated, but after they click together they hold very well.

0F76F269-E095-4BA0-BE8C-74CAE261CA26.jpeg

Here are some things I will recommend. First, get a saw blade specifically for cutting laminate. We couldn’t find the right size blade locally so we used a new fine tooth finish blade. It worked great for most of the project, but by the end it was cutting very slow and we replaced it before doing the transition moldings.

Second, a battery powered hand-held jig saw is very helpful for notching out the laminate to go around corners or any other molding or trim you may have in your room.

3FE980E6-024D-4E0D-A1E6-0FFDB445C7CD.jpeg

Third, do your research! There is a lot of good info here and more is available all over the internet. Especially if you will be going through any doorways, as the undercutting of the door frames is a different process.

1914B1F5-2BAC-4089-9152-FA338E8DBFAD.jpeg
2E92592F-1F7E-46AD-9314-B164FA48FAC0.jpeg

I had friends of ours that saw my Instagram stories of us installing the floors and they had to come over to check them out. They were in awe and couldn’t believe how amazing these laminate planks looked! They’re ordering their flooring samples from Select Surfaces next week!! 

I can’t even begin to tell you how impressed I am with the flooring from Select Surfaces! Definitely check them out for your flooring needs!

15FD07BE-6308-4E95-8698-A588CE14FF5B.jpeg

Adding Sparkle to the Office

I forgot to post this at christmas time! But I wanted to share!

This was the first year I decorated my office, actually, this is the first Christmas that I have actually had an office. Before it was my Husbands office. I knew I wanted to go glam and girly, so what better way than to add little and sparkles in the Chsrmas decor,

93E923D6-0AA8-45E7-B0DB-8A26361D4916.jpeg
83AF2FA0-ABF7-42F9-A213-32450DFC2786.jpeg

I wanted the the to compliment the room, so I decorated my 6fy floot focked tree with silver balls, and blush bows. Both of which I found at Hobby Lobby. Tip: when you seen a seasonal item you like at Hobby Lobby, buy it! They rarely get restocked! Once it’s gone- it’s gone!

C65154E6-07D4-448E-A968-D75CF140B4DA.jpeg
Adjustments.jpeg
Click on the images below to shop my office.

Click on the images below to shop my office.

Decorating to Make Christmas Feel Magical

I’m super excited to be a part of a Christmas blog hop with so many talented ladies, as they share some wonderful Christmas inpiration! Follow the links to their blogs below.

Even before there was social media, I knew I wanted Christmas in my home to feel magical. When I was young, I remember my mother spending days, every year, decorating for Christmas. She would trasform the entire downstairs into a whimsical, magical, Christmas land. I remember when I was in college, I couldn’t wait to come home to such a festive house. So when I started having my own children I knew I wanted the same type of atmosphere to surround my family.

825FD687-3942-48A7-BE05-D8817E9C0D1C.jpeg

Over the years I’ve discovered three easy budget friendly decor items to help make your home magical for the holidays.

First is lighting! I put Christmas lights everywhere! I buy short strands of lights at Target or Amazon and place them on console and entryway tables. I also put them in all my garlands, wreaths, and coffee table decor! I also add a bunch of candles. In years past I’d use real ones, but now I opt for the LED battery operated, remote control candles.

These wooden candlesticks are a staple for decorating! You can get them here.

These wooden candlesticks are a staple for decorating! You can get them here.

Another key piece I use to make Christmas shine is plastic Christmas balls. You can buy them in bulk making them pretty inexpensive. I always mix silver and red ones, in all different textures. Foe example, I use red and silver glitters ones, matte ones, ones with designs, and balls in all different shapes and sizes. These shine when the light hits them - making them sparkle. It is so easy, I just dump them into glass vases or jars, and display them all around the house. They look so glamorous, festive and fun! You can also tie ribbon around the glass for an added color!

You can find these beautiful velvet quilted stockings here.

You can find these beautiful velvet quilted stockings here.

christmasarmchair.jpg
This year I ordered most of my holiday decor from Krumpet’s. Use code NISSALYNN for 10% off your order.

This year I ordered most of my holiday decor from Krumpet’s. Use code NISSALYNN for 10% off your order.

kindeness sign.jpg
I recently purchased this sofa table and LOVE it! You can find the sofa table here.

I recently purchased this sofa table and LOVE it! You can find the sofa table here.

jars2.jpg

Which brings me to my other decorating necessity: ribbon. I but new ribbon every year, but never throw old ribbon away, unless it’s worn out. Ribbon is another super economical way to add Christmas flair to everything! You can tie ribbons on candlesticks, packages, jars, stockings, pretty much anything! I use a lot of different ribbon on my Christmas trees, and I love to mix and match different patterns to create interest. I often use Christmas ribbon along with regular ribbon that you can find in sewing or fabric department at the craft stores. Before purchasing, I always make sure I have a store coupon or wait until ribbon goes on sale - with crafts stores, you should never have to pay full price!

fireplace.jpg
73101EF7-21FE-4261-9F4E-759EE851A028.jpeg
The I layered the buffalo check boards with the wreath and sign, using command strips. All pieces came from Krumpets. And you can use code: NISSALYNN for 10% off you total purchase. The sideboard can be found here.

The I layered the buffalo check boards with the wreath and sign, using command strips. All pieces came from Krumpets. And you can use code: NISSALYNN for 10% off you total purchase. The sideboard can be found here.

All the ribbon seen here came for the Hobby Lobby sewing department.

All the ribbon seen here came for the Hobby Lobby sewing department.

All the hot chocolate accessories are from Krumpets. Use code NISSALYNN for 10% off your entire order!

All the hot chocolate accessories are from Krumpets. Use code NISSALYNN for 10% off your entire order!

Hopefully these tips I’ve shared will help when you’re creating your own magical Christmas!

I also encourage you to visit these other inspirational home decor bloggers. They constantly amaze me with their talents and love of decorating!

Step By Step for Decorating a Christmas Tablescape

You can find the video tutorial footage in my Highlights on my Instagram page.

I’ve come up with easy steps to decorating a Christmas tablescape.

IMG_0088.JPG
  1. Start with table runners. I have an 84 inch long table so a lot of table runners don’t go the entire length of my table, so I use three table runners. One down the middle and two on either end of the table running horizontal.

  2. Add a charger plate at every seat.

IMG_0096.JPG

3. Add the dinner plate.

4. Add the salad plate

5. Assemble the cloth napkins. I like to use a patterned napkin paired with a solid napkin and sparkling metallic napkin ring holder. The solid napkins I have here are from Target.

This gorgeous Boucle rug from Orian Rugs is the perfect rug for my riding room.

This gorgeous Boucle rug from Orian Rugs is the perfect rug for my riding room.

Dining roomless yellow.jpg

6. Place napkins in center on place setting.

7. Add silverware. Remember to ask yourself: Do you need a dessert or a soup spoon? Add all the silverware you need and place them in the proper places. (Salad and dinner forks on left, knife and spoon on right.)

8. Add glasses to the right side. Ask yourself what drinks you are having: Do you need wine glasses and water goblets?

EA9B5D45-1F77-490B-A263-99D67AFAB77E.jpg
diningroom2.jpg

9. Start adding the centerpiece. Place largest pieces first. I place chunky candles and accessories then fill the middle space with large pieces of greenery.

10. Keep building with smaller greenery stems to fill in the holes, then add taper candles. A trick my mom taught me was to put tin foil in the candlesticks to keep the taper candle from falling over.

IMG_0095post.jpg
chrsitmas dinig bright copy.jpg
IMG_0381.JPG
Sharing my dining room Christmas tree. The heart ornament in the middle has special meaning. I gave it to my grandmother last Christmas. She passed away last February. I went back to home this past July and brought it back with me to always have.

Sharing my dining room Christmas tree. The heart ornament in the middle has special meaning. I gave it to my grandmother last Christmas. She passed away last February. I went back to home this past July and brought it back with me to always have.

The decorative white and black, and gold gift boxes are from Target.

The decorative white and black, and gold gift boxes are from Target.

Bringing Christmas Joy Home

Sharing my living room all decorated for Christmas! I have to say this is my favorite look to date! I love using pops of red -as it’s just so happy and cheery! I incorporated several new decor items this year, and reused most of my staple items, such as the tree, fireplace garland, and coffee table decor. Read more for details!

The tree topper start is brand new! I got it from Krumpet’s Home Decor - and it's absolute perfect! The Joy to the World sign is also from Krumpets home decor.

The tree topper start is brand new! I got it from Krumpet’s Home Decor - and it's absolute perfect! The Joy to the World sign is also from Krumpets home decor.

I added so many different types of ribbon! I bought the ribbon from several different stores.

I added so many different types of ribbon! I bought the ribbon from several different stores.

I purchased these stockings and mirrored frames at at Pottery Barn this years on their “free monogram day” in November. Then I added different types of ribbon create a more interesting look. The garland I bought six years ago and it was all green. S…

I purchased these stockings and mirrored frames at at Pottery Barn this years on their “free monogram day” in November. Then I added different types of ribbon create a more interesting look. The garland I bought six years ago and it was all green. So I added flocked pieces from Hoby Lobby for more texture and to make it look more snow covered.

The view from the top of the stairs.

The view from the top of the stairs.

Love all these pillows from Target!

Love all these pillows from Target!

IMG_0432.jpg
My favorite view! I love when the fireplace is on - it makes for wonderful ambiance.

My favorite view! I love when the fireplace is on - it makes for wonderful ambiance.

I love addling splashes of red to my kitchen. The wreaths I found at Target a few years ago.

I love addling splashes of red to my kitchen. The wreaths I found at Target a few years ago.

Love all these adorable hot cocoa pieces from Krumpet’s Home Decor.

Love all these adorable hot cocoa pieces from Krumpet’s Home Decor.

Santa Clause is Coming to Town!

I'm super excited to share with you what I call my winter white living room! I received so many wonderful compliments about my living room, as well as lots of positive questions about how I decorated this space. But the best compliment of all was having this photo featured on several of Better Homes and Gardens social media sites! Thank you for the love!

I'm to happy to share all the details with y'all!

The darling Santa Clause Decor came from http://www.krumpetshome.com Their Santa Clause collection is so magical!

The darling Santa Clause Decor came from http://www.krumpetshome.com Their Santa Clause collection is so magical!

Design Tip:  It's important to get some classic decor pieces that you love and fit your personal style.  This will save you money because you could refinish or repurpose those pieces in the future for an  to updated look - instead of buying new. My coffee table of 12 years is a great example. It's solid wood with a classic design. I've painted it several times to update it - instead of buying new!

Christmas Tree Detail
This year I had the privilege of receiving a 9 foot Flocked Christmas tree from King of Christmas. It gave me a whole new direction for decorating my living room! Since my flocked tree is such a natural beauty I chose to keep the decor simple and stately. I opted for larger round ornaments rather than many small ones. 

When decorating my tree the first thing I do is put on the ribbon. I cut about 5-6 foot strips, a little longer than the length of the tree. Then I start from the top and tuck about ever 3-6 inches it into the center of the tree - making it "bubble out." I repeat these streps until I reach the bottom of the tree. Then I cut 12 inch strips of another patterned ribbons and place those around the tree to fill in empty spaces.  I add sprigs of frosted sticks and silver was stems throughout. For a tree skirt I just added white fabric and an old white curtain I had in my decorator closet! Crazy huh? 

post58.jpg
blog66.jpg
IMG_7935 copy.jpg
IMG_7952 copy.jpg
The Santa Claus boxes under the tree were a new addition this year! They were sent to me by a darling home decor shop called Krumpets Home Decor. The white candle sticks on the hearth I've had forever! I bought them from Hobby Lobby 8 years ago when…

The Santa Claus boxes under the tree were a new addition this year! They were sent to me by a darling home decor shop called Krumpets Home Decor. The white candle sticks on the hearth I've had forever! I bought them from Hobby Lobby 8 years ago when they were black. I painted them white to give them a fresh new look.

Garland and Wreath

I purchased the garland on my fireplace about five years ago from Hobby Lobby. (I also have the same garland on my stairs.) The garland was originally just green. I added flocked pieces or stems, to brighten it up and give it an updated snowy look. 

blo5.jpg
blog77.jpg

Mantle Decor


The mecury glass vases and candles sticks, and cathedral mirror, are part of my everyday decor and are up on my mantle year round. Most times I like to mix holiday decor with my everyday decor. I also change out my Christmas signs as find new ones.

IMG_8342.jpg
blog2.jpg

Here are the references to where my decor is from:

Silver trees - Home Goods.

Large Decorative Truck Figurine came from Target.   

Decorative white deer - ZGallerie. 

Believe Sign- Kirklands

Mercury Glass- At Home