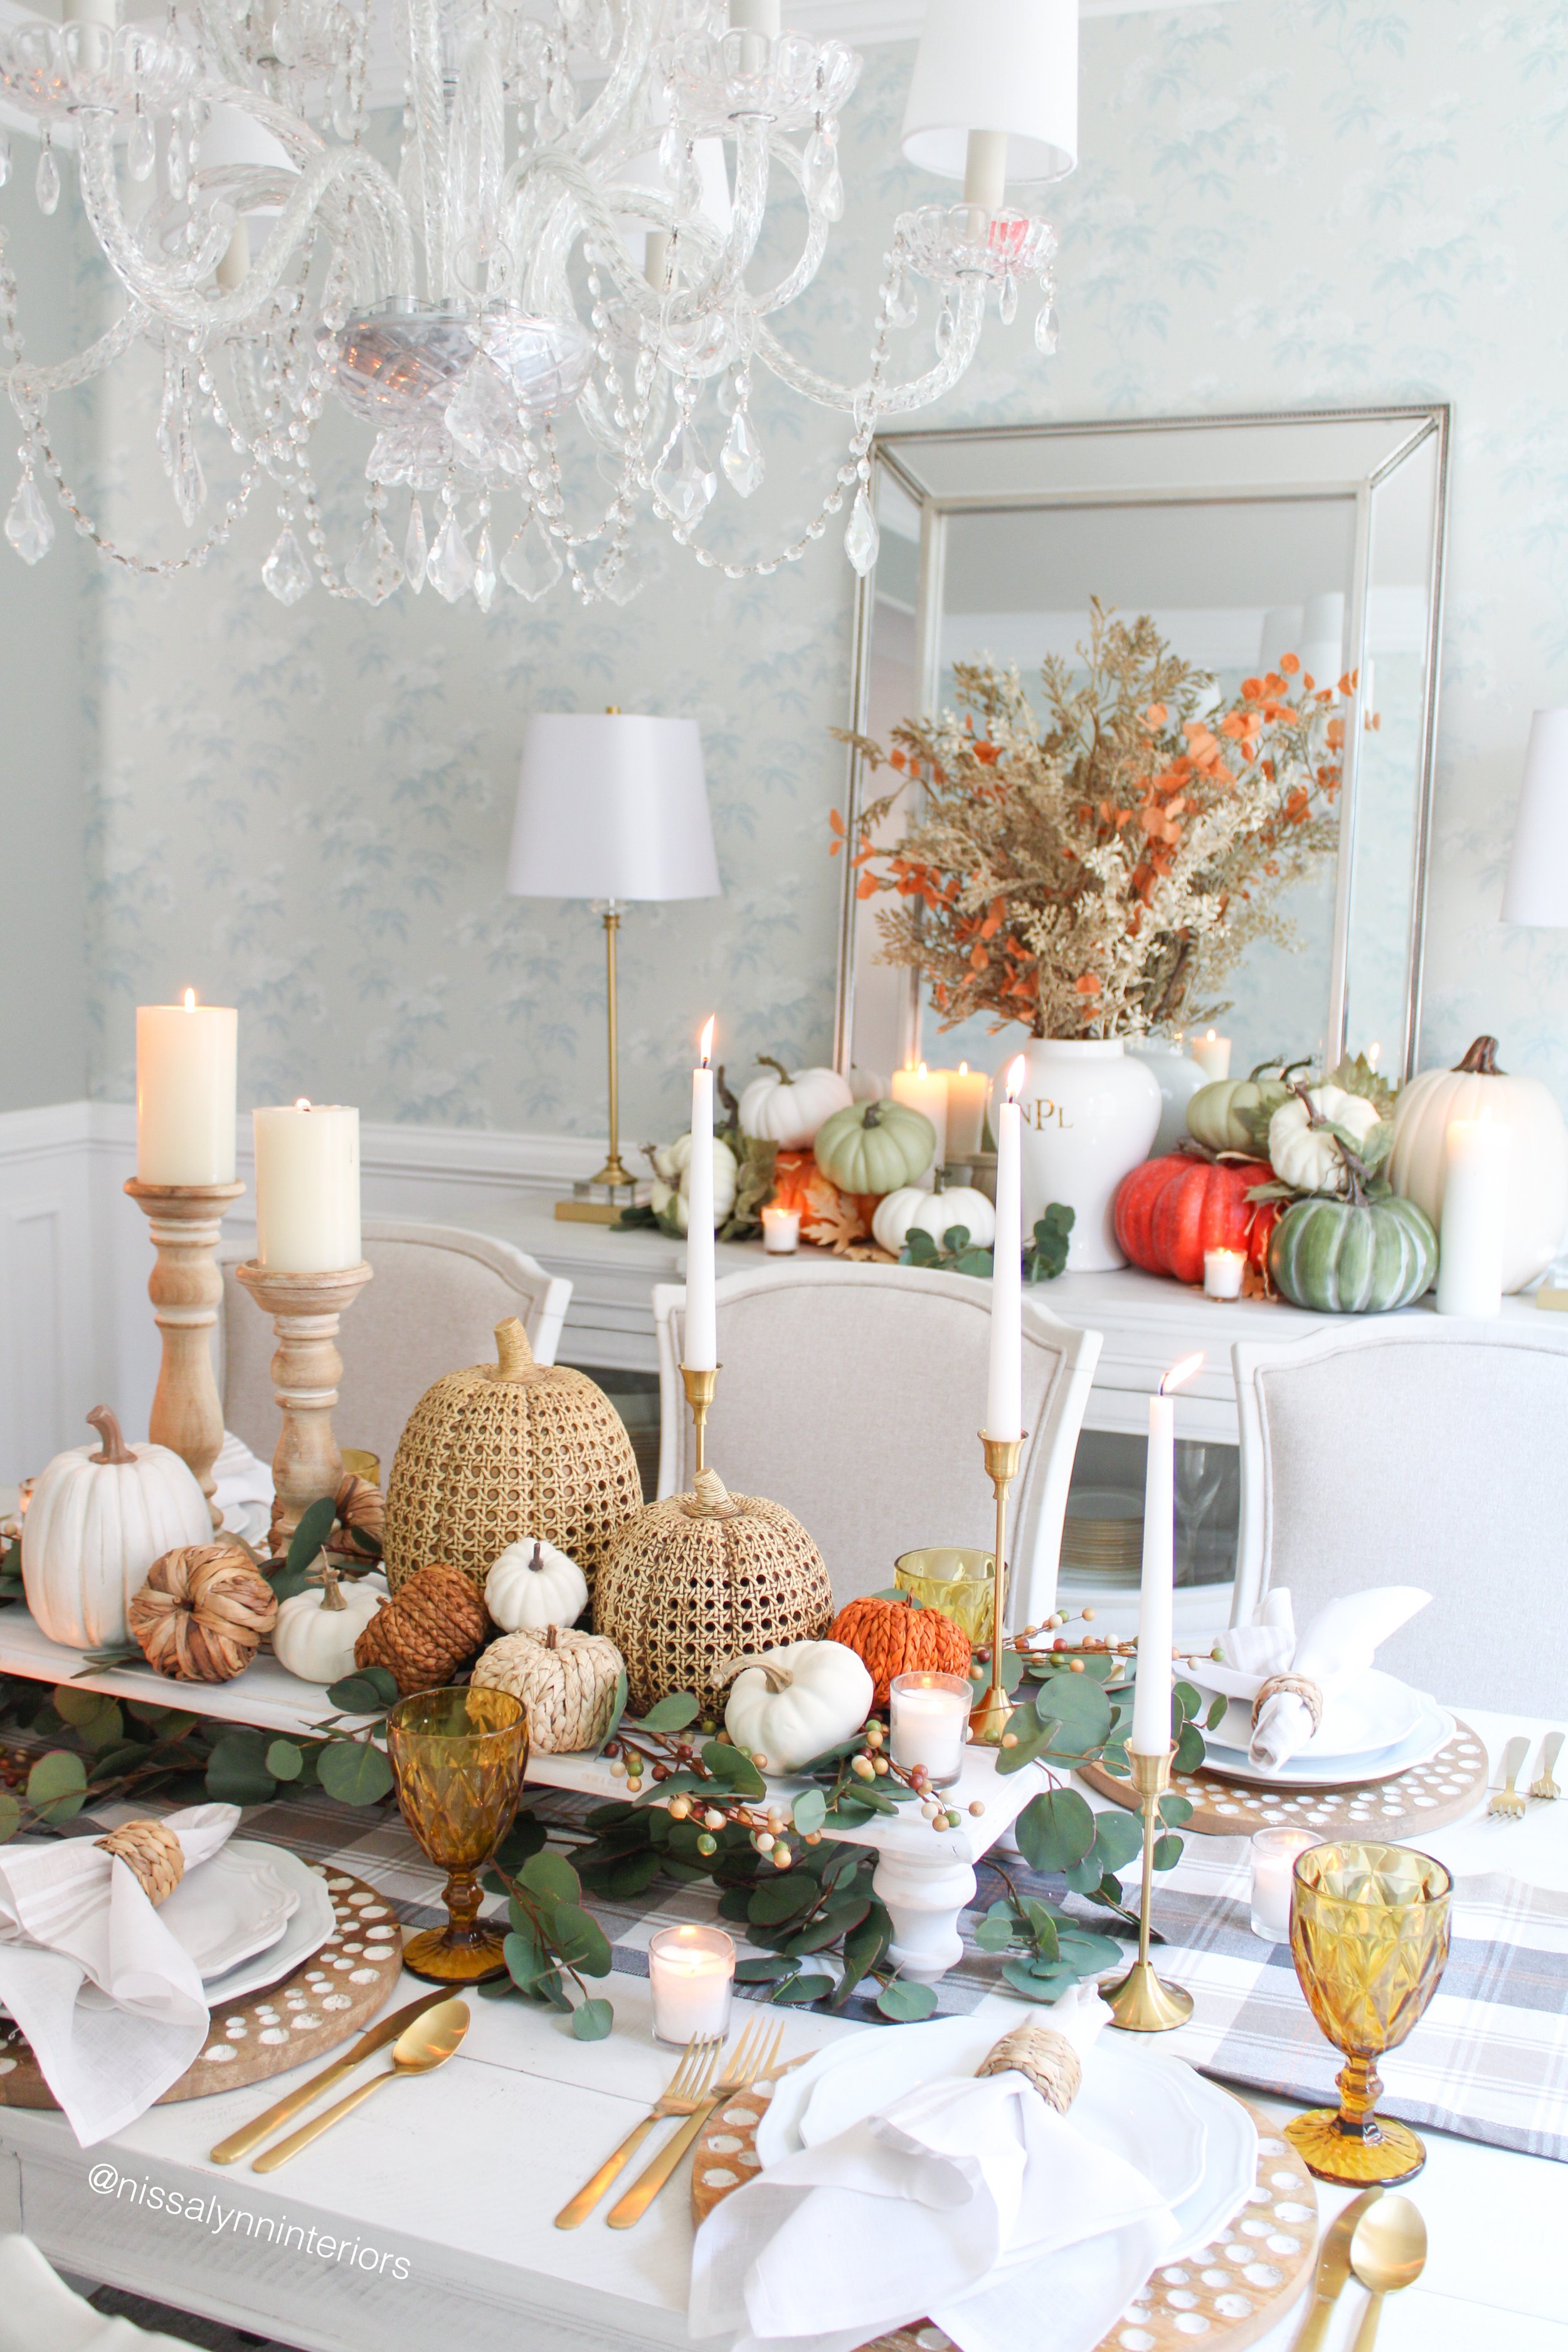
DIY Thanksgiving Tablescape with American Farmhouse Style Magazine

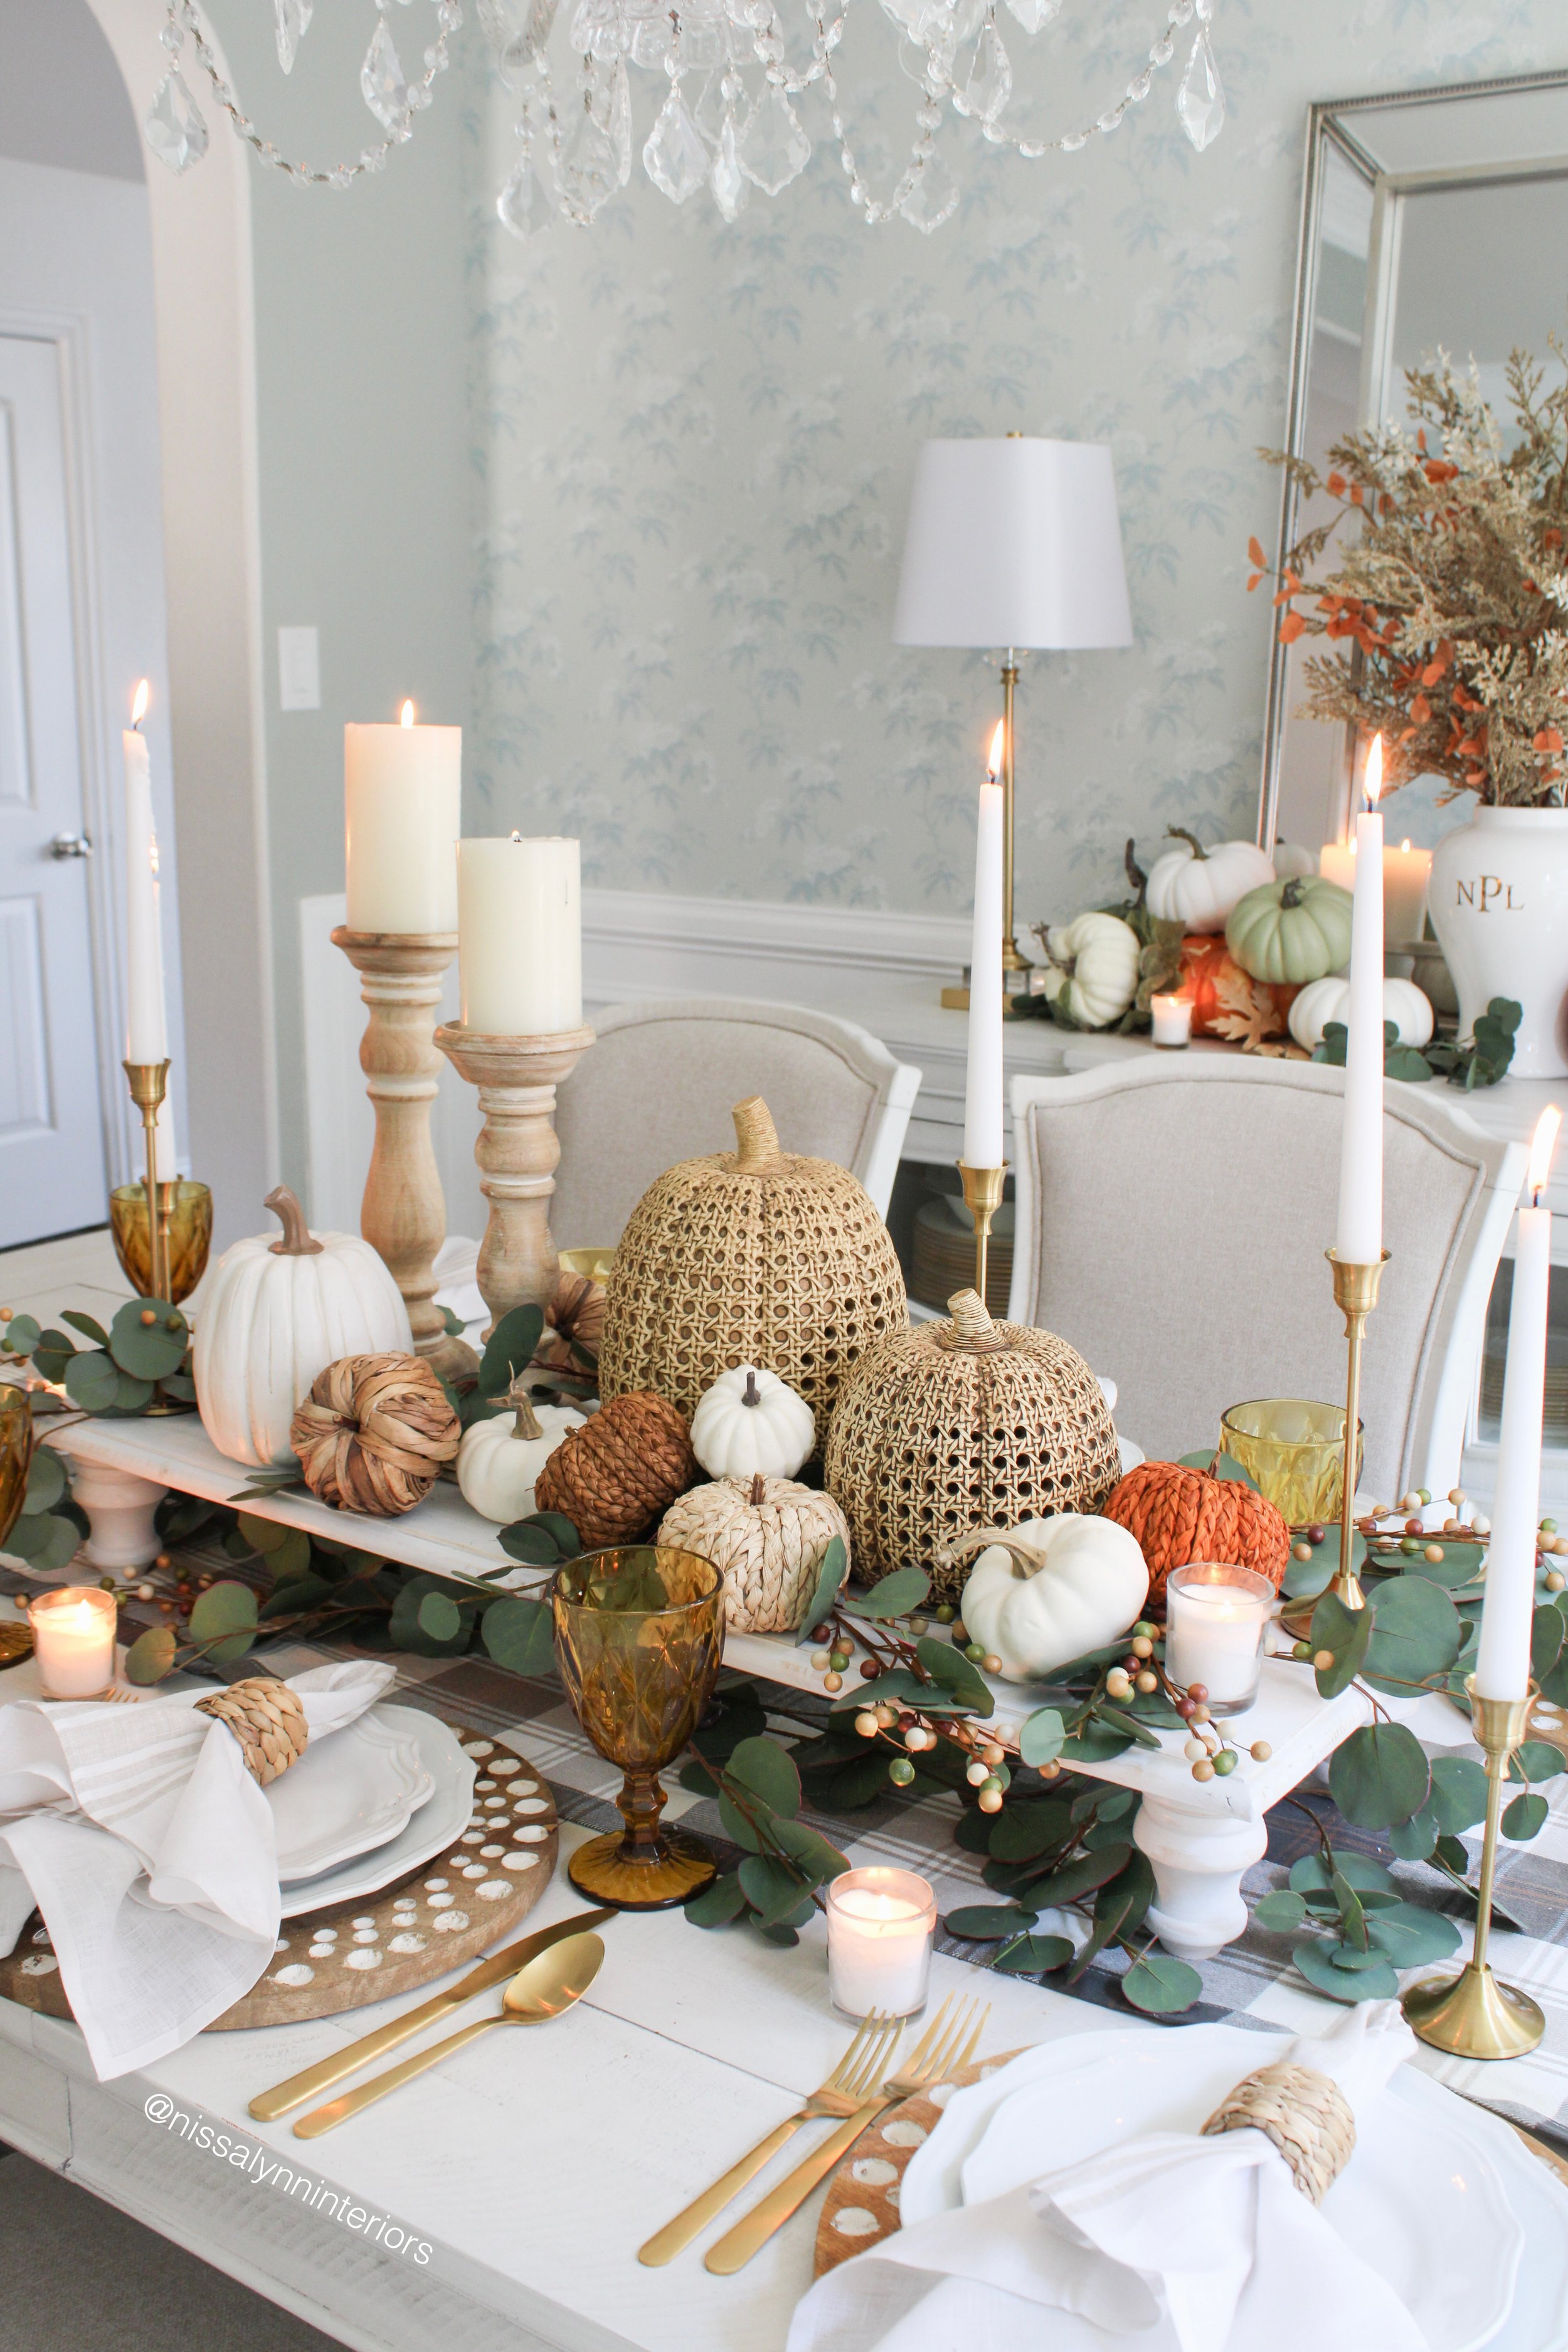
Last year after a nation wide search with thousands of entries, I was honored to selected one of the top four finalists for the 2022 American Farmhouse Style Magazine Ambassador contest. Below is the DIY table riser I built for the final project. You can view the magazine article here.

As the seasons change, fall ushers in cool crisp nights, falling leaves, pumpkin decor, cider, and cozy sweaters. 

A Time for Gratitude

Thanksgiving will soon be here and families will gather around a loved one’s kitchen or dining room table to celebrate the season of gratitude and renewed blessings. Creating a fun and festive thanksgiving tablescape is my way to welcome family and friends into my home and help make the holiday feel special.

DIY Centerpiece for the Thanksgiving Tablescape

I love to think of an empty table as a canvas, and the pieces as the paint. Creating a Thanksgiving tablescape can be a wonderful way to be creative and expressive. I always start with the centerpiece and make it the focal point of the table.

My table is just over eight feet long, so I wanted to use an extra long elevated centerpiece. But I couldn’t find one in the stores so I decided to make my own! I went to my local hardware store and bought a large board and some furniture feet.

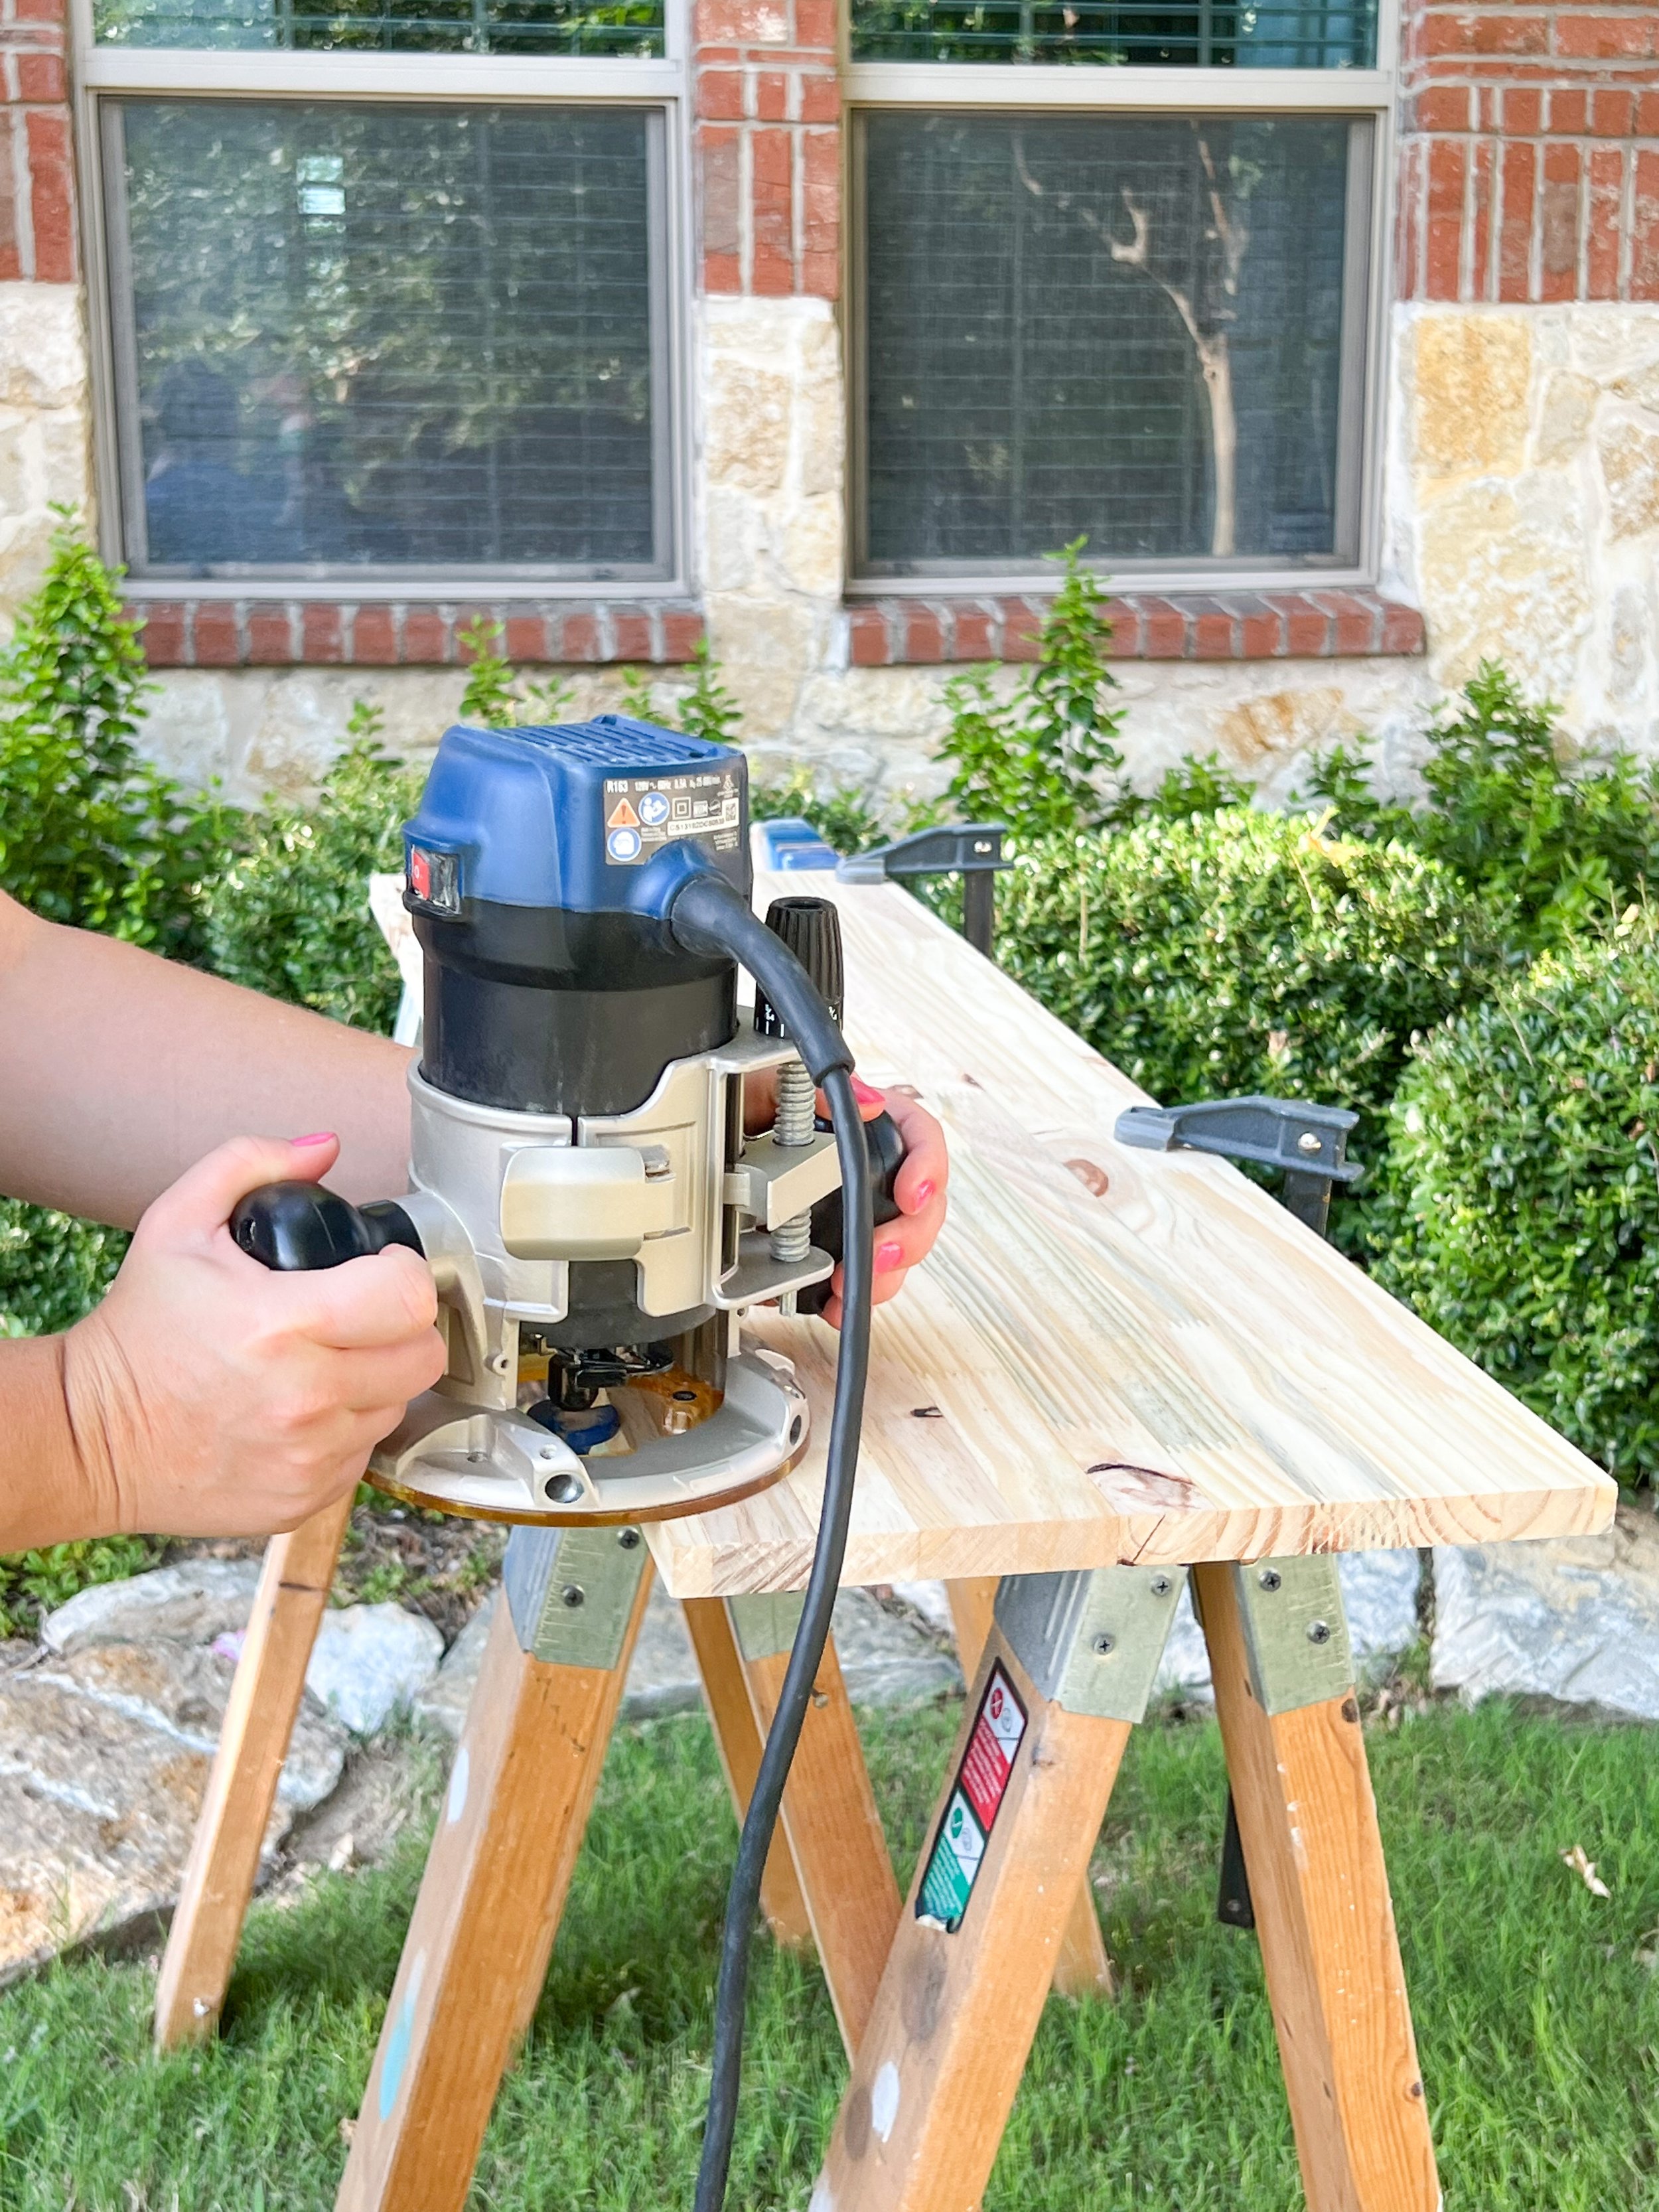
Once home, I gathered the materials and planned out my next steps. To make this centerpiece a bit more interesting, I used a router to create a decorative edge. If you don’t have a router, or want a simpler technique, just use sandpaper to round off the corners for a smooth finished look.

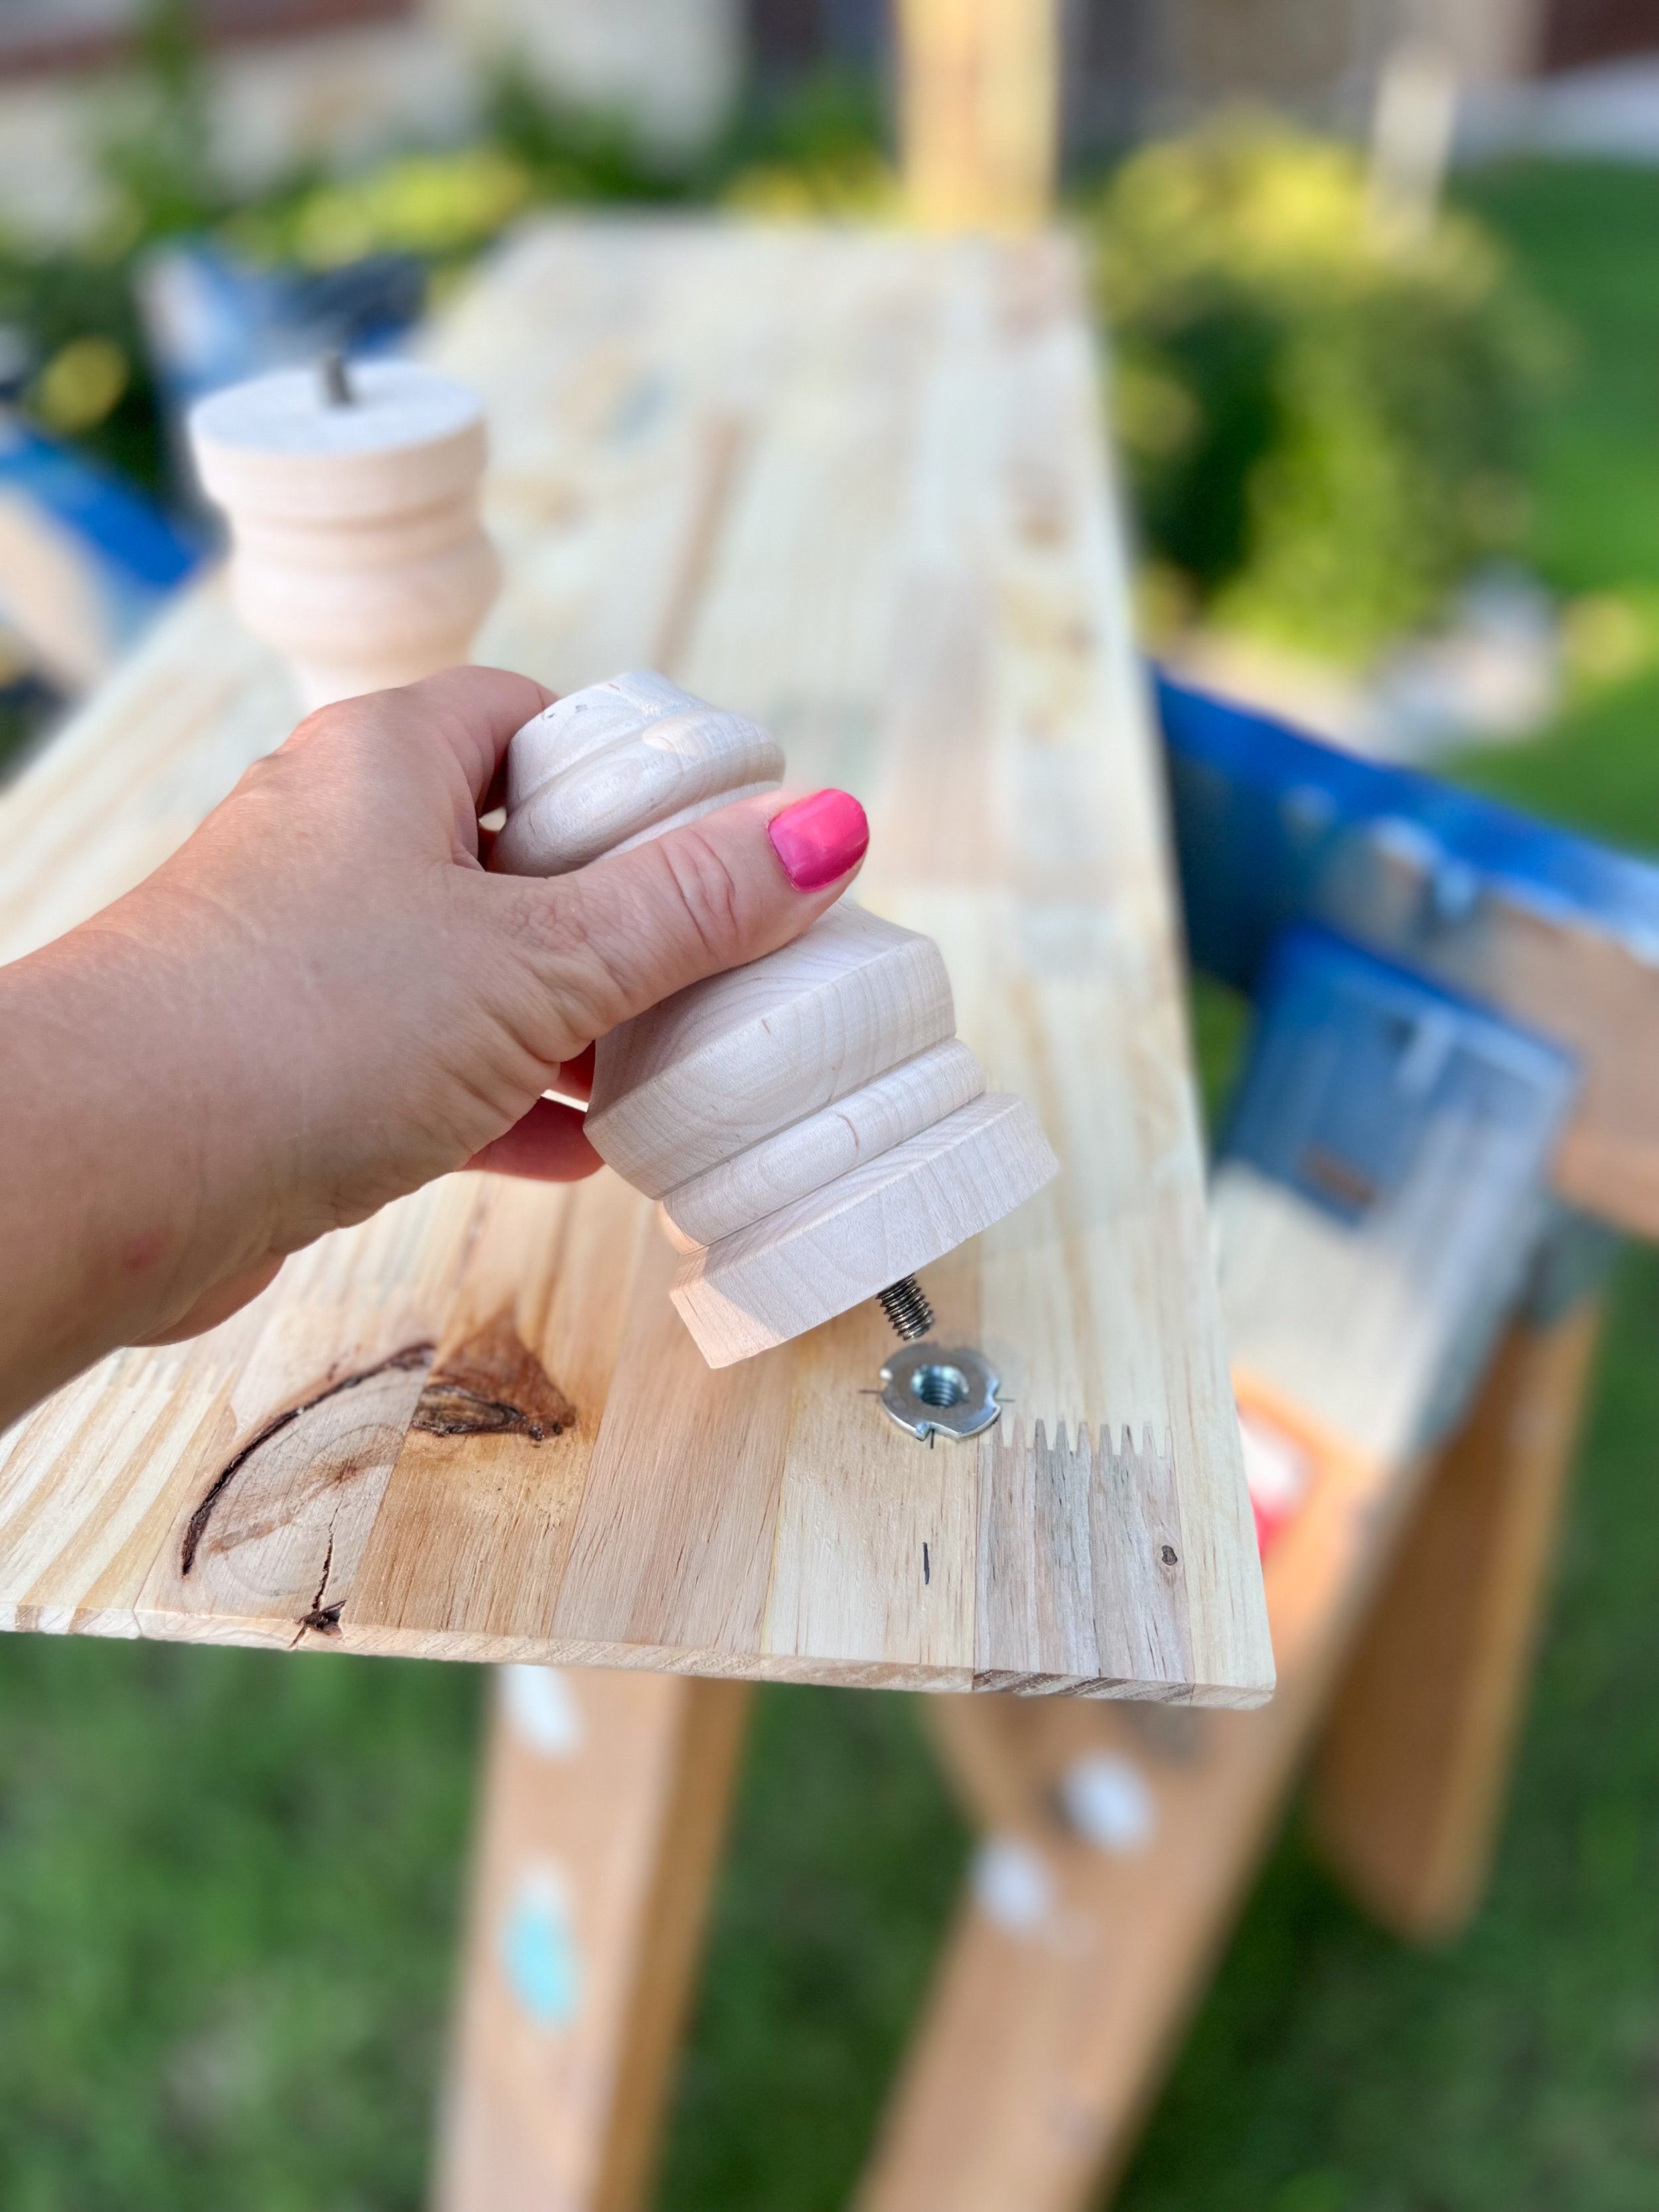
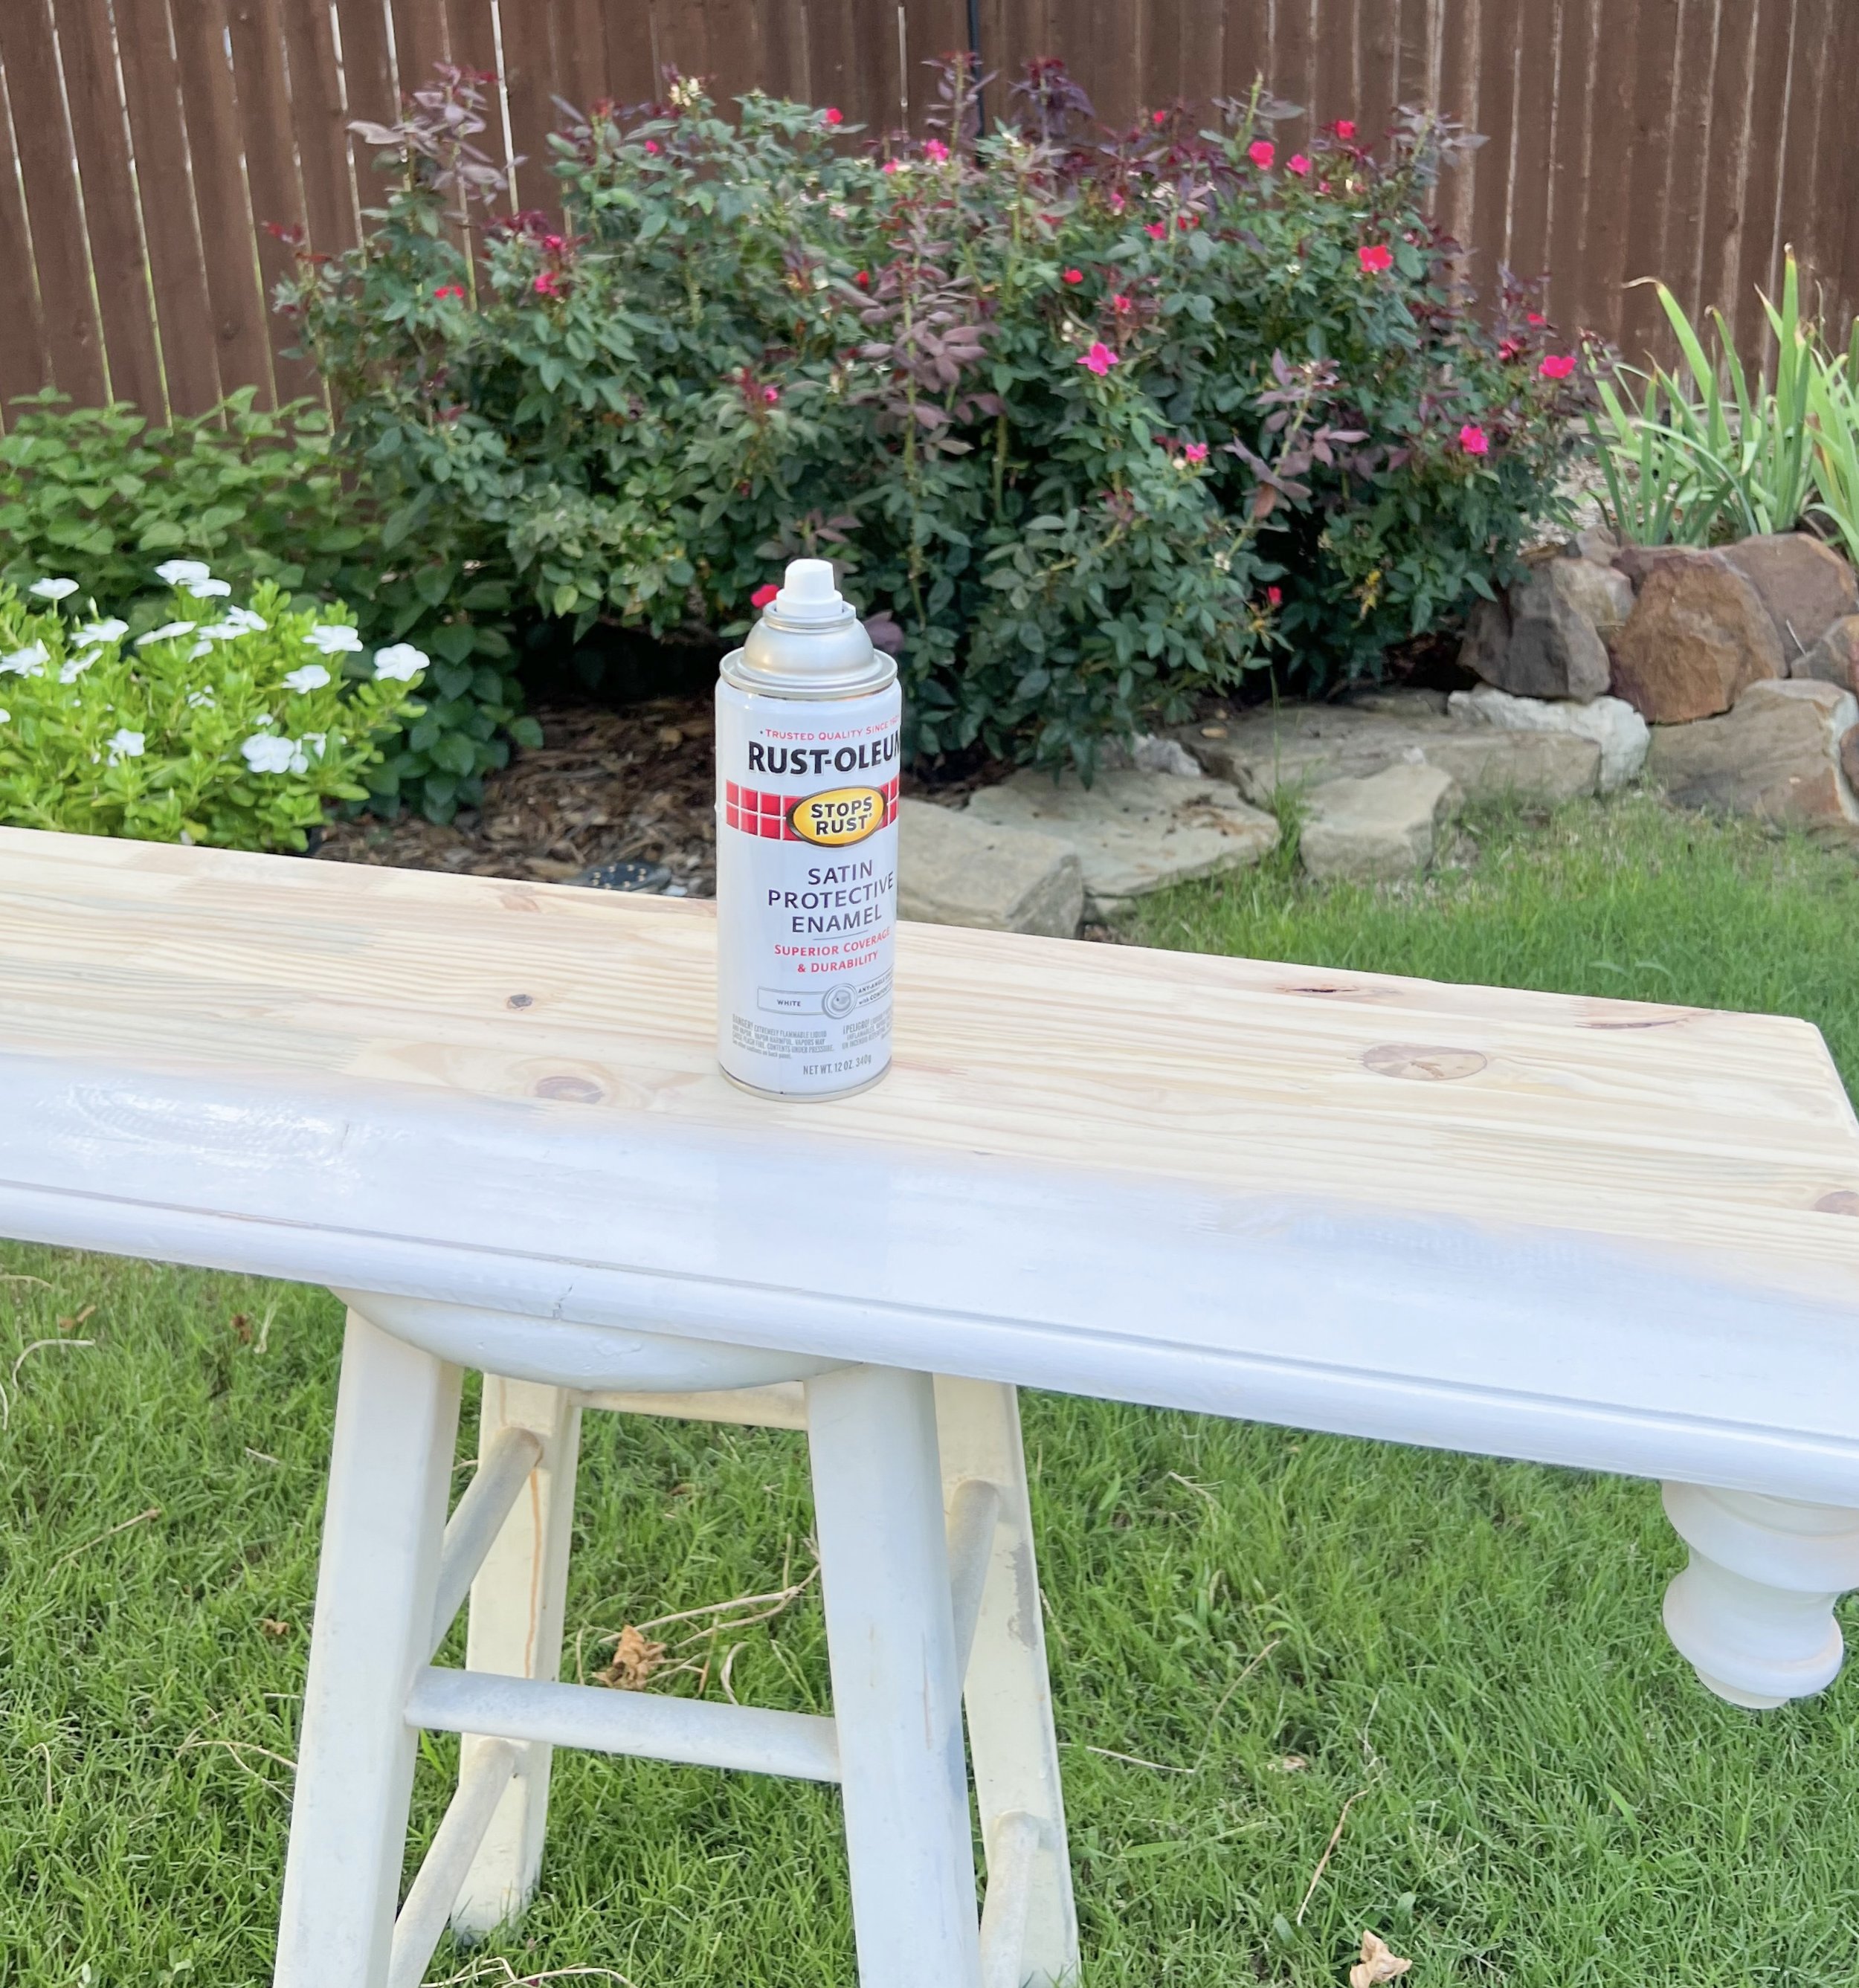
Afterwards, I drilled holes in one side of the board and hammered in threaded plugs to attach the feet. With the feet attached, it was time to paint. I chose a satin white spray paint for a quick durable finish. After the paint dried I went back over it with sandpaper to create a rustic texture for my Thanksgiving tablescape.

 Creating Coziness with Decor

With the board complete, it was time to decorate the table. (My favorite part!) Going around the table I started layering the plates using a charger as a base, followed by the dinner and salad plates. By putting the largest plates down first, it gives me an idea on how much room I have to add the decorative pieces, uch as candles near the centerpiece. 

Next I place the glasses, silverware napkins with napkin holders. (There’s a wide assortment of napkin holders available.) I love to mix in florals, pumpkins, faux leaves, and sprinkle them around the Thanksgiving table to create ambiance. You could also incorporate a small charcuterie board mixed in with the decor. 

I hope these ideas spark your creativity and get you excited for the upcoming holiday season! 

DIY Thanksgiving Tablescape with American Farmhouse Style Magazine (Copy)

After a nation wide search with thousands of entries, I am honored to selected one of the top four finalist for the American Farmhouse Style Magazine Ambassador contest. Below is the DIY elevated tablescape riser I built for the final project. You can view the magazine article here.

As the seasons change, fall ushers in cool crisp nights, falling leaves, pumpkin decor, cider, and cozy sweaters. 

A Time for Gratitude

Thanksgiving will soon be here and families will gather around a loved one’s kitchen or dining room table to celebrate the season of gratitude and renewed blessings. Creating a fun and festive thanksgiving tablescape is my way to welcome family and friends into my home and help make the holiday feel special.

DIY Centerpiece for the Thanksgiving Tablescape

I love to think of an empty table as a canvas, and the pieces as the paint. Creating a Thanksgiving tablescape can be a wonderful way to be creative and expressive. I always start with the centerpiece and make it the focal point of the table.

My table is just over eight feet long, so I wanted to use an extra long elevated centerpiece. But I couldn’t find one in the stores so I decided to make my own! I went to my local hardware store and bought a large board and some furniture feet.

Once home, I gathered the materials and planned out my next steps. To make this centerpiece a bit more interesting, I used a router to create a decorative edge. If you don’t have a router, or want a simpler technique, just use sandpaper to round off the corners for a smooth finished look.

Afterwards, I drilled holes in one side of the board and hammered in threaded plugs to attach the feet. With the feet attached, it was time to paint. I chose a satin white spray paint for a quick durable finish. After the paint dried I went back over it with sandpaper to create a rustic texture for my Thanksgiving tablescape.

 Creating Coziness with Decor

With the board complete, it was time to decorate the table. (My favorite part!) Going around the table I started layering the plates using a charger as a base, followed by the dinner and salad plates. By putting the largest plates down first, it gives me an idea on how much room I have to add the decorative pieces, uch as candles near the centerpiece. 

Next I place the glasses, silverware napkins with napkin holders. (There’s a wide assortment of napkin holders available.) I love to mix in florals, pumpkins, faux leaves, and sprinkle them around the Thanksgiving table to create ambiance. You could also incorporate a small charcuterie board mixed in with the decor. 

I hope these ideas spark your creativity and get you excited for the upcoming holiday season! 
New Floors Make the Best Christmas Gift!

Christmas came early with this new flooring from Select Surfaces! I keep looking around and can’t believe this is my home! ❤️ This new laminate flooring is a game changer! Everything went so smoothly from receiving the planks, to the removal of the carpet and final installation. (Sponsored)

F80626B3-4867-4DBB-8C77-4BA66F70D53C.jpeg

After living in our home for nine years, the builder grade carpet had definitely lived its life and needed to go! We planned on replacing the carpet in the dining room, living room, and master bedroom with wood flooring. But first I needed to explore options. I did a lot of research on different flooring types and materials.

We had some specific things we were looking for in new floors: 

-It had to be durable - because we have five children and lots of traffic. 

-It also needed be be waterproof/water resistant to protect against spills.

-We needed to be able to install it ourselves. 

-And I wanted a beautiful, timeless shade of laminate wood color. 


Select Surfaces met all of these requirements hands down, plus they offer a limited lifetime residential warranty!

7449C5DA-15C3-4263-AB16-931B481A9972.jpeg

You can purchase the flooring from your local Sam’s Club or order it online, and then pick it up at Sam’s Club.

We installed this over a concrete subfloor so after we removed the old carpet and pad, we put down a plastic moisture barrier to protect the laminate from any moisture that may transfer from the concrete. You can learn more about prepping your subfloor at here.

DE7311A7-56EF-4BB6-9706-6AEFF4136DA5.jpeg

Once we started installing we were amazed at how great it was. Select Surfaces flooring uses their Speedloc™ installation system which makes this laminate flooring extremely easy to install. The Speedloc™ system uses a tongue and groove joint that fits right together. Sometimes you need to wiggle the planks a bit to get them seated, but after they click together they hold very well.

0F76F269-E095-4BA0-BE8C-74CAE261CA26.jpeg

Here are some things I will recommend. First, get a saw blade specifically for cutting laminate. We couldn’t find the right size blade locally so we used a new fine tooth finish blade. It worked great for most of the project, but by the end it was cutting very slow and we replaced it before doing the transition moldings.

Second, a battery powered hand-held jig saw is very helpful for notching out the laminate to go around corners or any other molding or trim you may have in your room.

3FE980E6-024D-4E0D-A1E6-0FFDB445C7CD.jpeg

Third, do your research! There is a lot of good info here and more is available all over the internet. Especially if you will be going through any doorways, as the undercutting of the door frames is a different process.

1914B1F5-2BAC-4089-9152-FA338E8DBFAD.jpeg
2E92592F-1F7E-46AD-9314-B164FA48FAC0.jpeg

I had friends of ours that saw my Instagram stories of us installing the floors and they had to come over to check them out. They were in awe and couldn’t believe how amazing these laminate planks looked! They’re ordering their flooring samples from Select Surfaces next week!! 

I can’t even begin to tell you how impressed I am with the flooring from Select Surfaces! Definitely check them out for your flooring needs!

15FD07BE-6308-4E95-8698-A588CE14FF5B.jpeg

Simple Ways to Refresh a Child's Bedroom

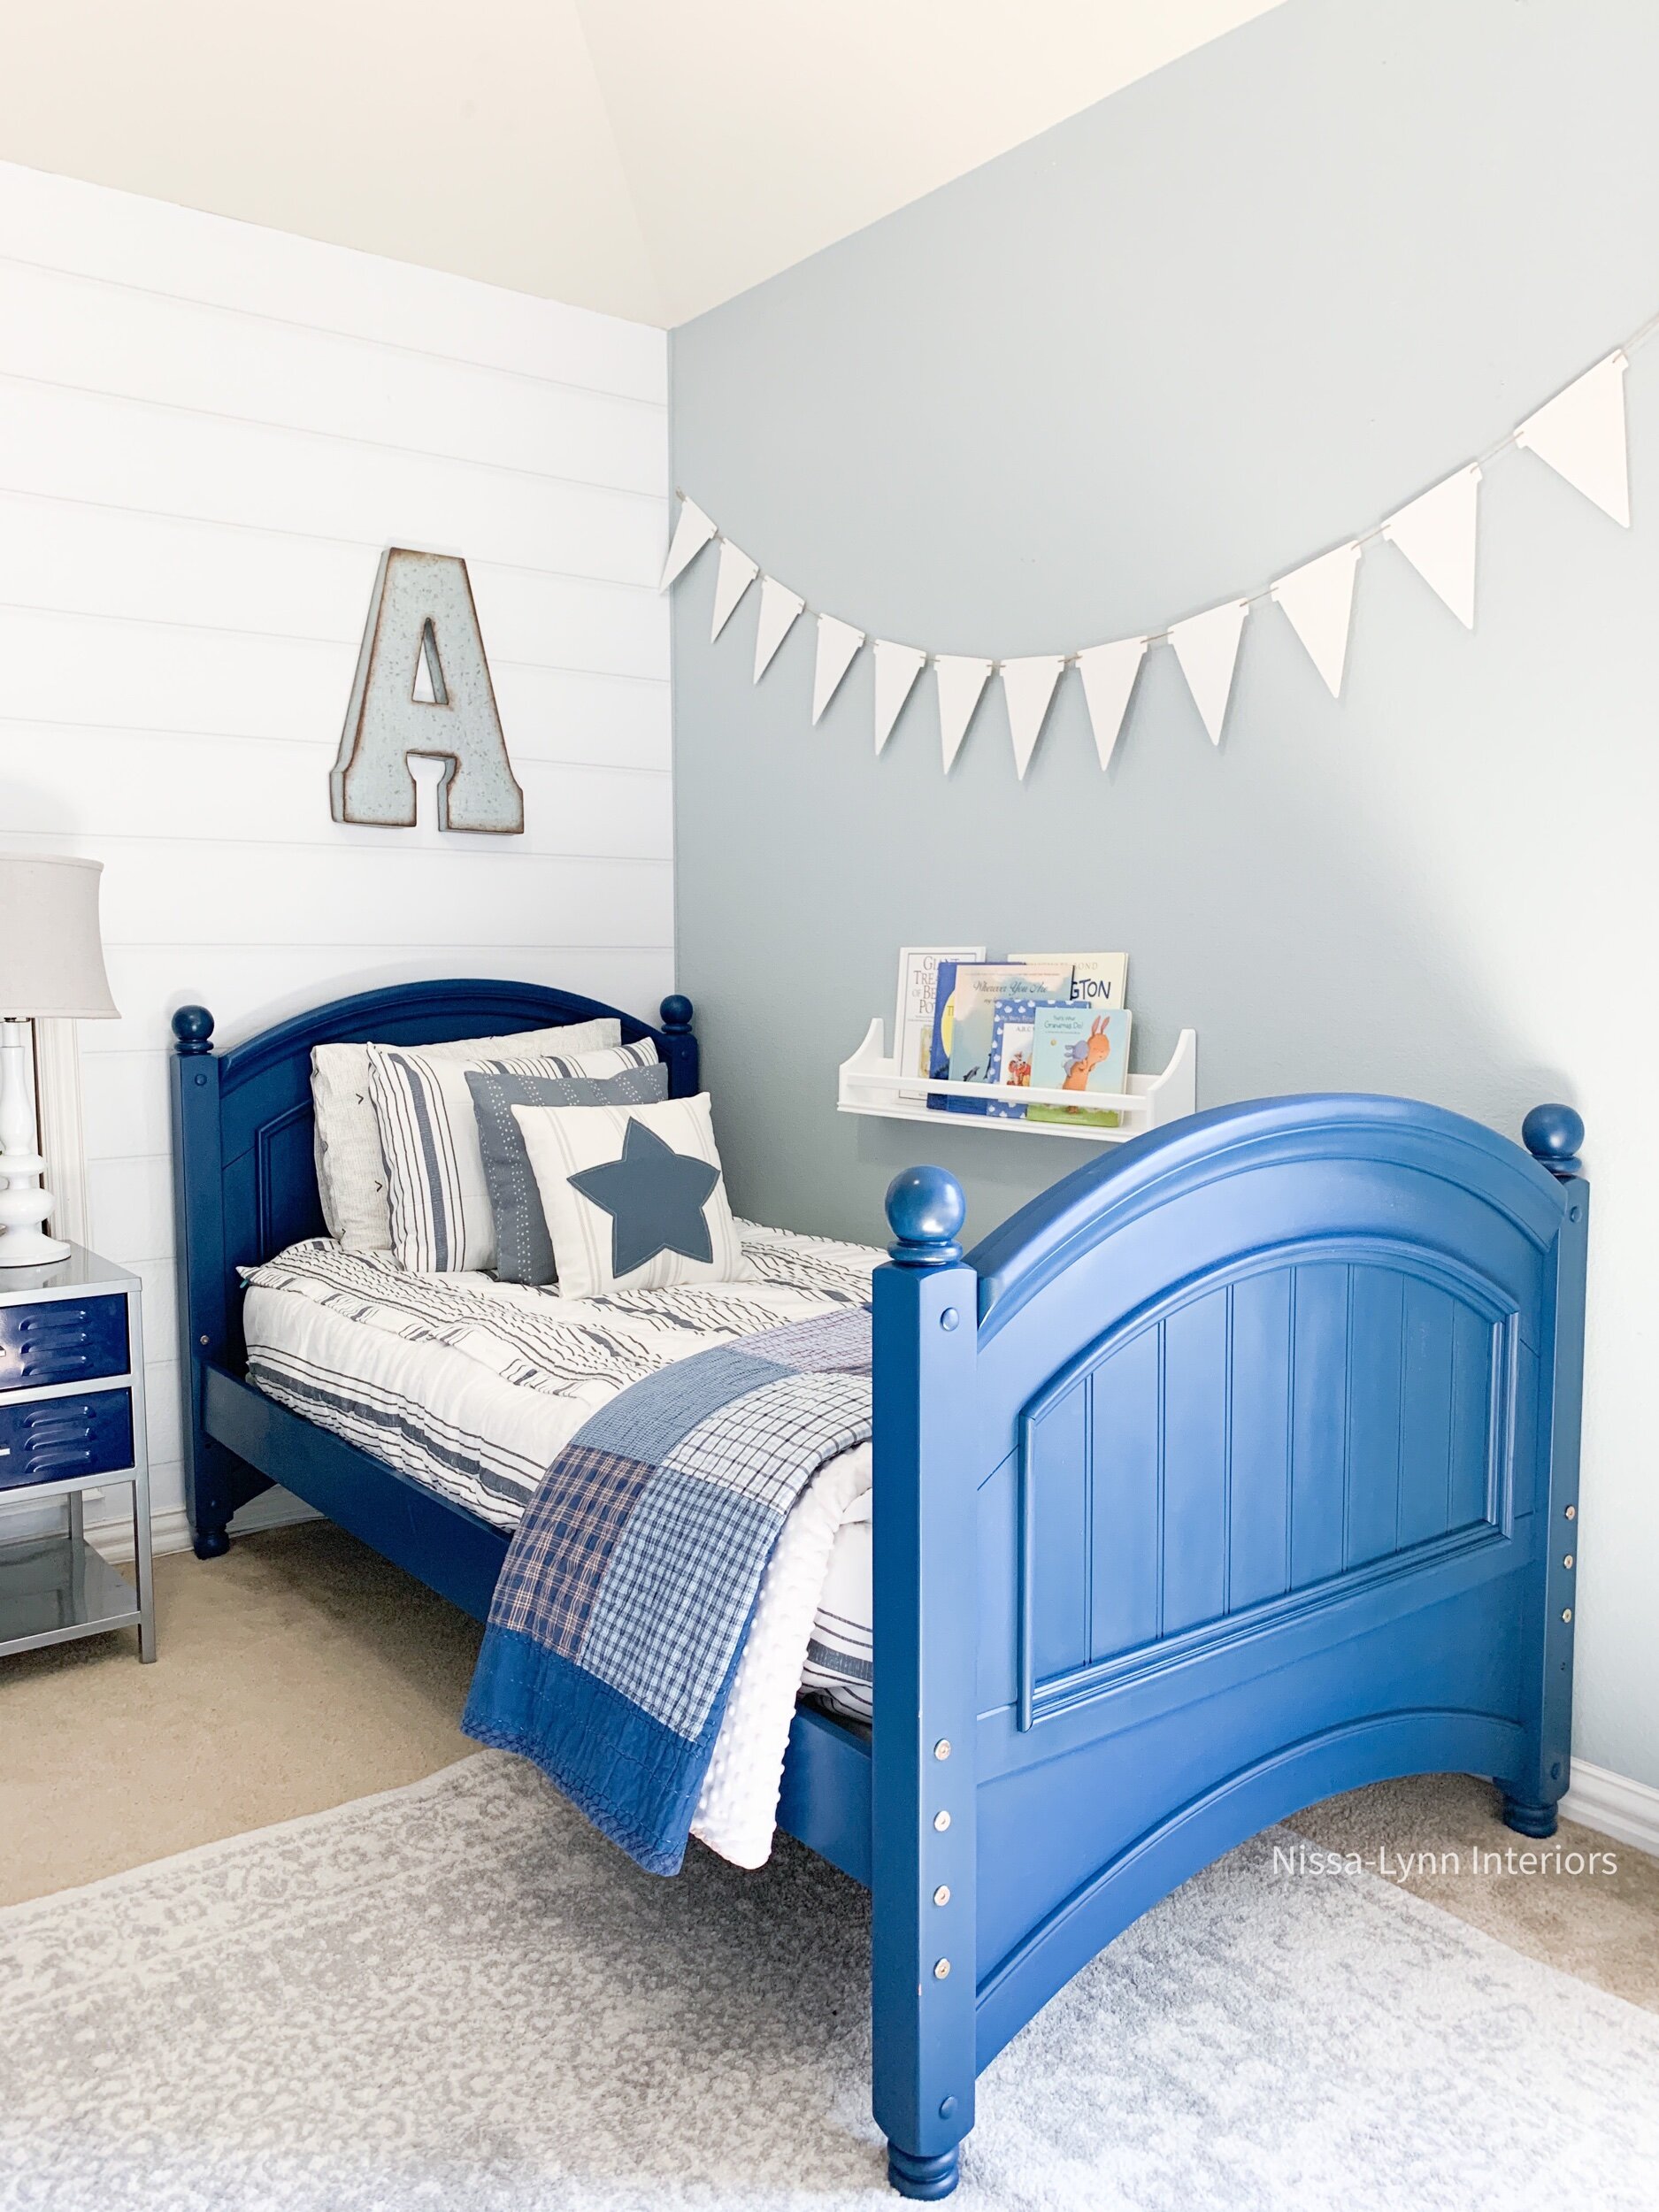
Hello! How has your summer been? We’ve been keeping busy by going to the pool and doing some small projects around the house. One of these was updating my son Brady’s bedroom. I didn’t want to go with a theme bedroom, but rather a modern farmhouse/coastal look that would last a while. We had a small budget to work with so we didn’t buy any new furniture, instead we decided to repurpose the items we had. To change the look of the room, the first thing we did was paint the dark red cottage style twin beds. I chose a vibrant blue spray paint called Oxford Blue by Krylon in a satin finish finish. It worked so well!

Adjustments.jpeg

First, I want to let you know, this room is tricky to decorates because of that little white door in the middle of the wall. The door leads to the attic, which we into a hideout for the kids. The majority of the time the night stand table is off to the side of the left bed. But for these photos I moved it to the middle.

Adjustments.jpeg

After painting the beds, we changed up the bedding. To me, new bedding makes a huge difference in any bedroom. This adorable bedding is from my favorite bedding place - Beddy’s. I chose the Farmhouse Collection because the bedding has a blue/gray stripe against a refreshing white background. The collection also has matching pillows, which coordinate well with the bedding. As a mom, I love Beddy’s because of the soft fabrics and styles, but most importantly because of the functionality of the zip up feature. It helps keep kids’ rooms tidy! Beddy’s are an easy way to make the bed, and we no longer have blankets and sheets dragging on the floor. Plus, the Beddy’s come with a pillow case and matching sham - so you don’t need to buy a separate sheet set! To save you money, you can use code NISSALYNN at Beddy’s check out to save 15% off your entire order! #sponsored

I already had the gray rug, but it’s only a 5x7, so I definitely need an 8x10 for this room.

I already had the gray rug, but it’s only a 5x7, so I definitely need an 8x10 for this room.

I love anything with stars on it, so I also added these cute star pillows from Krumpets Home Decor. (You can use code NISSALYNN at Krumpetshome.com for 10% off your order.)

I love anything with stars on it, so I also added these cute star pillows from Krumpets Home Decor. (You can use code NISSALYNN at Krumpetshome.com for 10% off your order.)

To brighten up the room we tried a new thing - peel and stick wall paper. I chose a shiplap wallpaper from Wall Blush and it looks great! But it was pretty tricky to put up, but defintley with it! (You can use code nissalynninteriors15 for 15% off your order.)

I took down the previous decor and replaced it with wooden pennants. The pennants were originally a natural wood color - so we spray painted them white. I also added this darling little wall shelf by the bed for easy access to books for bedtime reading.

The quilts at the foot of the beds, I’ve had for years. I bought them at Target, and they have lasted for a long time. (Here’s a link to a similar quilt that I have.) I love having a quilt or extra duvet at the foot of every bed in my home because it makes the room feel more cozy.

Adjustments.jpeg
Adjustments.jpeg

I also changed out the curtains in this room. Before we had navy chevron window treatments, but they didn’t go with the modern farmhouse look I was going for. (Plus, we only have on window in the room, so I wanted somthing light and airy.) The buffalo check curtains were perfect! And they were so inexpensive!

Adjustments.jpeg

As for the galvanized metal letters above the beds, I purchased them at Hobby Lobby several years ago. I love them so much I decided to keep them in the same place.

I hope this post inspired you in some way! If you have any questions, please feel free to leave a question in the comments and I’d be happy to get back to you.

7F5E9602-1CBA-47E9-9381-EFE195F529C0.jpeg

Appliance Shopping Stress Free with Nebraska Furniture Mart

Let’s be honest, when one of your household appliances starts to give out, you probably panic. I know I do! Because having to replace it is not a small cost. And then there’s the comparison shopping, hoping for the best deal, picking out the right brand, and delivery issues. After many years of buying appliances at various stores, I found the perfect solution - Nebraska Furniture Mart! #Sponsored

sidefrontpost.jpg
closersideview.jpg

I got my dishwasher and microwave from there, so when I was in the market for a new stove, I skipped the other retailer’s websites, and headed straight to NFM.com. Once at their site, I found it very easy to navigate. I started my search for ranges by filtering “slide in stainless steel range”, and based on my current kitchen measurements, I knew I could only fit a 30 inch wide range so I added that to the search criteria. Then I was able to compare brands, appliance options, and price. A list of ranges came up and I fell in love with this wonderful Frigidaire 30'' Slide-In Gas Range. I was able to order it right then and there from the comfort of my home. Although I must say, whenever I get the chance I love physically going to Nebraska's store and wandering aimlessly down the home decor isles. I love looking at all their visual displays.

After the range was ordered and I received a confirmation number and installation date. I couldn’t wait for that day to arrive! I didn’t worry about a thing and Nebraska Furniture Mart’s customer service department called two days prior to delivery just to confirm with me that everything was good to go.

IMG_5481.jpg

On the day of installation, I was like a kid on Christmas morning! The installers called ahead to let me know they would be at my home in about 45 minutes. I kept looking out the window for that big white and green truck. They came right when they said they would - right on time! How often does that actually happen? Once the truck pulled up to my driveway two Nebraska Furniture Mart employees jumped out, and let me tell you, these two guys were the nicest installers I’ve ever met! They were so positive and helpful and were great people people. Besides their attitude being so pleasant, they totally knew what they were doing. They disconnected the gas line and removed my old stove and then carefully took my new stainless steel slide in range off the truck and delicately unwrapped it. The men worked together to install it and hook up the new gas line. They also showed me information in the owner’s manual, and taught me all about the features of my new range. They cleaned up all the trash and made sure I was comfortable with everything before they left. Seriously, it was the best installation experience I’ve ever had! And they didn’t even mind posing for pictures!

IMG_5463.jpg
IMG_5474.jpg
IMG_5475 copy.jpg

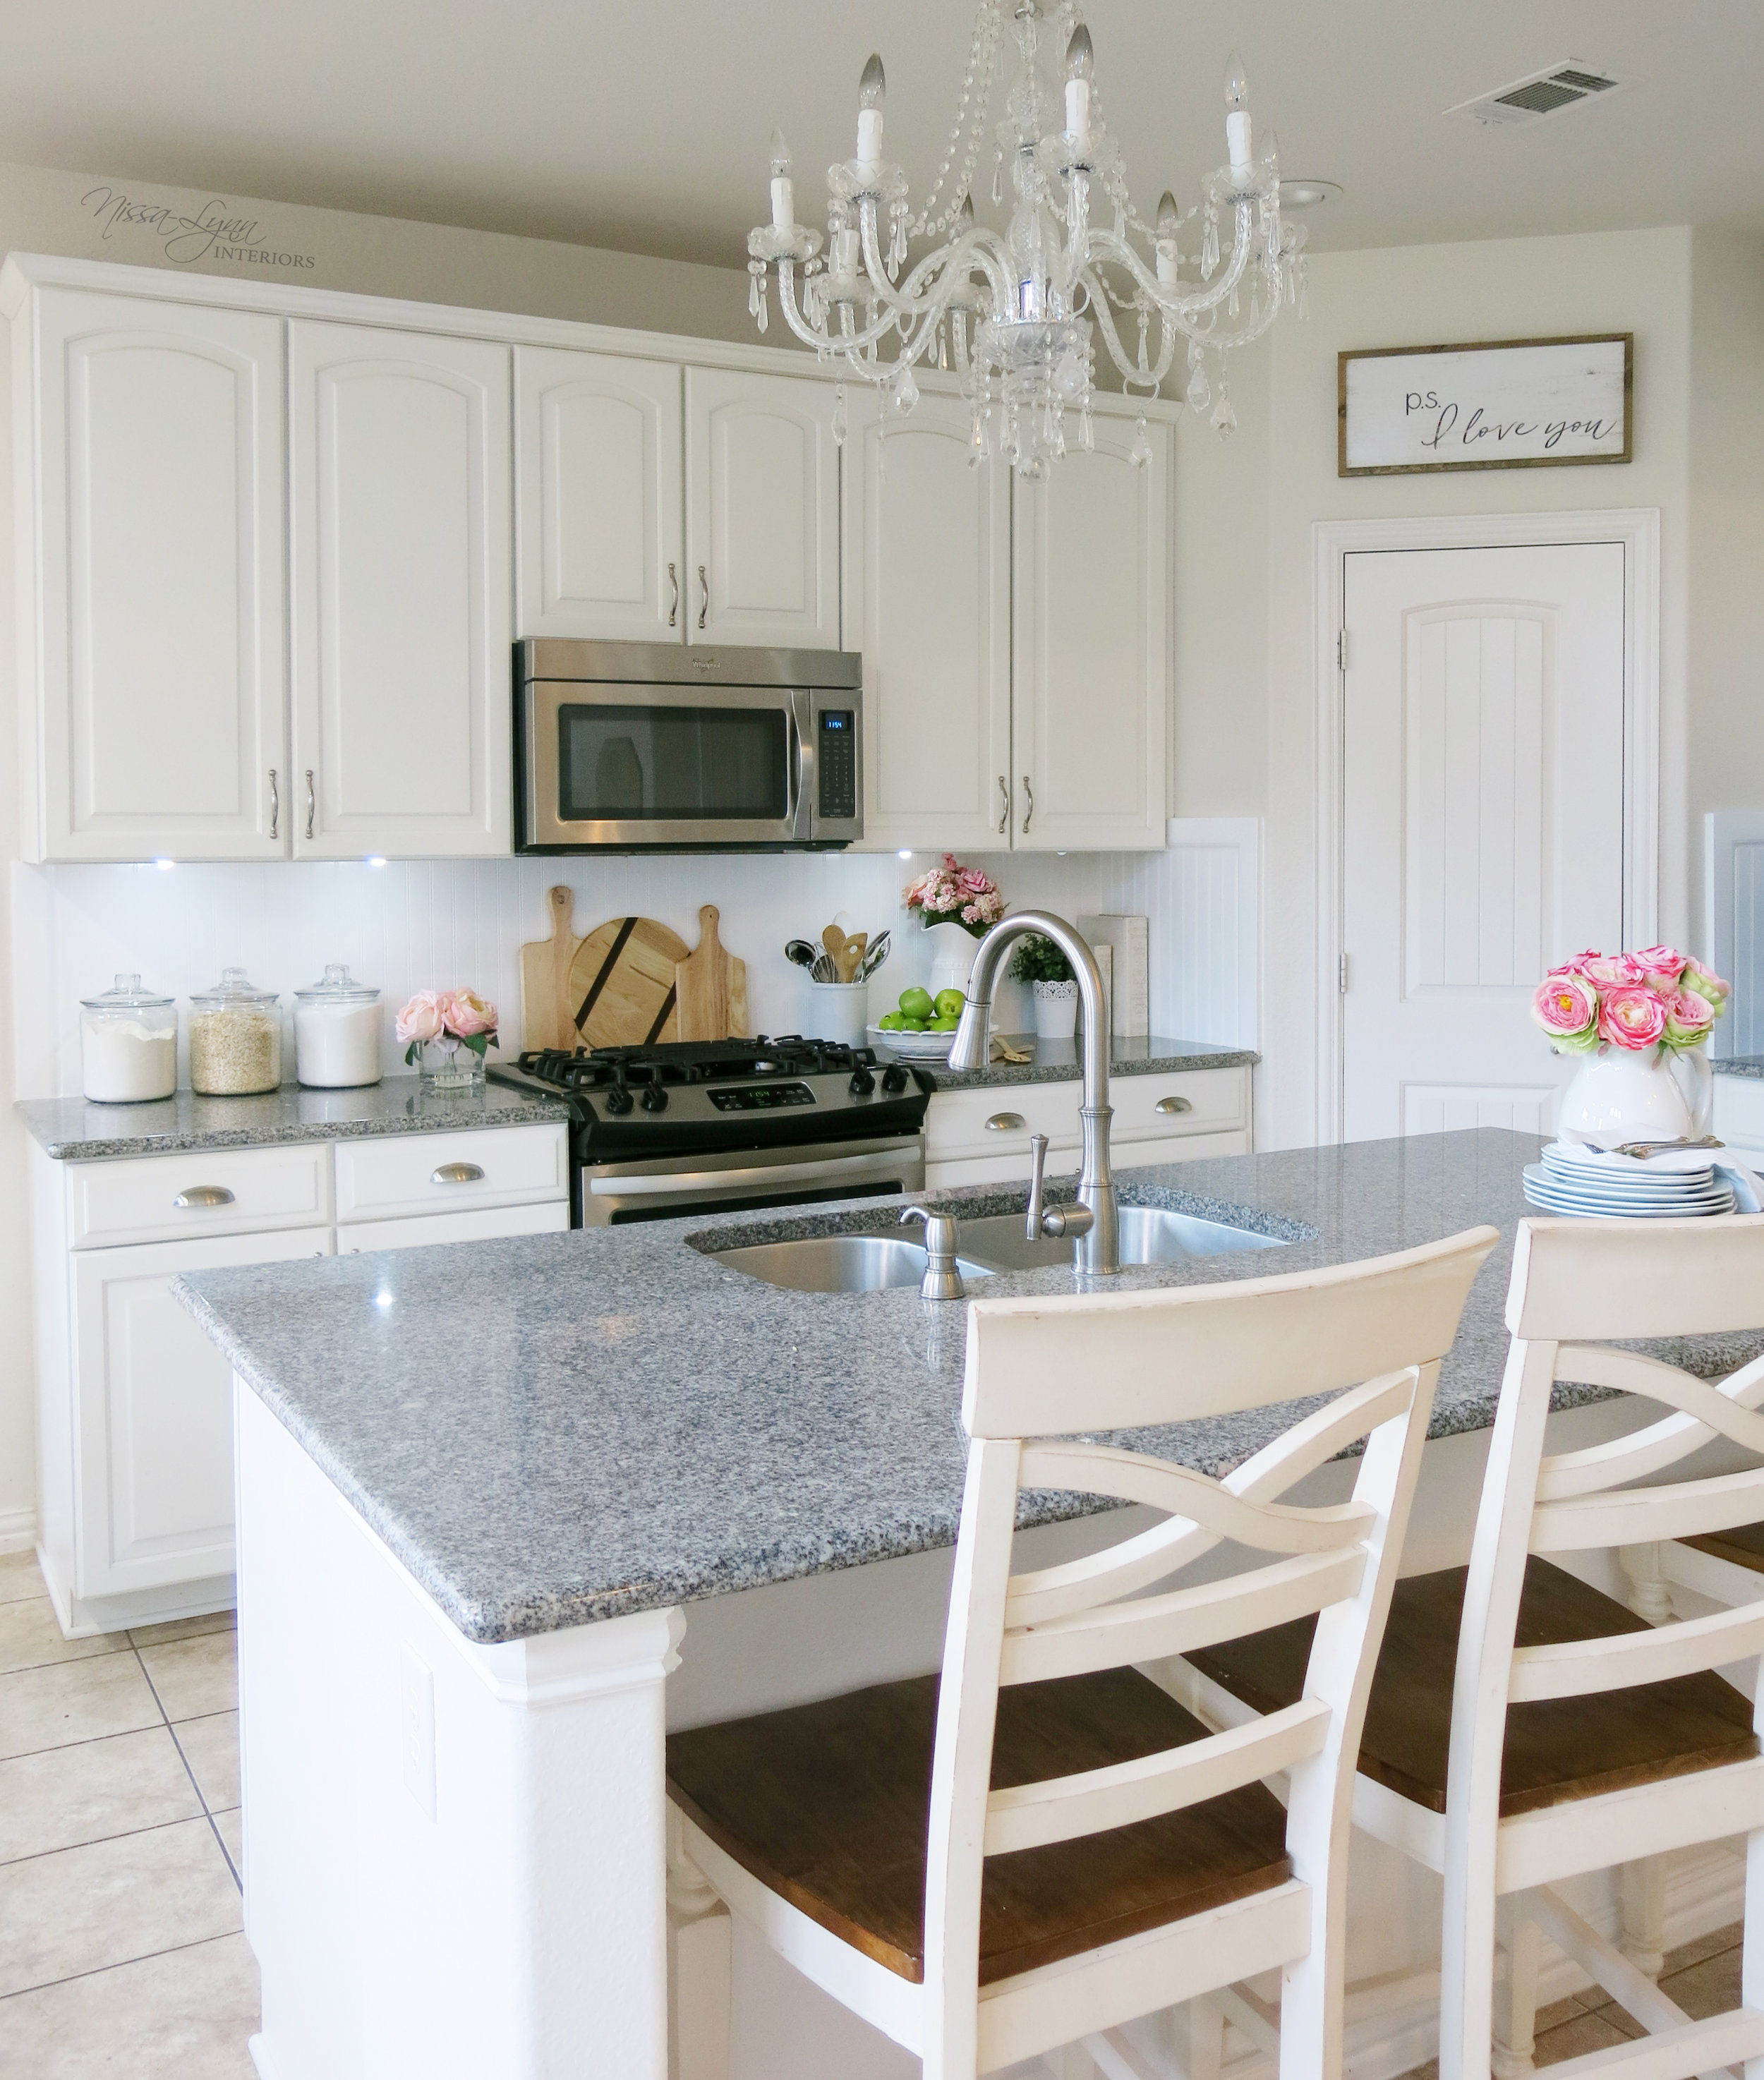
The difference between my old and new oven is amazing! I specifically wanted a stainless steel range without a back for a sleek, modern design. My prior oven was all back and I felt it just got grease on it all the time, not to mention being a bit of an eye sore. The black was such a stark contrast against my white kitchen cabinets. I also feel this new range helps to “open up” the kitchen making the space appear a little larger.

frontpost.jpg
cornerclose.jpg
upcloseside.jpg

The new oven came with a larger bottom drawer - something I’m in always need of because i have a lot of cookie sheet and cake pans.

opendoor.jpg
See the faux pink roses on the island - those are from Nebraska Furniture Mart too! I bought them at the store in their home decor section!

See the faux pink roses on the island - those are from Nebraska Furniture Mart too! I bought them at the store in their home decor section!

The entire experience was a exceptional. Nebraska Furniture Mart has definitely figured out how to make a customer happy. The entire process from selection to installation was a breeze! #NFMatHome #NFMStyle