Simple Ways to Refresh a Child's Bedroom

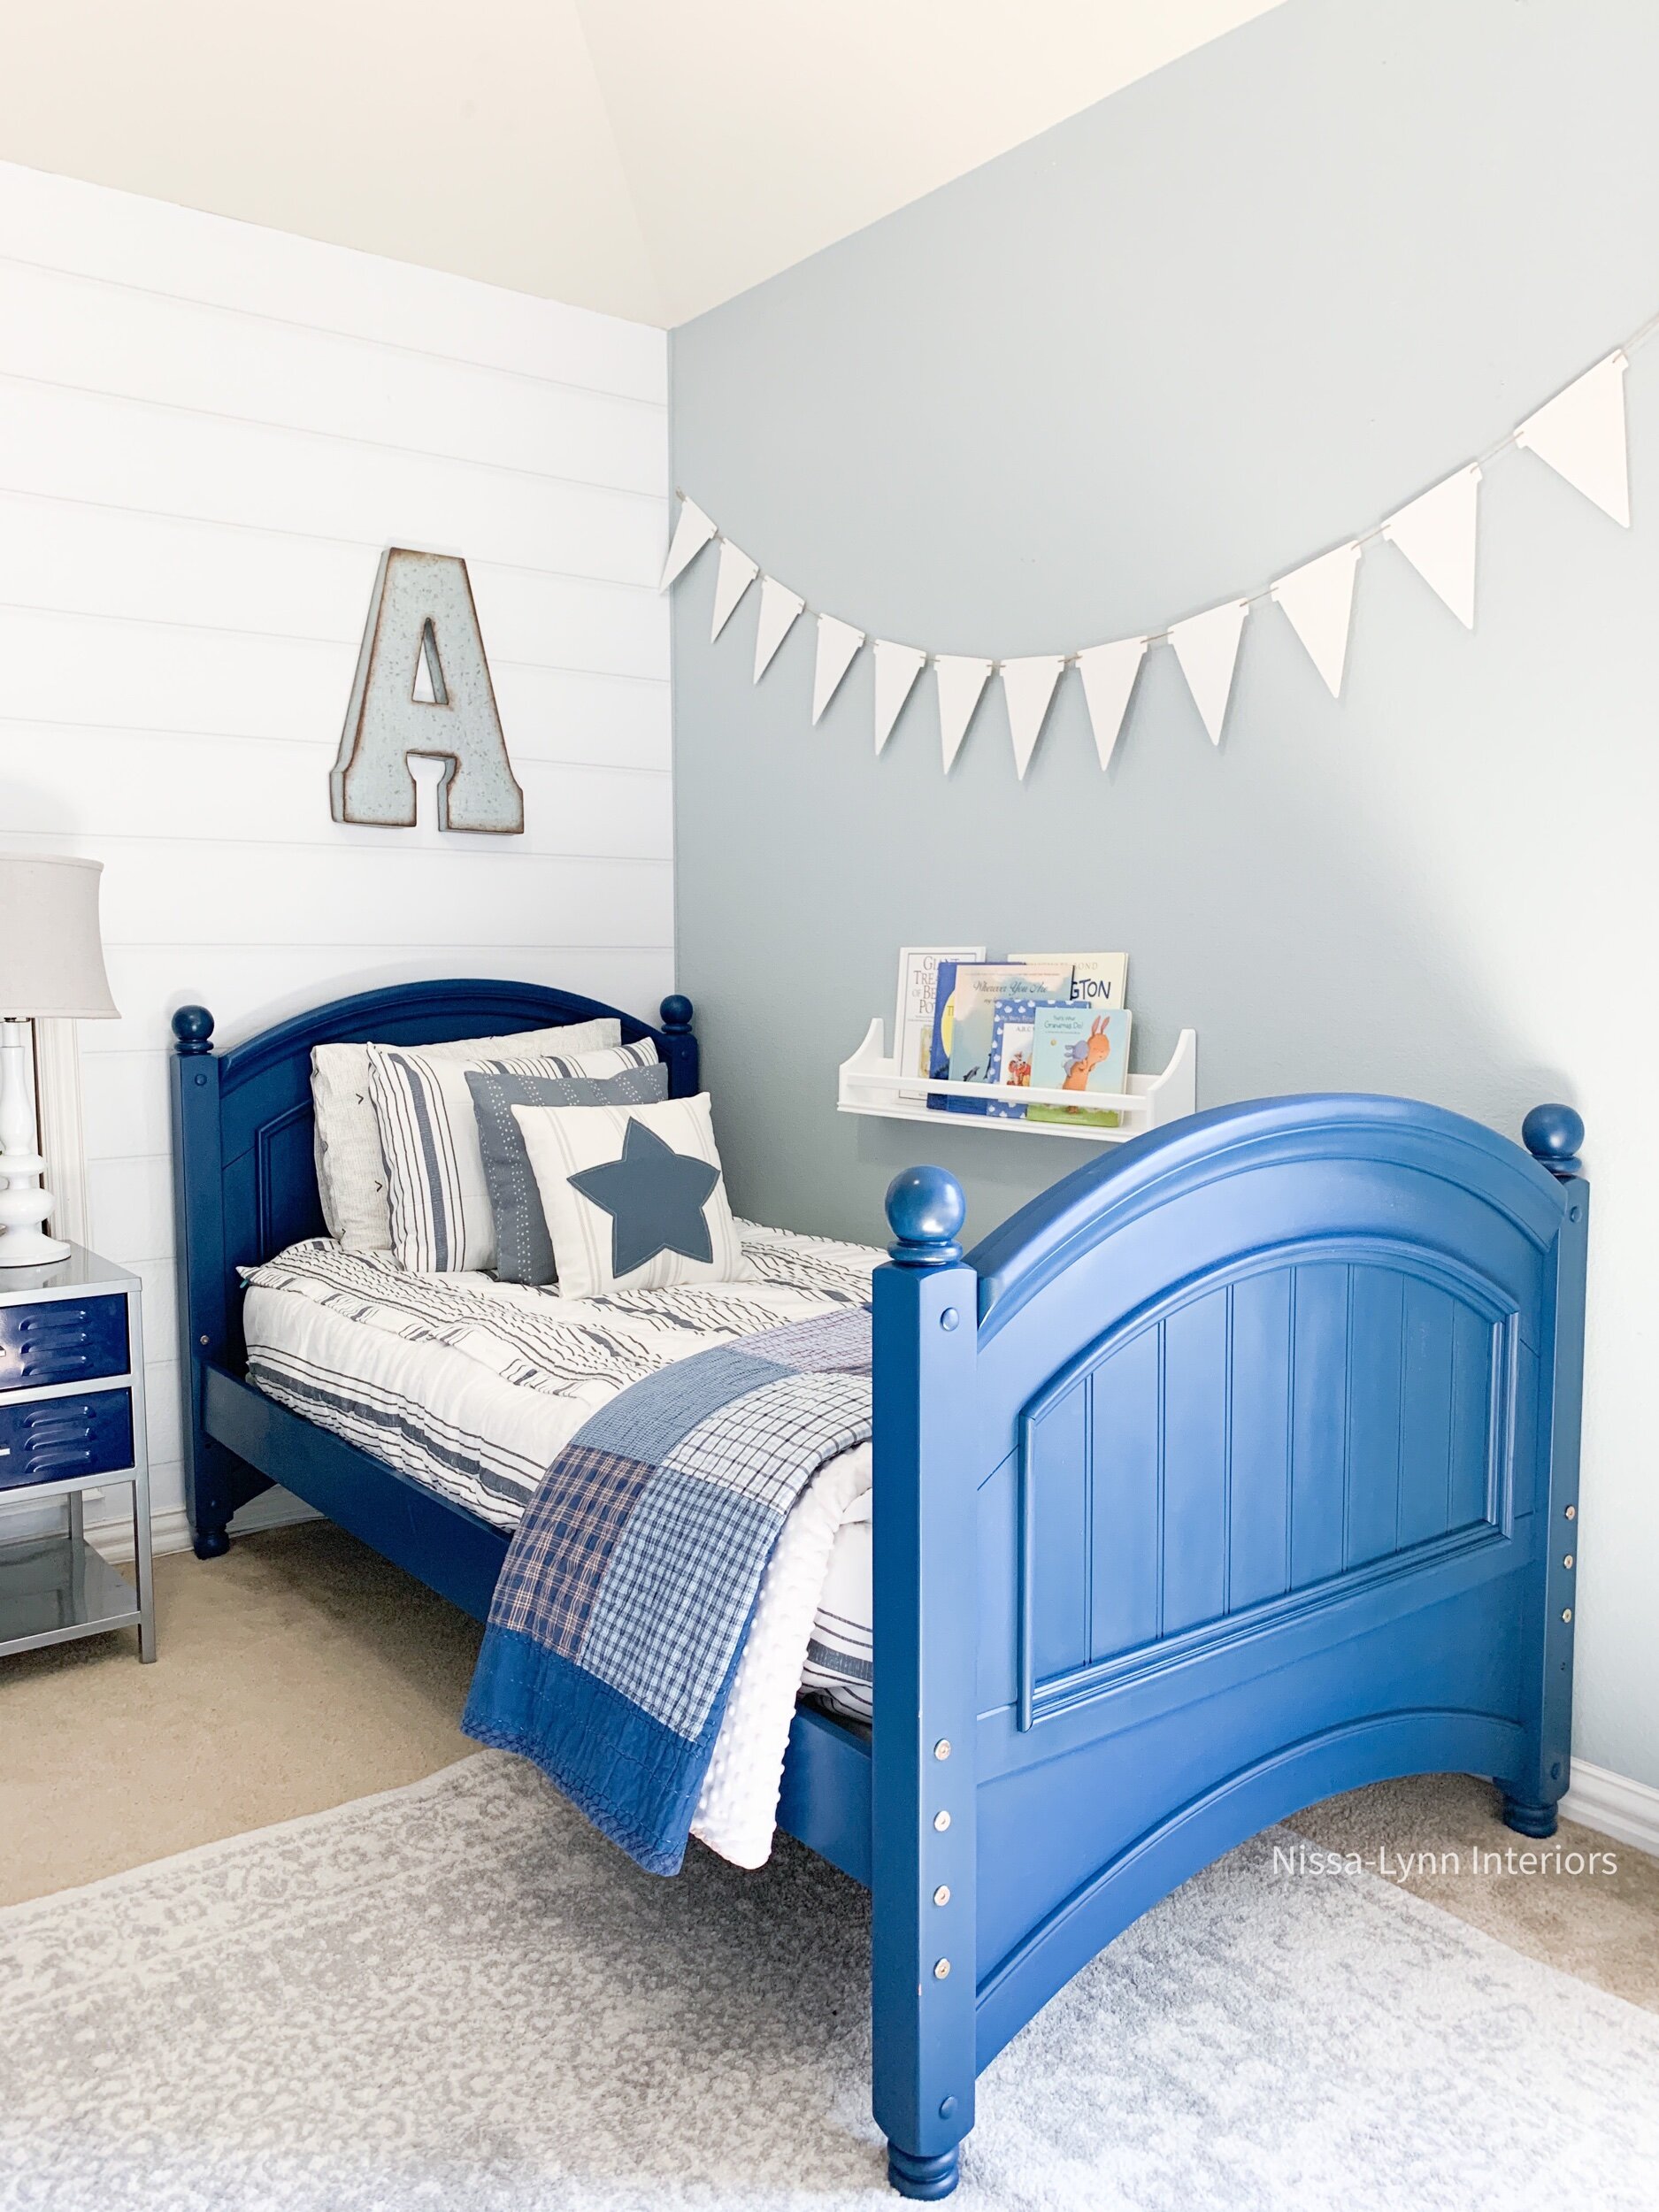
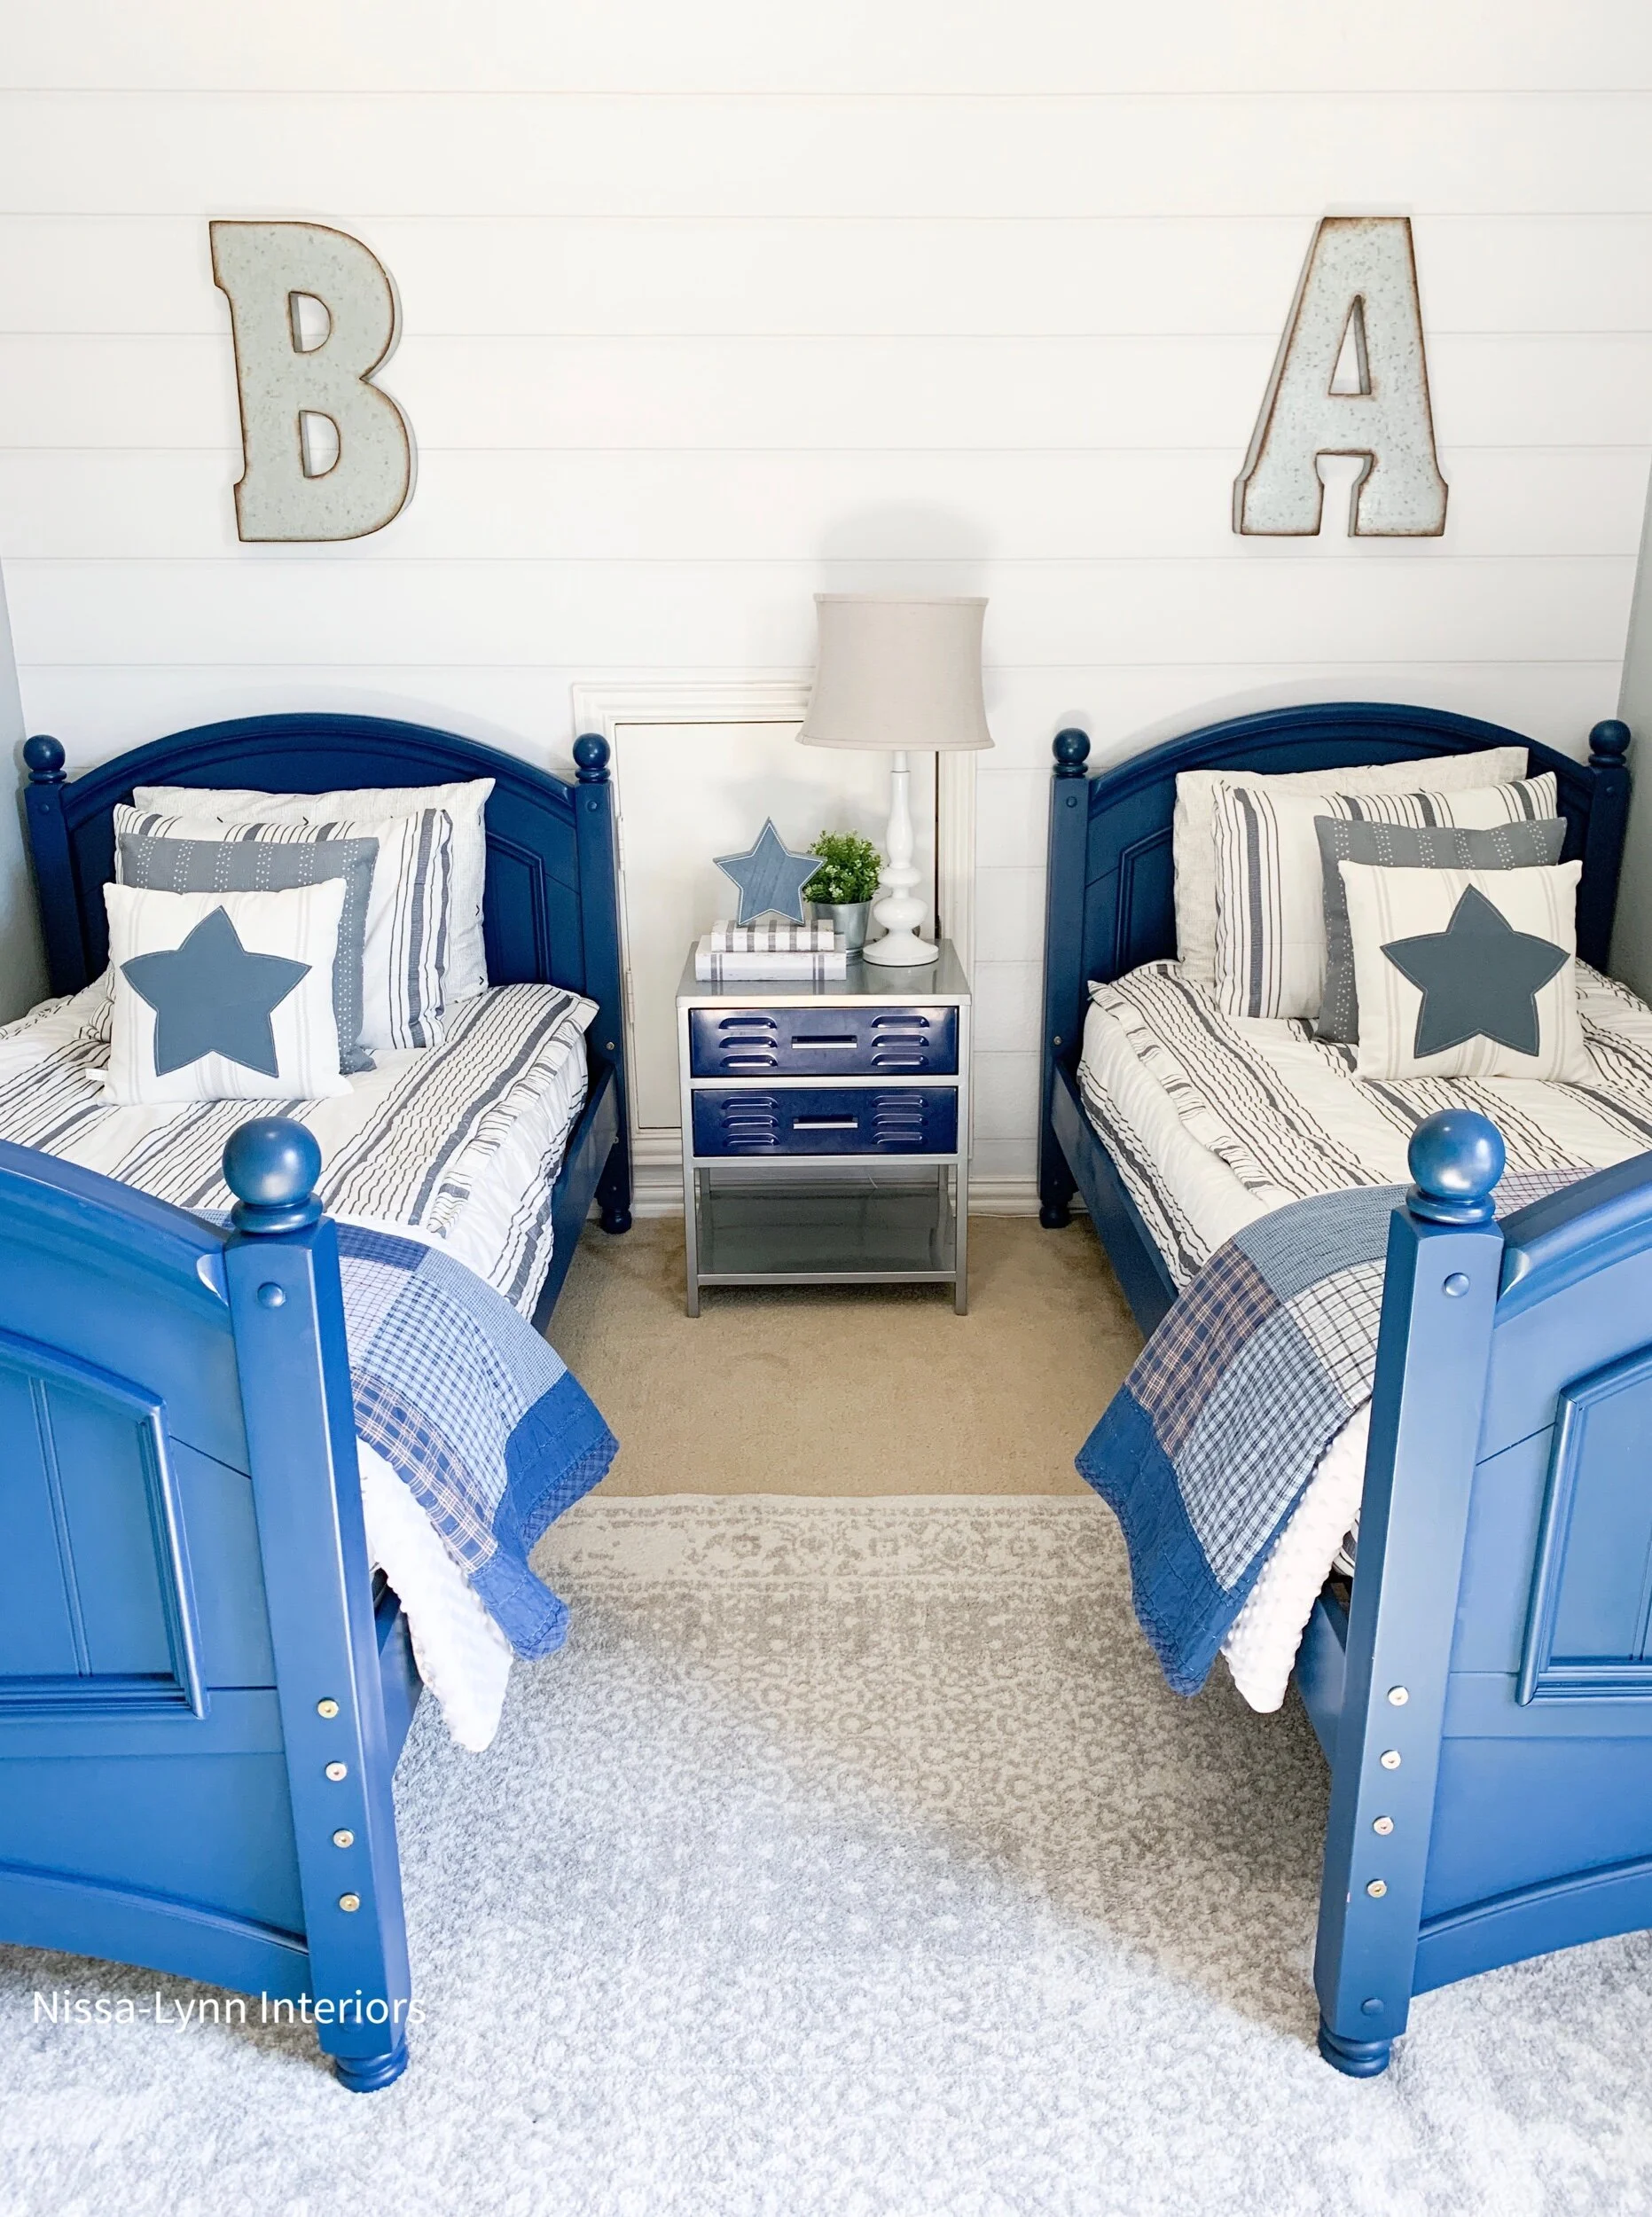
Hello! How has your summer been? We’ve been keeping busy by going to the pool and doing some small projects around the house. One of these was updating my son Brady’s bedroom. I didn’t want to go with a theme bedroom, but rather a modern farmhouse/coastal look that would last a while. We had a small budget to work with so we didn’t buy any new furniture, instead we decided to repurpose the items we had. To change the look of the room, the first thing we did was paint the dark red cottage style twin beds. I chose a vibrant blue spray paint called Oxford Blue by Krylon in a satin finish finish. It worked so well!

Adjustments.jpeg

First, I want to let you know, this room is tricky to decorates because of that little white door in the middle of the wall. The door leads to the attic, which we into a hideout for the kids. The majority of the time the night stand table is off to the side of the left bed. But for these photos I moved it to the middle.

Adjustments.jpeg

After painting the beds, we changed up the bedding. To me, new bedding makes a huge difference in any bedroom. This adorable bedding is from my favorite bedding place - Beddy’s. I chose the Farmhouse Collection because the bedding has a blue/gray stripe against a refreshing white background. The collection also has matching pillows, which coordinate well with the bedding. As a mom, I love Beddy’s because of the soft fabrics and styles, but most importantly because of the functionality of the zip up feature. It helps keep kids’ rooms tidy! Beddy’s are an easy way to make the bed, and we no longer have blankets and sheets dragging on the floor. Plus, the Beddy’s come with a pillow case and matching sham - so you don’t need to buy a separate sheet set! To save you money, you can use code NISSALYNN at Beddy’s check out to save 15% off your entire order! #sponsored

I already had the gray rug, but it’s only a 5x7, so I definitely need an 8x10 for this room.

I already had the gray rug, but it’s only a 5x7, so I definitely need an 8x10 for this room.

I love anything with stars on it, so I also added these cute star pillows from Krumpets Home Decor. (You can use code NISSALYNN at Krumpetshome.com for 10% off your order.)

I love anything with stars on it, so I also added these cute star pillows from Krumpets Home Decor. (You can use code NISSALYNN at Krumpetshome.com for 10% off your order.)

To brighten up the room we tried a new thing - peel and stick wall paper. I chose a shiplap wallpaper from Wall Blush and it looks great! But it was pretty tricky to put up, but defintley with it! (You can use code nissalynninteriors15 for 15% off your order.)

I took down the previous decor and replaced it with wooden pennants. The pennants were originally a natural wood color - so we spray painted them white. I also added this darling little wall shelf by the bed for easy access to books for bedtime reading.

The quilts at the foot of the beds, I’ve had for years. I bought them at Target, and they have lasted for a long time. (Here’s a link to a similar quilt that I have.) I love having a quilt or extra duvet at the foot of every bed in my home because it makes the room feel more cozy.

Adjustments.jpeg
Adjustments.jpeg

I also changed out the curtains in this room. Before we had navy chevron window treatments, but they didn’t go with the modern farmhouse look I was going for. (Plus, we only have on window in the room, so I wanted somthing light and airy.) The buffalo check curtains were perfect! And they were so inexpensive!

Adjustments.jpeg

As for the galvanized metal letters above the beds, I purchased them at Hobby Lobby several years ago. I love them so much I decided to keep them in the same place.

I hope this post inspired you in some way! If you have any questions, please feel free to leave a question in the comments and I’d be happy to get back to you.

7F5E9602-1CBA-47E9-9381-EFE195F529C0.jpeg

Pretty in Pink

Welcome to Miss Annalise Kathryn's nursery! I'm so excited to share with you my tips and tricks to achieving this princess look!

nursery3.jpg
nursery.jpg

Next I looked for bedding in the color blush. I found the perfect bedding at Pottery Barn Kids. I bought the crib quilt, crib skirt, bumper and small pillow sham with Annalise monogramed on it. I really wanted a blush tulle crib skirt - but after searching high and low, I couldn't find the right one anywhere! So I took matters into my own hands and sewed a sheer silk fabric on top of the Pottery Barn Kids crib skirt. I loved how it turned out! I also sewed the white bows myself. I wanted a fabric to drape from a crown but didn't want tulle. So I used a similar sheer fabric as the crib skirt, and sewed a pink edge using biased tape.

To get started I combed the internet for ideas of what I loved. I chose the color pallet first. I saw the Love sing at Hobby Lobby and knew that the pink, gold and blush were it! I didn't want a lot of decorations and a I was on a tight budget.

To get started I combed the internet for ideas of what I loved. I chose the color pallet first. I saw the Love sing at Hobby Lobby and knew that the pink, gold and blush were it! I didn't want a lot of decorations and a I was on a tight budget.

IMG_1251.jpg

To get started I combed the internet for ideas of what I loved. I chose the color pallet first. I saw the Love sing at Hobby Lobby and knew that the pink, gold and blush were it! I didn't want a lot of decorations and a I was on a tight budget. 

Next I looked for bedding in the color blush. I found the perfect bedding at Pottery Barn Kids. I bought the crib quilt, crib skirt, bumper and small pillow sham with Annalise monogramed on it. I really wanted a blush tulle crib skirt - but after searching high and low, I couldn't find the right one anywhere! So I took matters into my own hands and sewed a sheer silk fabric on top of the Pottery Barn Kids crib skirt. I loved how it turned out! I also sewed the white bows myself. I wanted a fabric to drape from a crown but didn't want tulle. So I used a similar sheer fabric as the crib skirt, and sewed a pink edge using biased tape.

And I have to tell you the gorgeous 100% raw silk blessing dress hanging on the wall was custom made by my extremely talented Mother-in-law Kathryn Parson. She made my dream blessing dress! 

IMG_6424 copy.jpg

The dresser was purchased from Ikea. We bought the corresponding glass top for an extra $30.00 to add an more feminine touch. My hubby sawed off the original square Ikea feet and we added round feet. He also added two pieces of crown molding - one to the top and one to the bottom of the dresser. The new molding helped make the dresser look more elegant.

We also changed out the knobs with glass/mirror ones found on Amazon. 

And the pretty pink chiffon dress hanging on satin white hanger was mine from when I was a baby!

IMG_6455.JPG

After the bedding was done I picked out the paint. I picked out a color called Soft Pink Shell and painted a sample on the wall. It looked great - or at least the swatch did! So we bought a gallon and my hubby painted the entire room. It turned out horrible!!! So back to Lowes we went for another color. Bless my husbands heart, he painted the entire room again. This time it turned out perfect!

Then he added white trim work on the walls using quarter round trim. I love how it turned out! The trim gave the room wall decoration without having to put looks of knick-knacks up! To me, the trim helped the room look more regal and glamorous! 


I also receive the gorgeous custom made banner from Sweet Georgia Sweet. It was the perfect wall decor!

 The table and chairs I've had for fourteen years - it was in my oldest daughter's room when she was little. As my oldest daughter grew up, I kept the table and chairs in the play room un till now.

I bought the striped drapes four years ago from Linen-N-Things for my older daughters room. She thought they were to girly and did not want pink in her room! So I kept them in the package, hoping one day I'd have another girl again. When I became pregnant with our fifth child and found out she was a girl at her twenty-two week ultrasound appointment, the first thing I did when I got home was I pull out the drapes!  I was so excited!

I wanted gold curtain rods and could find any that worked - so we spray painted them! 

In continuing with the princess look, I wanted to drape fabric over the side on the crib. I also I wanted a crown for a topper for the drape to hang from. So I designed this box shape with crown moldings  with the crown in the middle. My super talented husband built the wood box with molding scraps, then he painted it white, and attached the crown to the box with several metal screws. 


Speaking of the crown, I bought it from Hobby Lobby and it was originally was hot pink! We spray painted the same gold color that we used for the curtain rods.

Speaking of the crown, I bought it from Hobby Lobby and it was originally was hot pink! We spray painted the same gold color that we used for the curtain rods.

IMG_6468 copy.jpg

More sources:


Silver table -Home Goods 

Leopard pillow -Home Goods 

Rug is from -At Home 

Chair - Costco

Frames - Home Goods

Lamp - At Home

Chandelier - Amazon

Floral - Pier1

Mirror - At Home

Tea Set- Amazon


Dollar Store Wreath Tutorial

I LOVE Valentine's Day so much, and sometimes I just wish I could go into stores and buy everything that is heart shaped, red, pink, blush etc! (I have to constrain myself - especially at Target.) This year I wanted make a Valentines Day wreath- but I didn't want to spend a lot of time or money. So I took this Boxwood Wreath I bought at Target a couple years ago and transformed it!

To update this on wreath on the cheap, I went to Dollar Tree and bought three packages of heart picks at a $1.00 per package. I broke the sticks in half and stuck them in the grapevine part of the wreath. Next I added some Valentine's Day ribbon, (also purchased at the dollar store,) and made a bow. Now it's ready to hang on my front door! And it only took me ten minuets start to finish! 

IMG_8478cut.jpg

Step #1

IMG_8454.jpg

Step #2

IMG_8456.jpg

Step #3

IMG_8464.jpg

Step #4

IMG_8466.jpg

Step #5

IMG_8461.jpg

Step #6

IMG_8474.jpg

Step #7

Now it’s ready to hang from the top of a door. Or you can make a bow instead, and hook the back the grapevine wreath to a Command hook or nail.

IMG_8477.jpg
IMG_8478.jpg

Fun Family Room Ideas

So here in Texas we don't have basements, instead homes are built with upstairs game/ family rooms. So for our upstairs game/family room, we wanted a cozy space for our family of seven. I decided early on that this was mostly going to be a kid/teen room, so I really didn't want to spend much money on decor - or even add much decor. But I wanted a place where we can all hang out watching movies together, or a comfortable space that my kids could hangout with their friends. 

familyroompost.jpg

So my husband Justin and I got to work and started planing! First, I drew up what kind of board and batten I wanted, then he started doing the measurements and bought the supplies. He also added a shelf lip to board and batten wall so that any picture frames wouldn't fall off. Then he built custom photo frames from scratch,  using chair rail molding at Lowes, and took the pics of everyone in our family. Taking the photos was the fun part as we smashed our faces onto the glass! (We wanted silly photos to show off our kid's personalities!) 

IMG_5245.jpg

Now for the room layout, furniture and decor. The Ikea sectional faces a large wall with a tv on it and console table that is directly under the TV and the table holds the Xbox - because of that this room is the hot spot with the kids! The pillows also came from Ikea, with the exception of the bicycle pillow which came from Target. The table decor is wire apothecary jars that I already had.  And I bought a basket at At Home to place the decor in. The throw blankets I already has as well. 

This photo was taken a few days later when I went to Costco and bought these beautiful fresh flowers. The clock from Stein Mart. (In case you didn't know, Stein Mart has a great home decor section!)

IMG_7385.jpg

Now I'm going to share my inspiration photo from taken from Ikea.
I found it on Pinterest a few years ago. My room space is much smaller than this Ikea photo, and I needed to keep walk way open to get to the bedrooms, so my family room has way less furniture and decor.

a912fd98c1c6d15c21a2876e3bc2f293.jpg
Hope that gives you a little inspiration on your next family room!

Hope that gives you a little inspiration on your next family room!

DIY Dining Room

One of the first projects we did when we moved into our home six years ago was to paint and add a half wall of trim work to our dinging room. The paint color I used was Restoration Hardware’s Silver Sage. (As you can see from photos it looks different in different light.) Sunlight bring out the blue color and the warm chandelier light’s bring out the green hues.

IMG_7236.jpg
IMG_2742.JPG
wall copy.jpg
IMG_9544.jpg

Spiffing Up the Stairs!

Have you ever though about spiffing up your staircase? Spring is right around the corner and its a great time to do house projects! Look at the amazing difference trim work can make! Before is the stairs right before the carpet was added, after is when the carpet is laid and my husband added the stair trim! I’ll write more details later.

Adding the trim work make such a difference! Some day we hope to change the stair cse to wood instead of carpet. But for now with a baby, carpet is safer.

Adding the trim work make such a difference! Some day we hope to change the stair cse to wood instead of carpet. But for now with a baby, carpet is safer.

IMG_7302.jpg
IMG_7276.JPG
The stairs under construction.

The stairs under construction.

The stairs and home all finished.

The stairs and home all finished.