Step By Step for Decorating a Christmas Tablescape

You can find the video tutorial footage in my Highlights on my Instagram page.

I’ve come up with easy steps to decorating a Christmas tablescape.

IMG_0088.JPG
  1. Start with table runners. I have an 84 inch long table so a lot of table runners don’t go the entire length of my table, so I use three table runners. One down the middle and two on either end of the table running horizontal.

  2. Add a charger plate at every seat.

IMG_0096.JPG

3. Add the dinner plate.

4. Add the salad plate

5. Assemble the cloth napkins. I like to use a patterned napkin paired with a solid napkin and sparkling metallic napkin ring holder. The solid napkins I have here are from Target.

This gorgeous Boucle rug from Orian Rugs is the perfect rug for my riding room.

This gorgeous Boucle rug from Orian Rugs is the perfect rug for my riding room.

Dining roomless yellow.jpg

6. Place napkins in center on place setting.

7. Add silverware. Remember to ask yourself: Do you need a dessert or a soup spoon? Add all the silverware you need and place them in the proper places. (Salad and dinner forks on left, knife and spoon on right.)

8. Add glasses to the right side. Ask yourself what drinks you are having: Do you need wine glasses and water goblets?

EA9B5D45-1F77-490B-A263-99D67AFAB77E.jpg
diningroom2.jpg

9. Start adding the centerpiece. Place largest pieces first. I place chunky candles and accessories then fill the middle space with large pieces of greenery.

10. Keep building with smaller greenery stems to fill in the holes, then add taper candles. A trick my mom taught me was to put tin foil in the candlesticks to keep the taper candle from falling over.

IMG_0095post.jpg
chrsitmas dinig bright copy.jpg
IMG_0381.JPG
Sharing my dining room Christmas tree. The heart ornament in the middle has special meaning. I gave it to my grandmother last Christmas. She passed away last February. I went back to home this past July and brought it back with me to always have.

Sharing my dining room Christmas tree. The heart ornament in the middle has special meaning. I gave it to my grandmother last Christmas. She passed away last February. I went back to home this past July and brought it back with me to always have.

The decorative white and black, and gold gift boxes are from Target.

The decorative white and black, and gold gift boxes are from Target.

North Texas Youth Prom

My husband and I were asked to be the North Texas Prom Chairmans and to put to together a prom for 400 youth from The Church of Jesus Christ of Latter-day Saints. Justin and I started from scratch. We had to form a committee, create a theme and logo, find a venue to hold 400 youth, as well as come up with decorations, refreshments, photo backdrops, and advertising, all the while staying in a strict budget. We planned for 8 months and oversaw every detail.

After 8 months of planning, Mormon Prom was turned out awesome! I’m so grateful for my committee, all the volunteers, and of course my partner in crime - Justin! The venue at Cross Creek Ranch was beautiful as well great to work with! I hope the 400 youth had a wonderful time dancing β€œUnder the Southern Sky!” #moprotx

All the details and photos still coming…

A Party Fit for a Princess

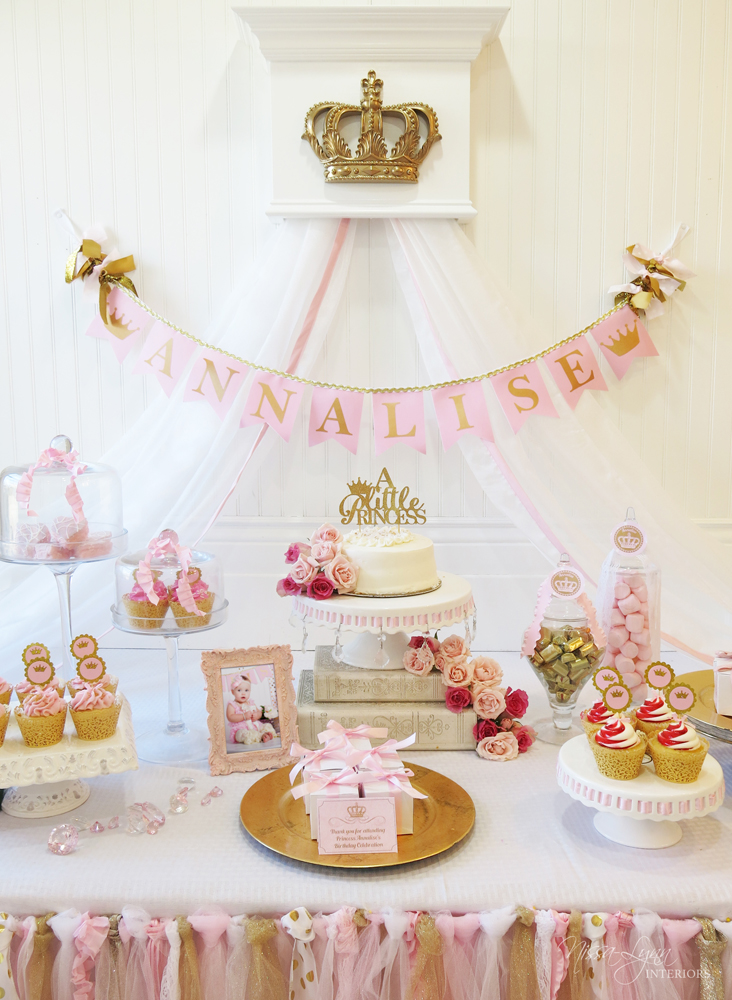
Happy first Birthday to our little Miss Annalise! Since my oldest daughter is now fifteen, I hadn't thrown a little girl themed party in years! So I knew when Annalise turned one, I wanted to have a super elegant, storybook, dream birthday party fit for a princess!  

I started planning weeks in advance. I loved how everything turned out! It was just what I dreamed! The gorgeous custom made banner was the key to the whole table setting! It's from SweetGeorgiaSweet, and it was the perfect focal point! I love it so much!

Read more below.

Annalise Party_Table3.jpg
Annalise Party_Table4.jpg
Annalise Party_Table.jpg
Annalise Party_Cupcake3.jpg
Annalise Party_cake1.jpg
Annalise Party_giftboxes.jpg
Annalise Party_Table2.jpg
Annalise Party_Thankyou card.jpg
Annalise Party_Cupcake1.jpg
Annalise Party_cake2.jpg
Annalise Party_Cupcake2.jpg

I started planning for the tables cape by searching for ideas. I knew I defiantly wanted whimsical princes tulle skirt! So that was the first thing I started working on. The first thing I started making was the ribbon and tulle table skirt. I was lucky to go to Hobby Lobby on a day when all their ribbon and tulle was half off! 

What would I do without my handy, talented husband Justin? He photographed some of these photos and edited them all for me. He's an Art Director/Graphic Designer by trade - therefore I am one lucky girl! He also built the decorative box with the gold crown on it. In fact, the crown was originally hot pink from my oldest daughter's room - so we spray painted it gold. We used the pink trimmed sheer fabric to drape the table to create a "storybook" look. (I sewed on the pink trim) The box with the crown, and fabric drape are actually from above Annalise's crib in her nursery. We just took it off the wall and nailed it to the bead board backdrop (which Justin also built). Justin and I also designed the thank you tags and personalized circle crown printables that went on the glass apothecary jars.

I ordered the cake and cupcake toppers and wrappers from Amazon. I just picked up the cake and  cupcakes from a local grocery store bakery - and added added the gold pearls and sprinkles. 

(It's much cheaper then going to a specialized bakery.) 

My favorite part of the table display was the roses cascading down the cake. There's something about fresh flowers that makes everything so beautiful! 

Hosting a Christmas Dinner Party

Tonight was a special night! I had the wonderful opportunity to speak and host dinner at my home for forty women from my church. It made me so happy to see so many beautiful faces. Our theme for the night was "We are like Snowflakes, Different in our own Beautiful Way." It's good to remind ourselves how beautiful, special and unique we each are

rsdinner12.jpg
rsdinner3.jpg

Design Tips for an Easy Thanksgiving Tablescape

With Thanksgiving right around the corner, lots of folks are already thinking about decorating their Thanksgiving table. Putting together a tablescape is one of my favorite things! But first, what is a "tablescape" and how is it different than just setting the table? The term tablescaping has developed in recent years with people decorating their tables, particularly for holidays, more and more elaborately to create an experience for their guests. 

"Tablescaping is the act of creatively arranging a tabletop so that it conveys a specific theme, mood, or experience. It's a thought process of being creative and planning to design a table top with a specific theme or mood." 


So it's different than just setting the table with forks, knives, plates etc. Most tablscapes have been methodically thought out and planned, shopped for and set to be perfect for one's guests. One drawback is the clean-up afterwards, especially with all the extra dishes!  

But If you don't have time to do all that - here's some quick tips for your Thanksgiving dinner;

1. First place a simple, neutral table runner down the middle of your table. You can also opt for buying placemats if you want. They don't have to match the table runner. These can be found at your Home Goods or Target stores. 

IMG_6358.jpg
Fall1.jpg
IMG_6347.jpg

2. Add pillar candles  at several different height for your centerpieces. You don't have to use candle holders - but it would look great to add height to your centerpiece. You can also place a few vases of fresh flowers as well. 

IMG_6346 copy.jpg

3. Adding chargers can also be a nice touch. A charger is a large plate that sit under the dinner plate. If you want to skip that charger, go ahead! Also, If you want the look of formal china without the cleanup - buy these amazing plates at you local grocery store. They're plastic, sturdier than paper, and  have a silver accent to look like china.

IMG_6386 copy.jpg

4. Sprinkle real or artificial leaves or foliage down the center of the table runner.

IMG_6355 copy.jpg

5. Add your silverware and glassware and if you have cloth or paper napkins place them in the glasses for a fun festive look. And that's it!

Kay-Lynn's Wonderland Birthday Party!

Welcome to Kay-Lynn's Wonderland!

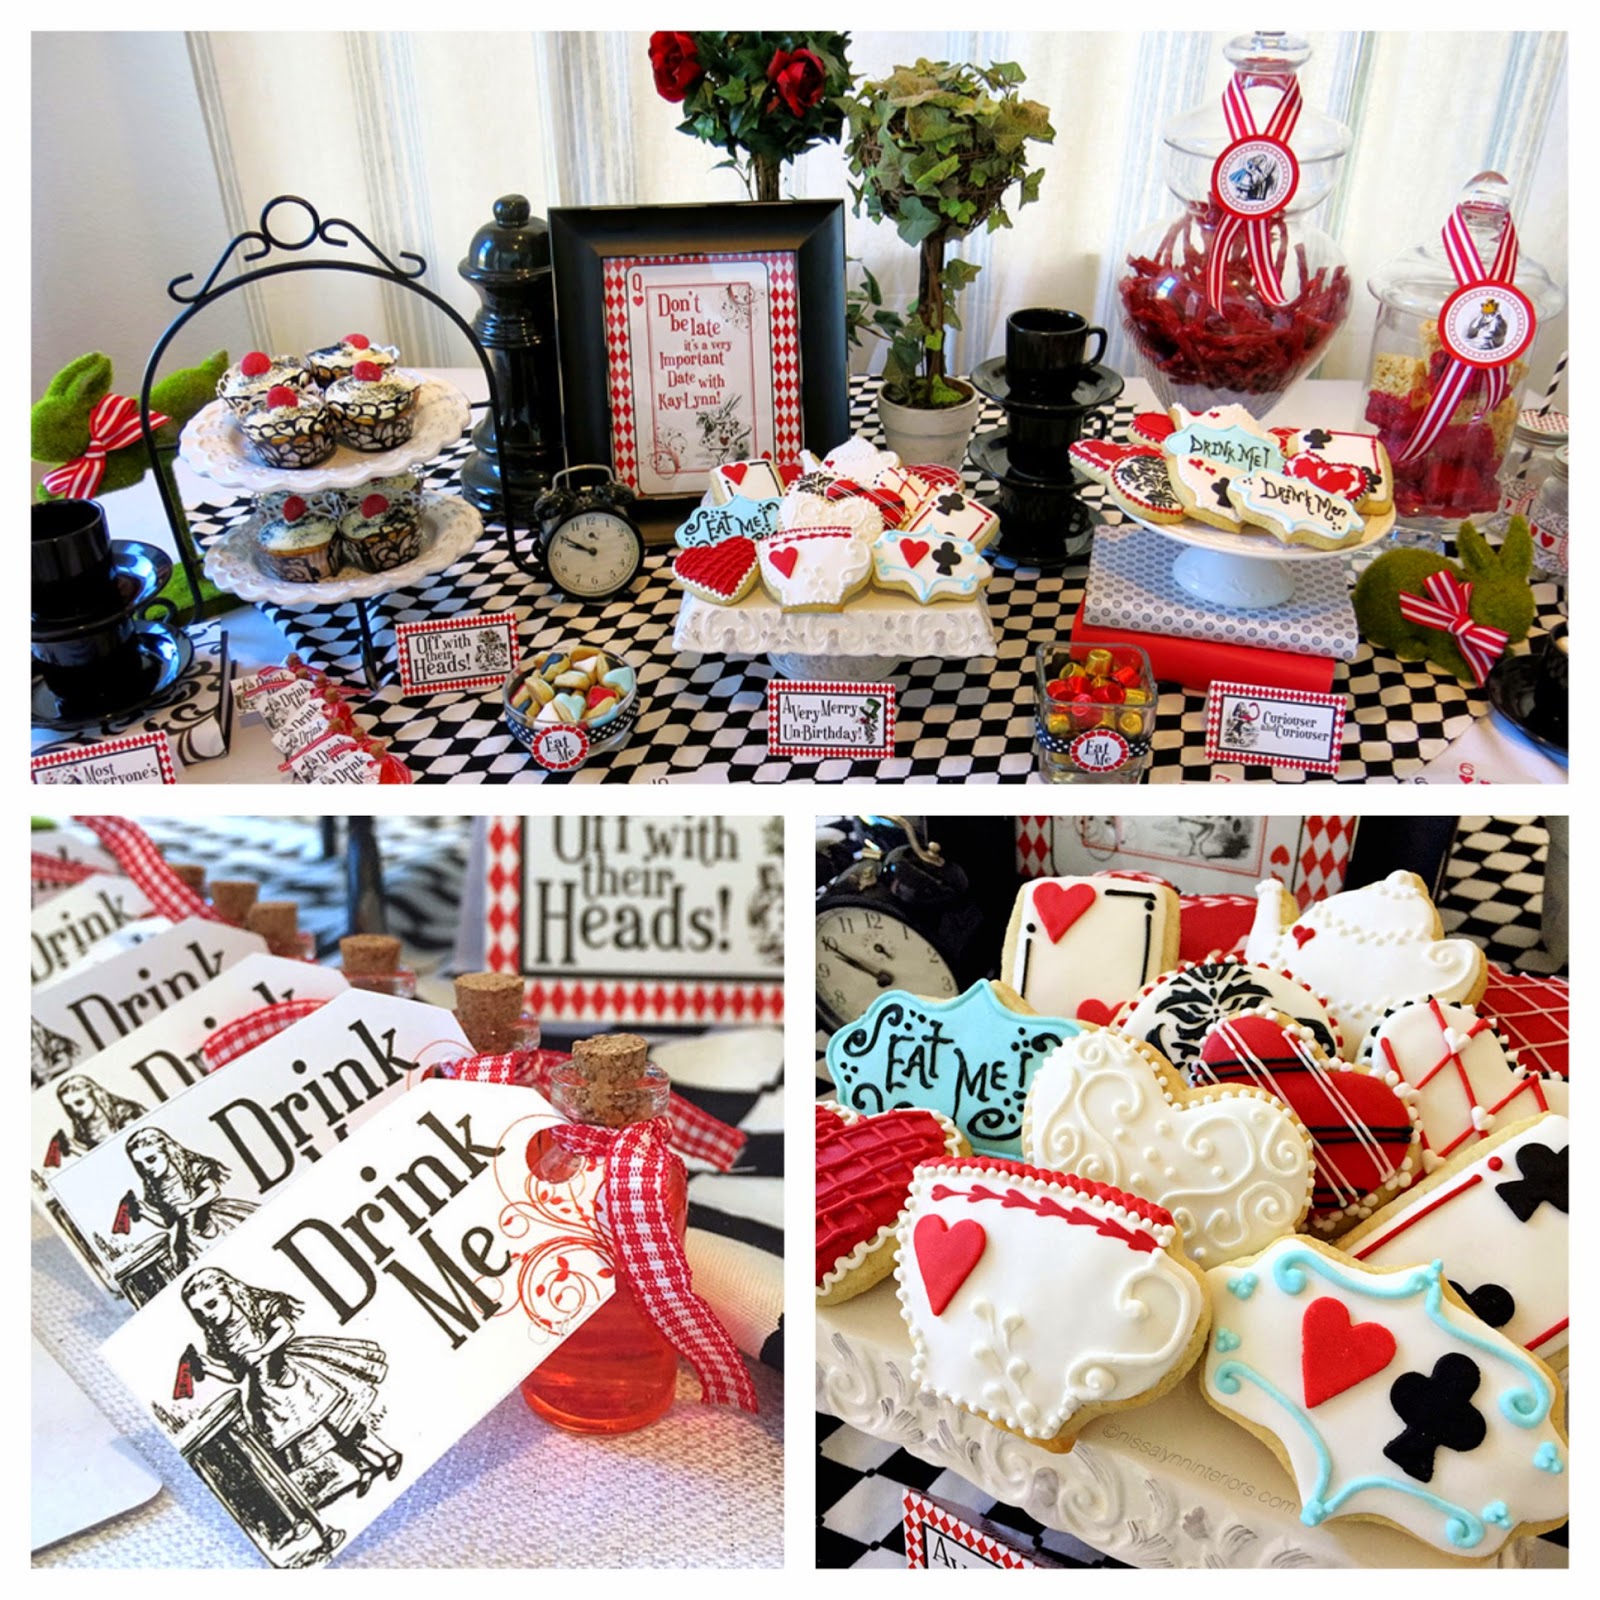
My daughter came to me a few months ago and said she wanted an Alice in Wonderland Birthday Party! I was excited to plan such a whimsical event, and felt this party would stretch me creatively-it did!

Kay-Lynn didn't want a tea-party, but rather a Queen of Hearts look- with a vintage feel.
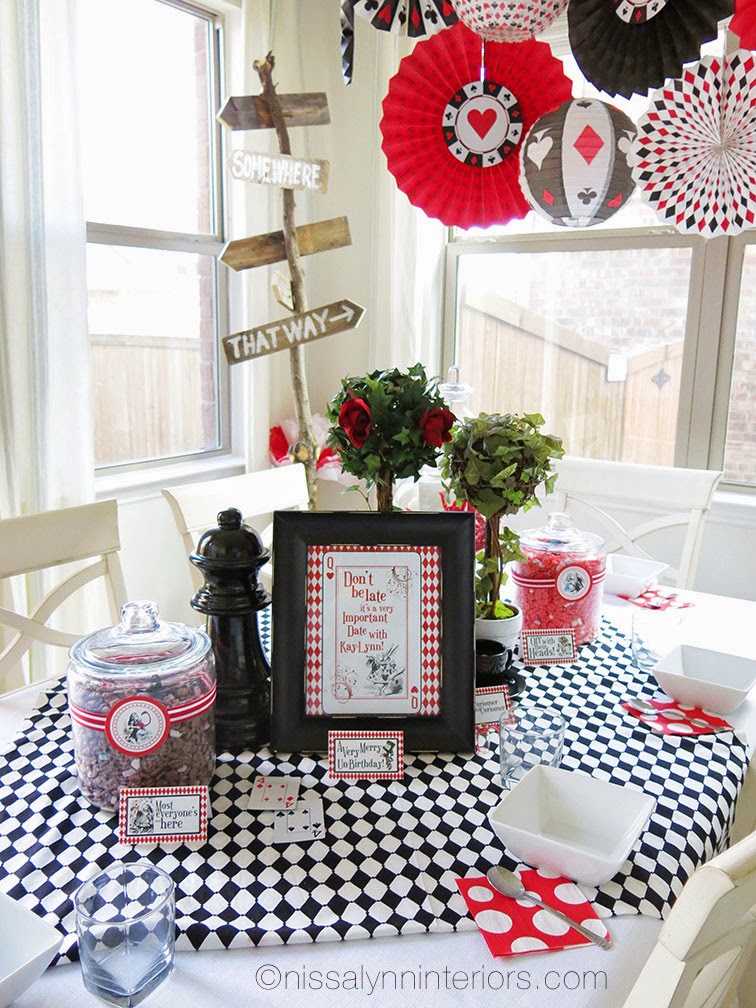
We were on a tight budget so a lot of the table decor came from my party storage closet!! (Including, the chess piece, the picture frame, the green rabbits, the clock, the topiaries... I even pulled the tea cups from my own dishes!) I did buy few things like the paper balls that hung from the ceiling and the cupcake wrappers. My husband even built and painted the "The Which Way"
sign with left over pallet wood in our garage!

The fourteen girls loved the decor and had a blast making edible tea cups and playing games.
It was a wonderful night had by all!

IMG_3494_post.jpg
IMG_8792.JPG

A huge thank you to my friend Jamie Wing for making the most beautiful cookies! The girl raved about them all night long!

IMG_8677_post.jpg

My daughter found these small, 3/4 inch vials on Amazon.com, and we they filled them with strawberry soda. The girls thought they were the coolest thing in the world!

My husband and I also designed all the custom printables for all the signs. It's a huge blessing having a husband who's a graphic designer by trade.

Below are pictures of the goody bags, the card banner I made that hung on the fire place, and some more table decor. 

IMG_8667_post.jpg
IMG_3529_post.jpg
IMG_3528_post.jpg
IMG_8761.JPG
IMG_3540_post.jpg

Because it was a slumber party, for breakfast I turned the table around and took off some of the decor from the prior night. Then I set a place setting for each one of the girls. I put two different kinds of cereal in glass containers, and added extra touches with the ribbon and decorative sign. 

IMG_3603_post.jpg

Because my daughter wanted to be Alice, and have a Alice in Wonderland party, I thought, "Why not the whole family be Alice in Wonderland characters for Halloween?" So that's exactly what we did :)

Family-Halloween-2014_small.jpg

Fourth of July with a BANG!

Fourth of July is the ultimate summer celebration! And it a great time to celebrate our nations's Independence day with family and friends. I have several family members coming over for a swim party and BBQ- and I couldn't wait to put up my July fourth decor! Plus, I have such fond childhood memories of July 4th- and decorations were always apart of them! My Mom and Grandma always had flags in yard, bunting banners hanging from outside windows, and cut out stars on the kitchen walls- all to make the 4th extra special!

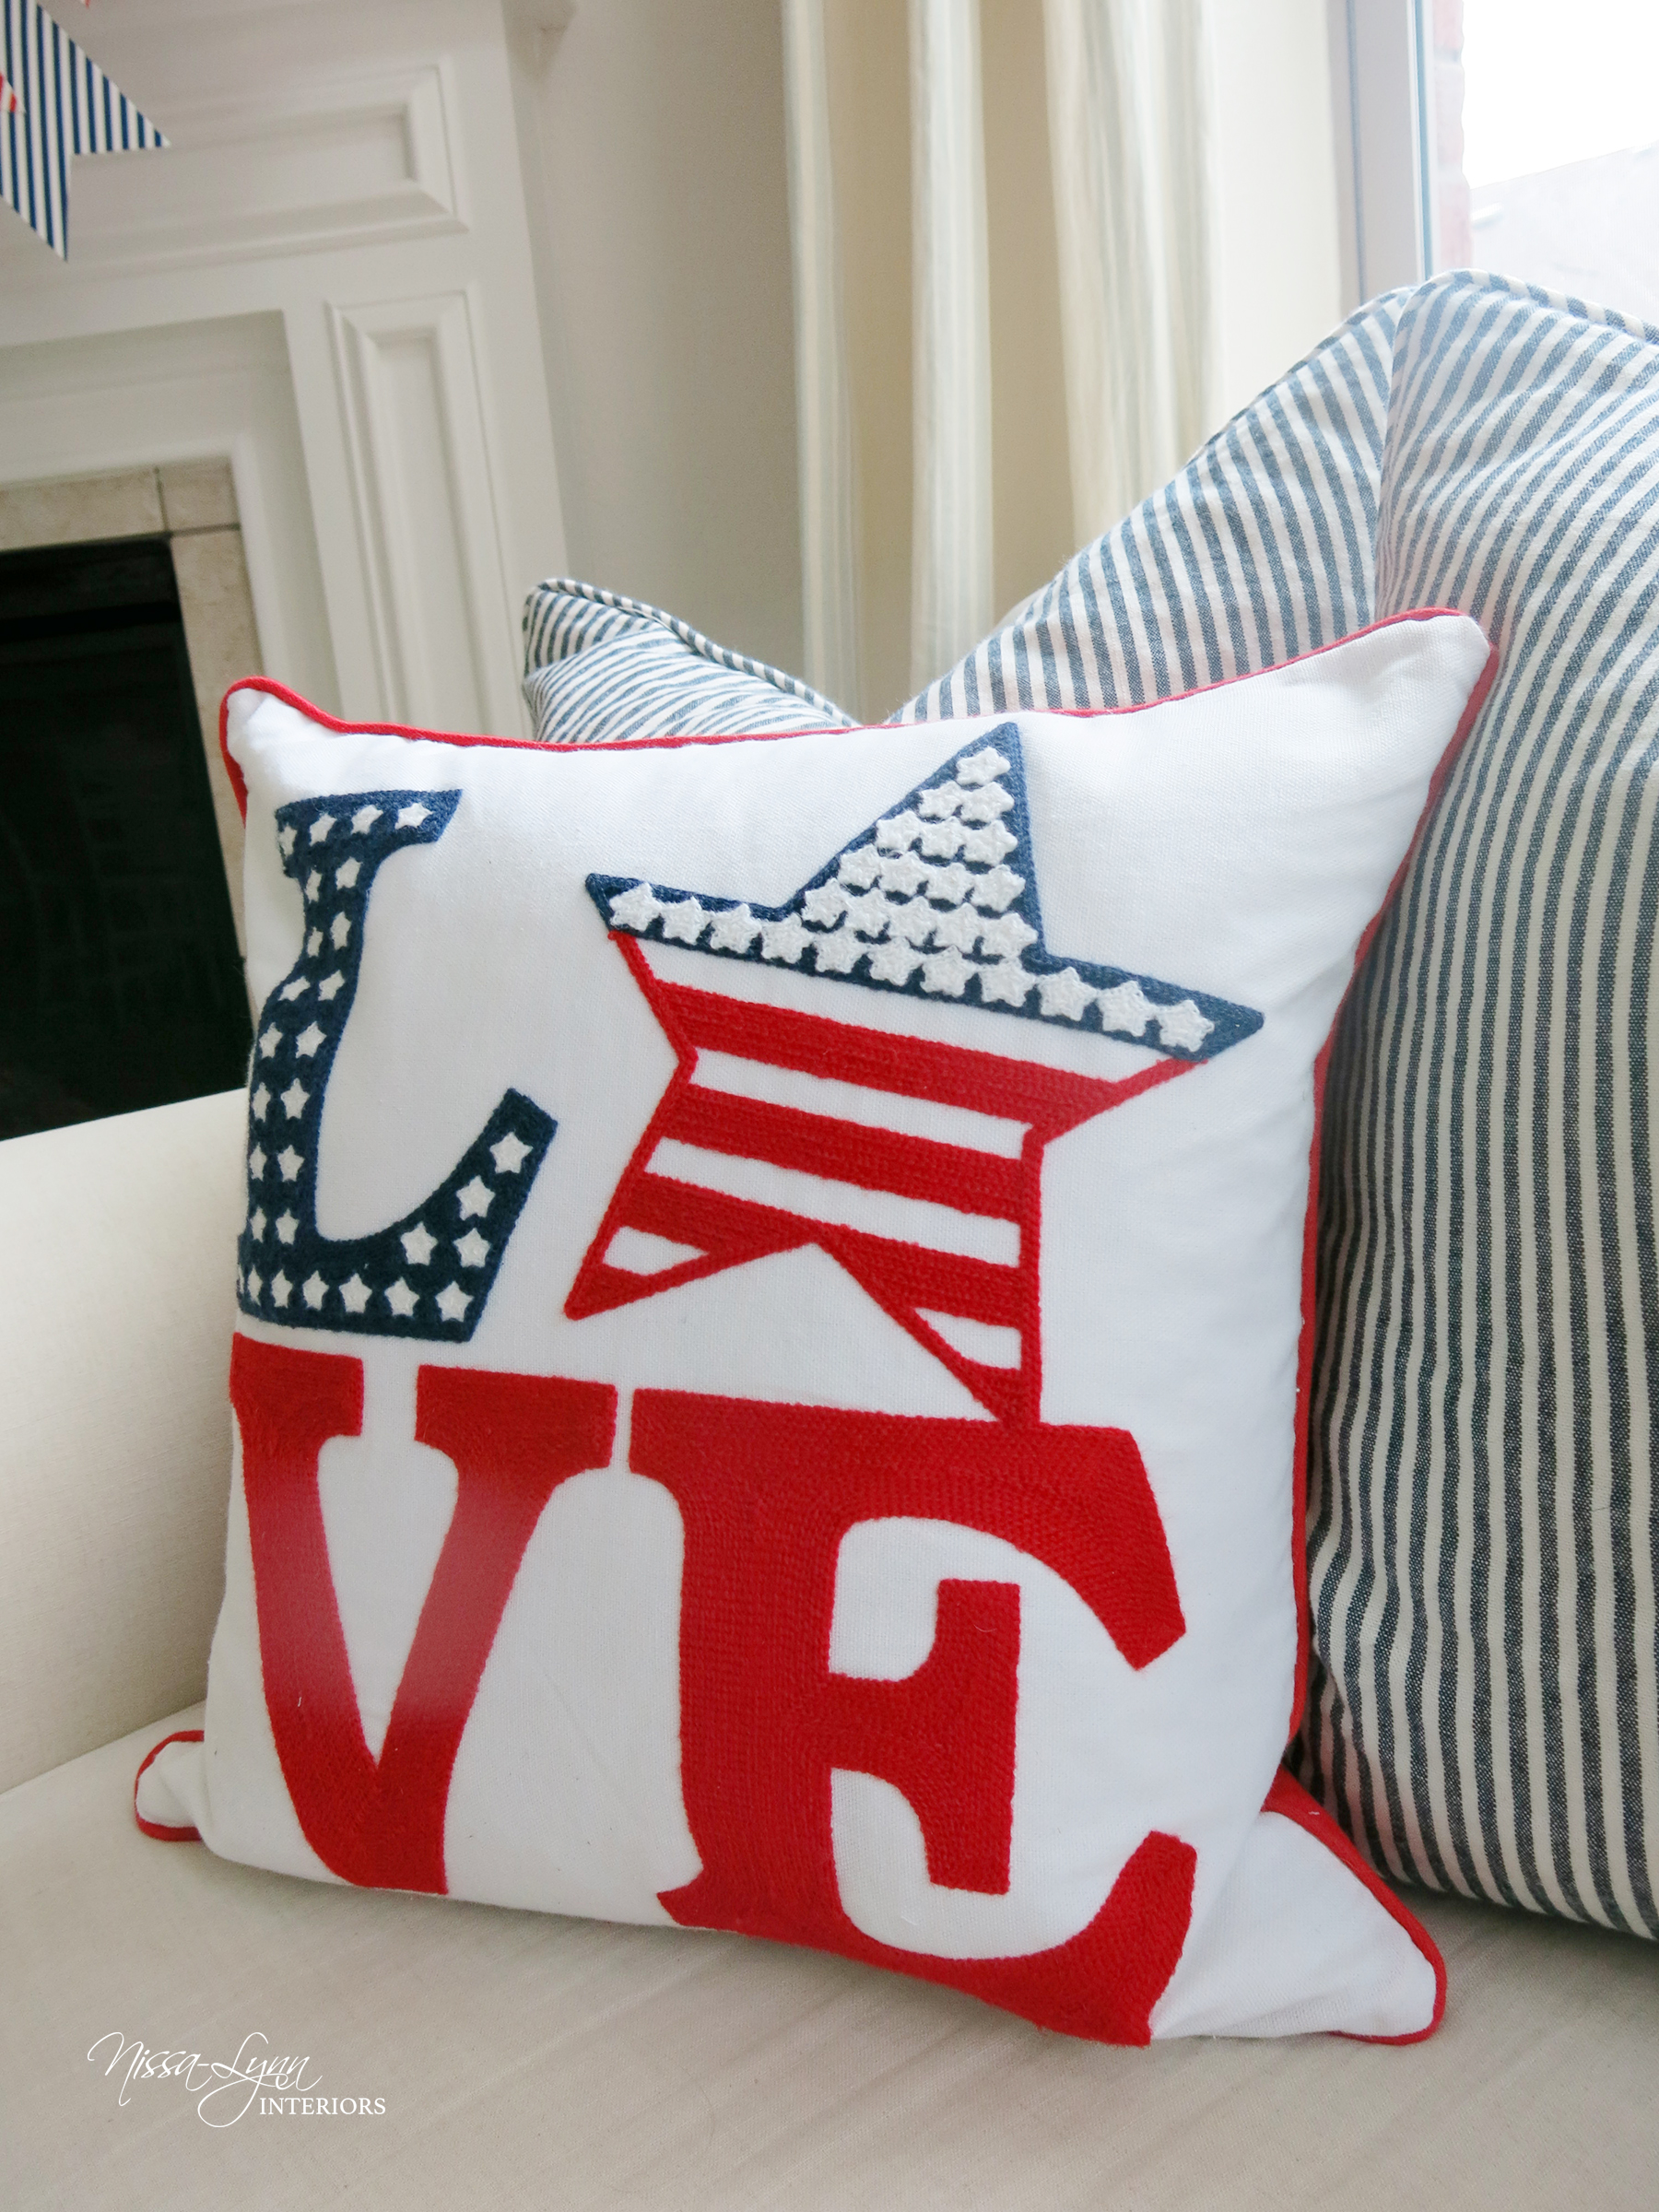
Here's the scoop where I got everything: All the banners came from Target. The lantern and throw pillow are from Home Goods. The colorful fans are from Party City. The star decor I purchased from the Dollar Store! Can you believe it? The July fourth printable I printed out from Pinterest and then put in a white frame I already had. I decided to mix up new and old decor. The red, white and blue paper circles I already had from my son's birthday party a couple years ago (I originally bought them at Party City). The glitter star is from Hobby Lobby. The darling July 4th printable I found on pinterest via the36avenue.com. The blue and red stripe banners I bought it target a few years ago. The "Love" I just picked up at JoAnne's for $9.99. Put it all together and it works! Happy Fourth of July everyone!

I hope y'all have fantastic Fourth!

IMG_7347.jpg
IMG_7342.jpg
IMG_7341.jpg
IMG_7337.jpg

A Happy St. Patrick's Day Breakfast

Top O 'the Morning to Ya! 

I love celebrating holidays- it makes life happy! The kitchen table is my favorite space to decorate as it brings the family together! Growing up my Mom went all out on holiday's to make life exciting and magical. I try to carry on those traditions for my own children. 


A lot of my party decor I actually buy at the Dollar Store and the Dollar Spot at Target! The paper shamrocks seen here came in a pack of 20 from the Dollar Store! The green placements and small silver buckets were $1.00 each at Target's Dollar Spot last year. The shamrock straws and green pinwheel also came from the Target Dollar Spot.

Check those stores out next time you're celebrating a special occasion- they have great deals! 


lucky-table.jpg

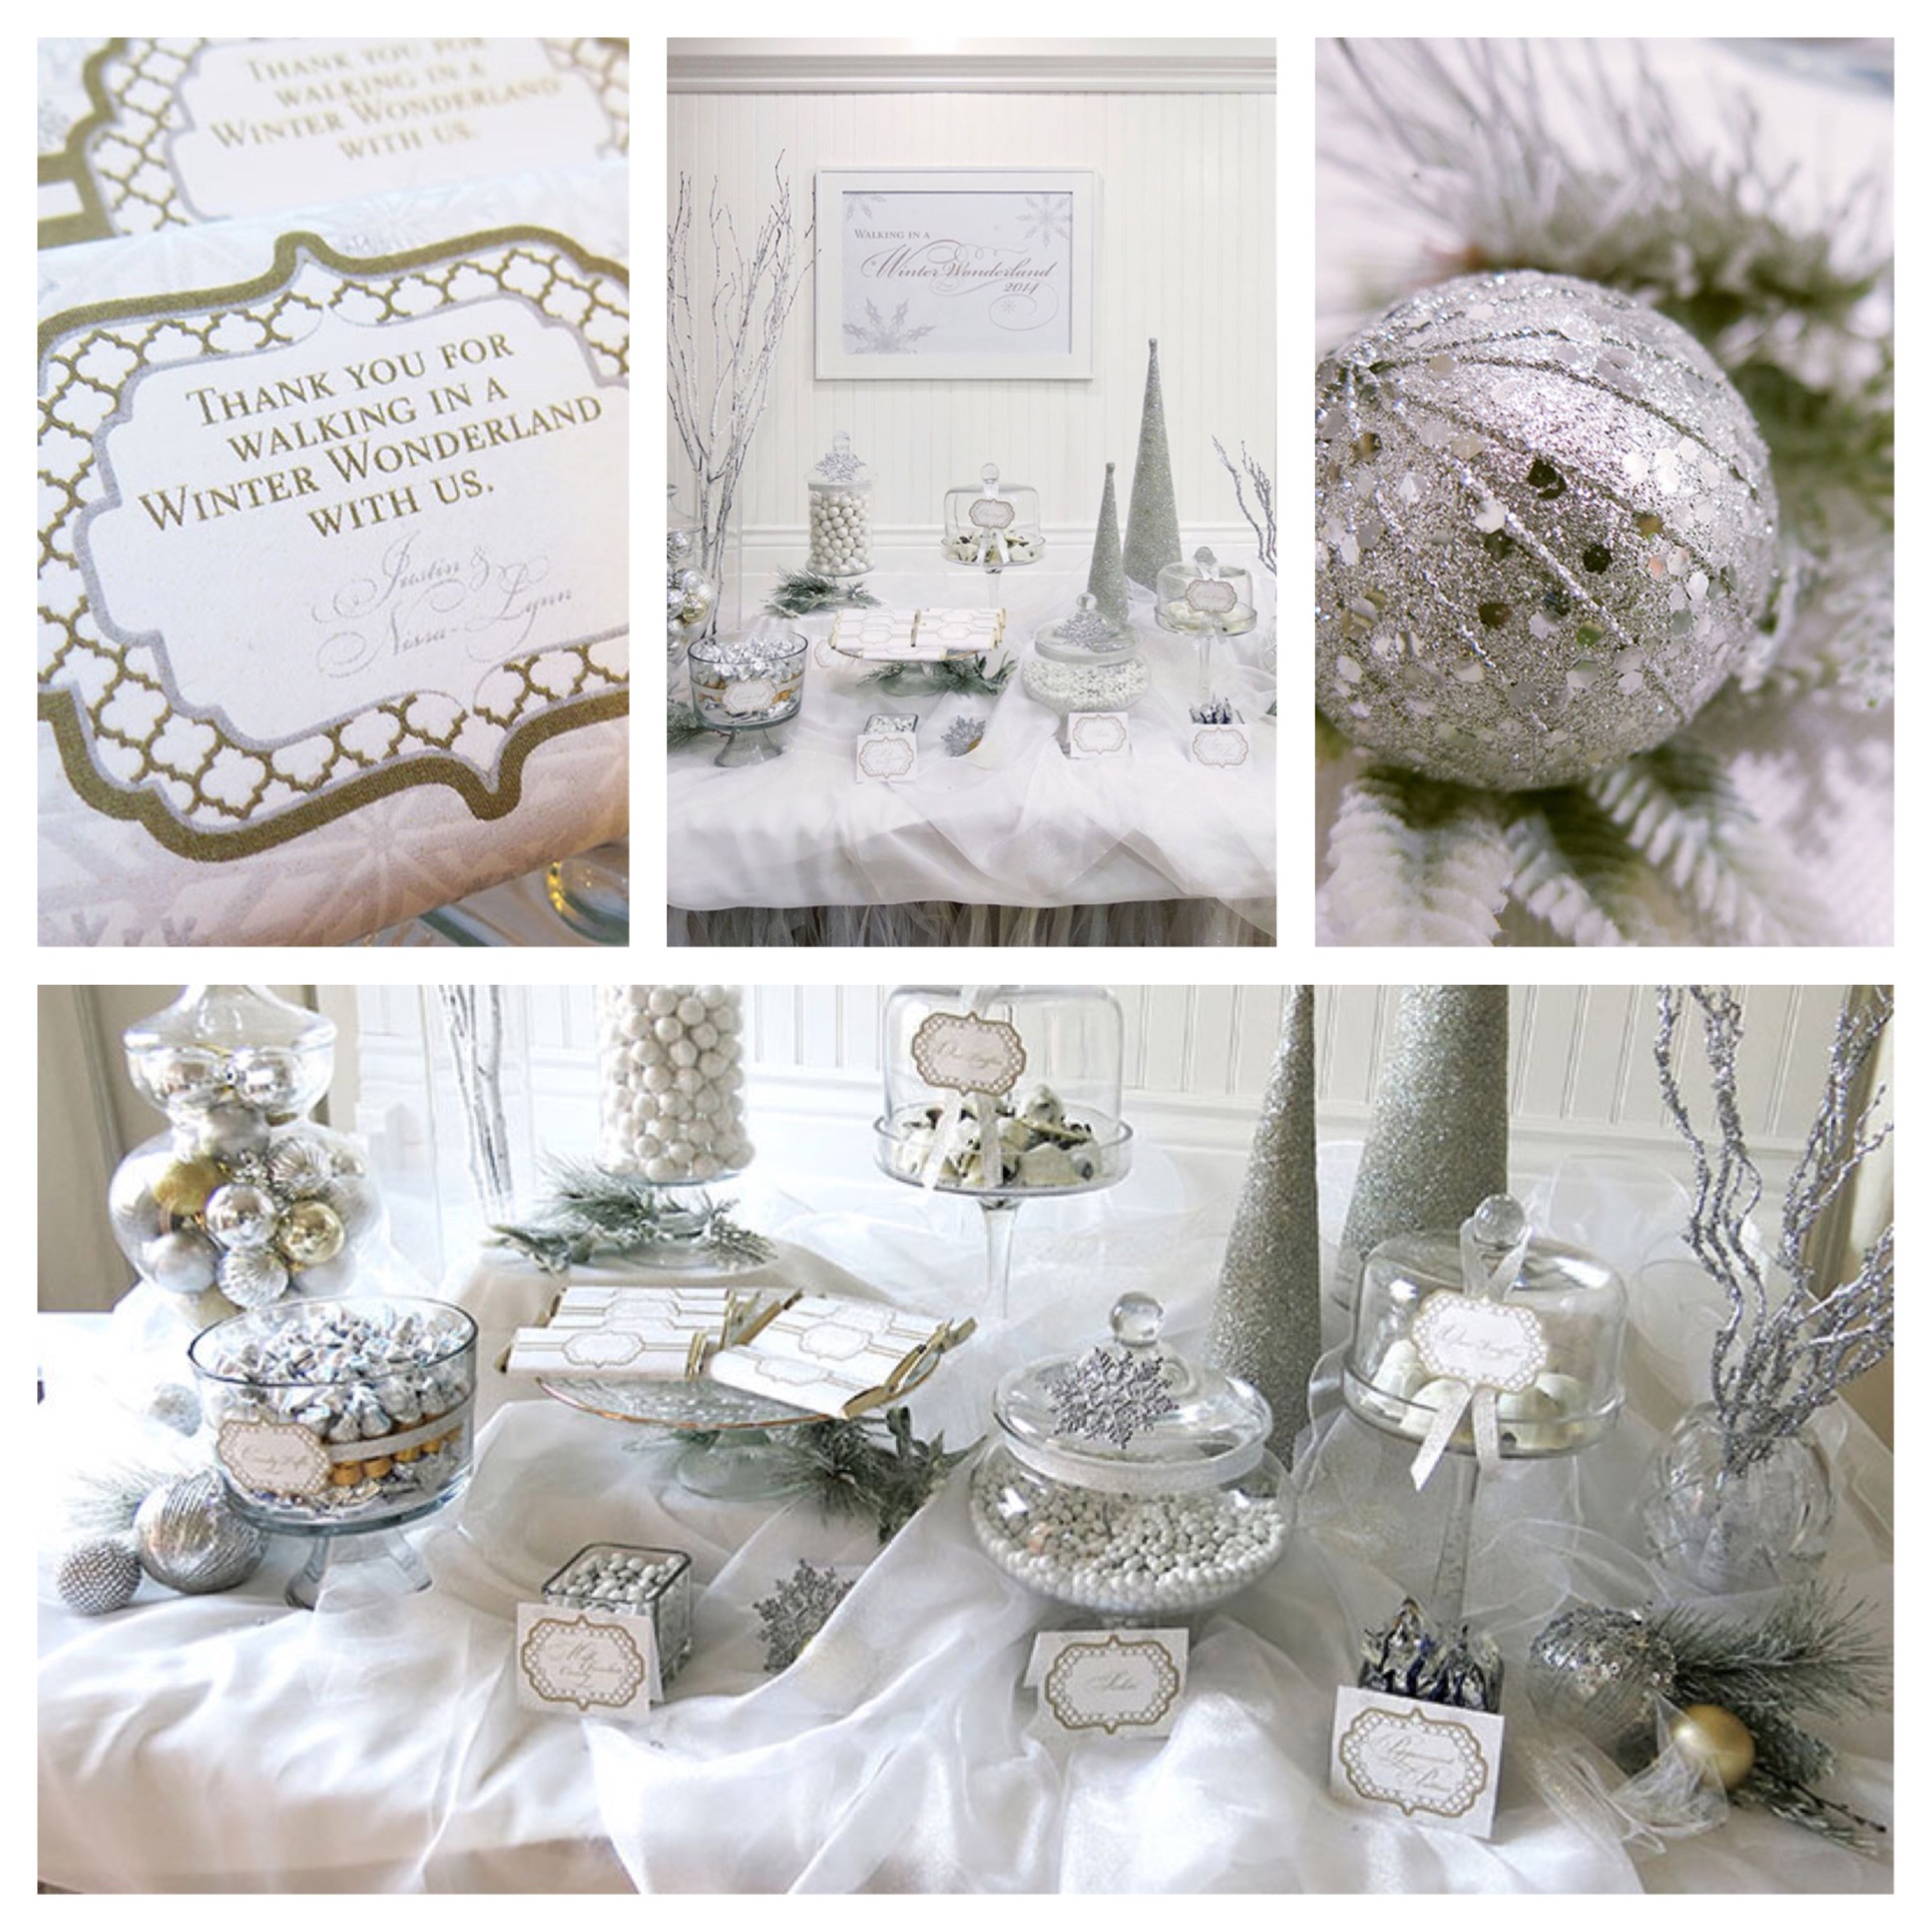
Walking in a Winter Wonderland

Every year my husband Justin and I host our Annual Couple's Christmas Party. +

It's a wonderful evening with friends, food, games and lots of laughter!Here's a picture of candy bar table display for our guests.

Most years I try and pick a theme for the decor. Last year we had a cozy hot chocolate bar. This year 000000I wanted more of a magical, elegant, silver and gold winter wonderland feel.

I didn't want the table to look flat, but rather give the feel of heavenly snow covered hills. To achieve this whimsical look, I used lots of different textures and fabrics (tulle, satin, and silks). For custom, and personal touch, my husband Justin designed all the food cards and candy bar wrappers.

To make the table display really grand I needed a dramatic backdrop. I got inspiration from my sister-in-law at homebyheidi.com. Justin altered the look and measurements of our back drop to fit space and height requirements. And because he built the back so large, he came up with idea of putting hinges on the back so it could fold in half for easy storage. It turned out great!

We played couple games, had a white elephant gift exchange, and made lots of memories. It was a wonderful night had by all! 

IMG_9796.JPG

A Simple Dessert Table

Last weekend we blessed my daughter at our church. After the blessing, we had family over for a special luncheon. Due to time and budget constraints, I needed an elegant, but simple display table. 

This is what I came up with:

I used a lamp (I already had), to add a soft light, and put roses in my grandmothers's tea set. I had little take home party favor boxes, which I found at the dollar store, and filled with them Hershey Kisses. My husband designed the signs on the table and tags. And I bought the frames from TJ Maxx and Hobby Lobby-which will now be decor in her nursery. The glass apothecary jars I already had, I just tied tulle on the tops for a touch of color. The rose cake I actually bought at Costco! I loved how the shape went along with the roses in the tea set. 

(Plus, the inside was white chocolate raspberry-delicious!) The beautiful table helped make for a wonderful family day!

IMG_5912 copy.jpg
IMG_5910 copy.jpg
IMG_5951 copy.jpg
IMG_5946 copy.jpg