A Royal Christmas Tree

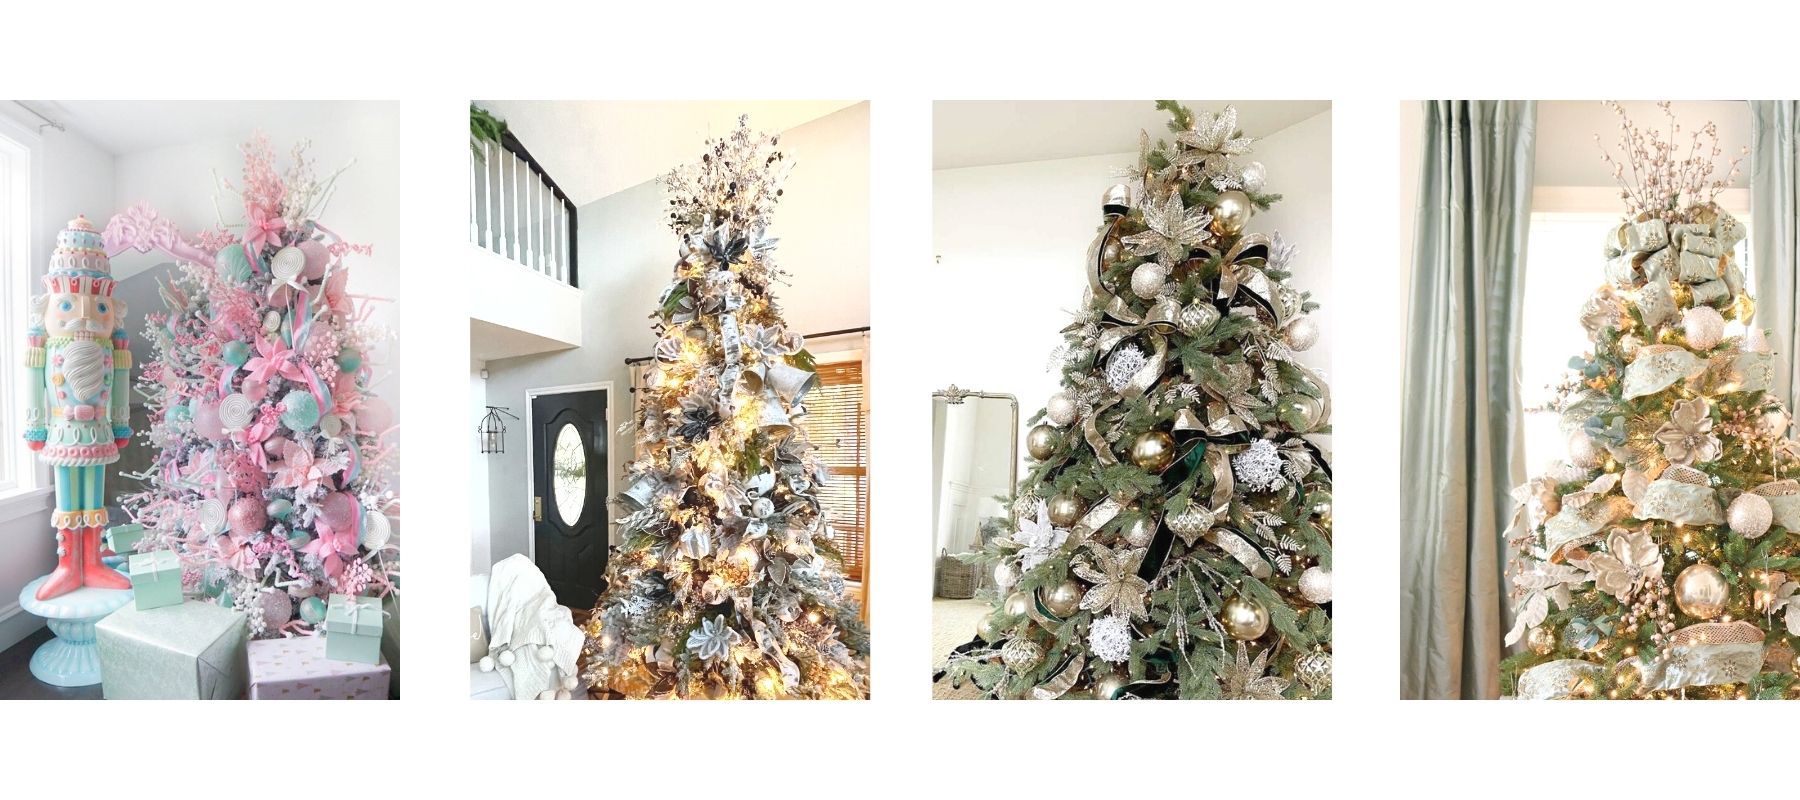
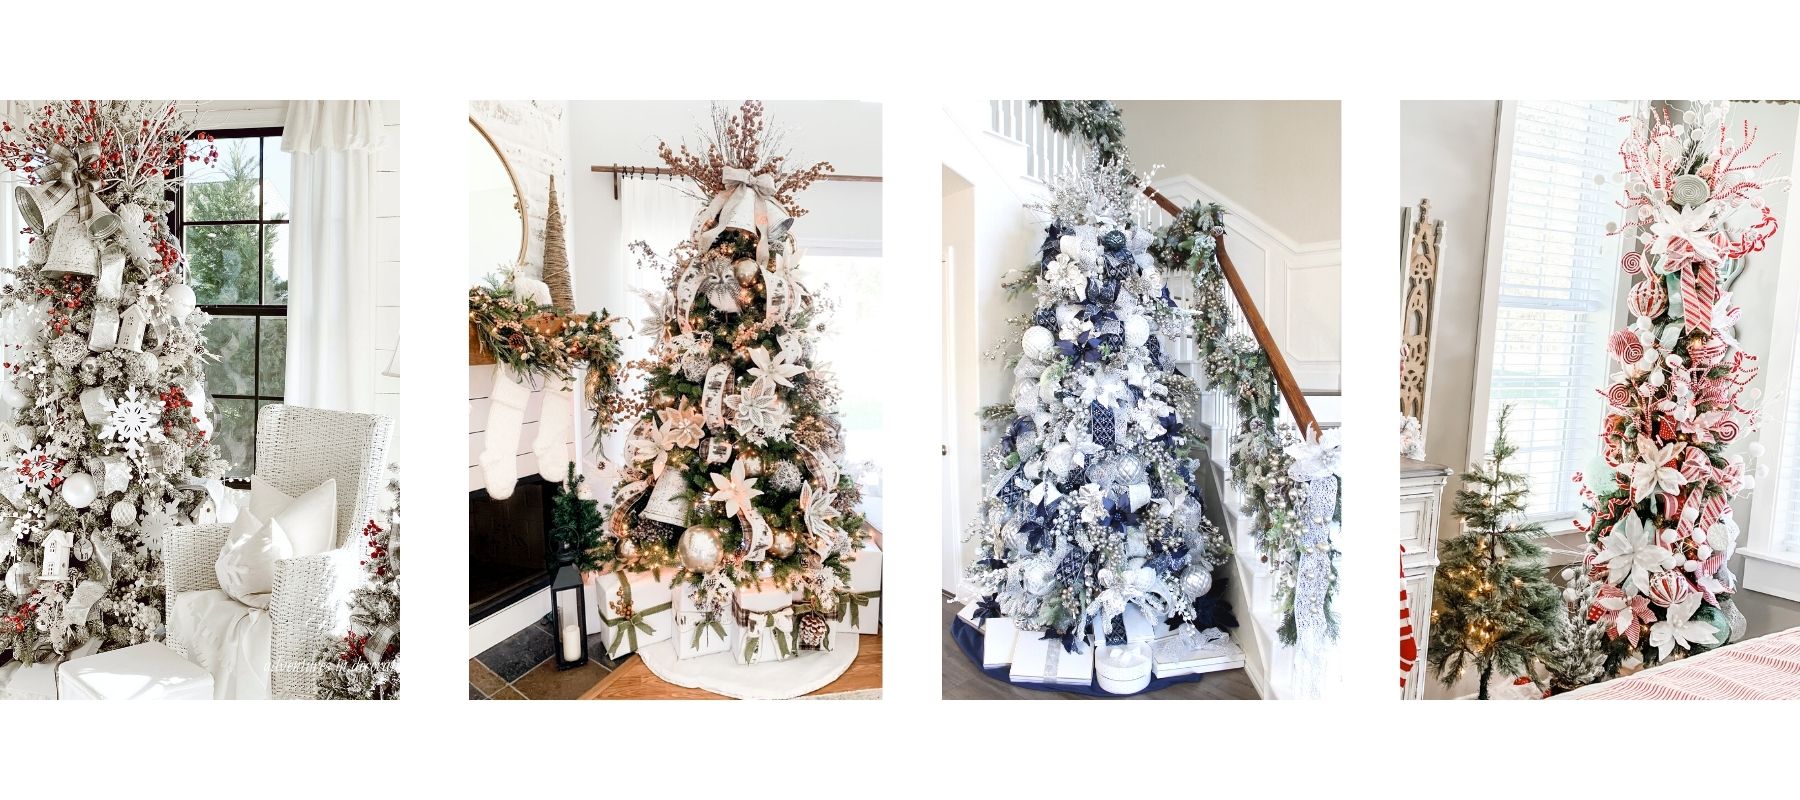
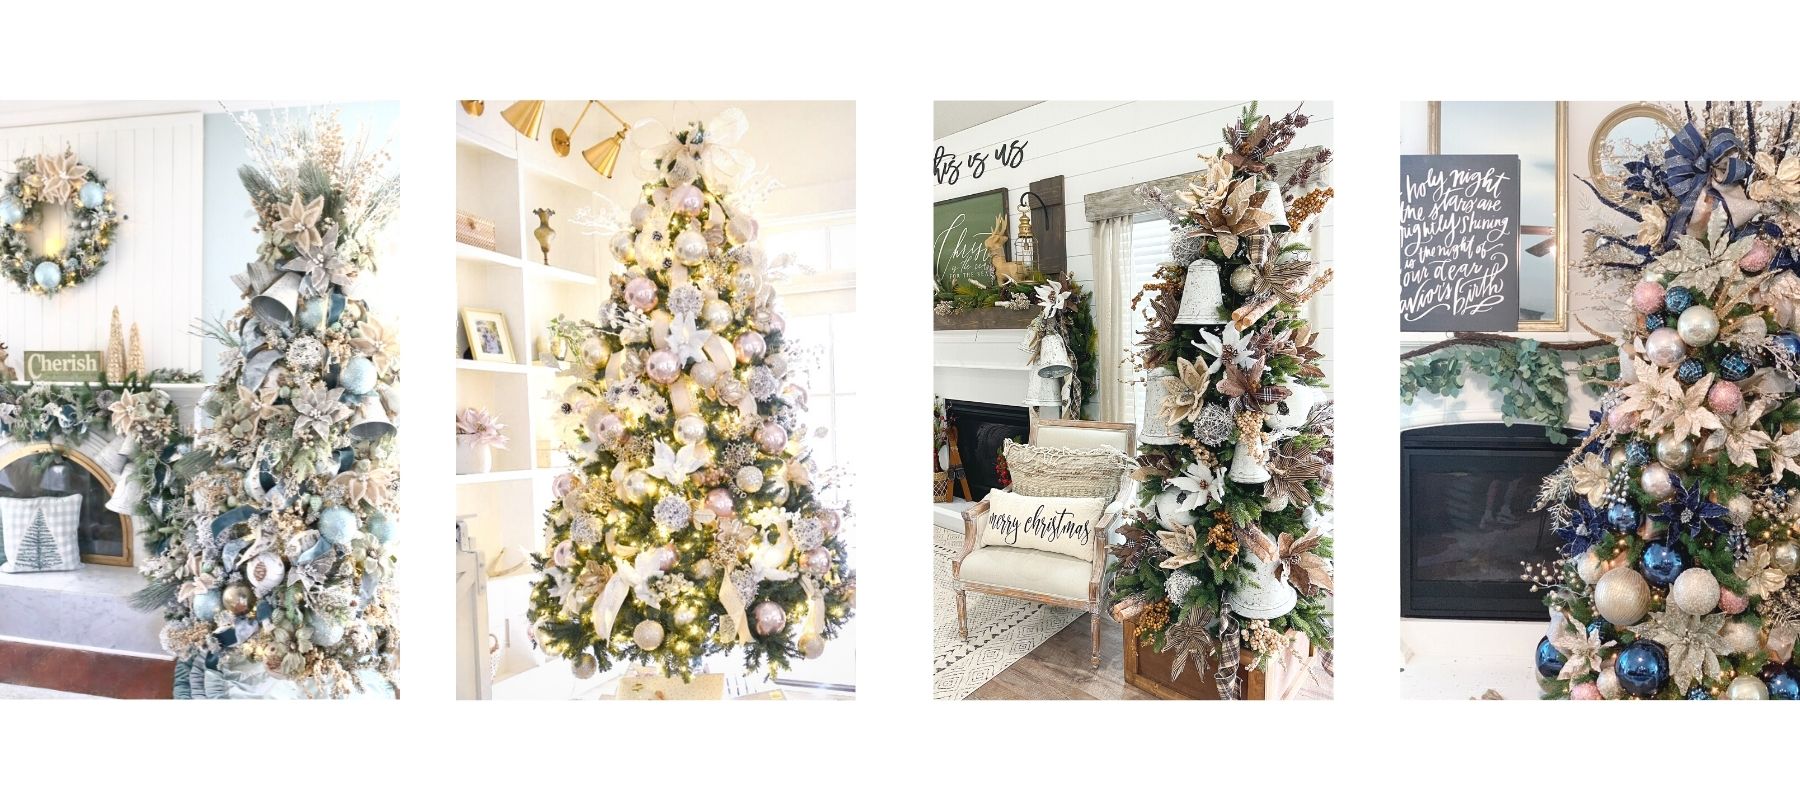
A few months ago I had the amazing opportunity to visit the Decorator's Warehouse in Arlington, TX. It was truly like stepping into a Christmas wonderland! Lights were twinkling everywhere, and themed Christmas trees were decorated to perfection!

B5460E58-4E9E-408F-8ECA-8196C941872B.jpeg

I met with Kristen, whose family has owned Decorator’s Warehouse for years, to pick out items to decorate a themed Christmas tree as part of the Home for the Holidays Christmas Tree Challenge with Decorator's Warehouse. #DWChristmasAtHome.

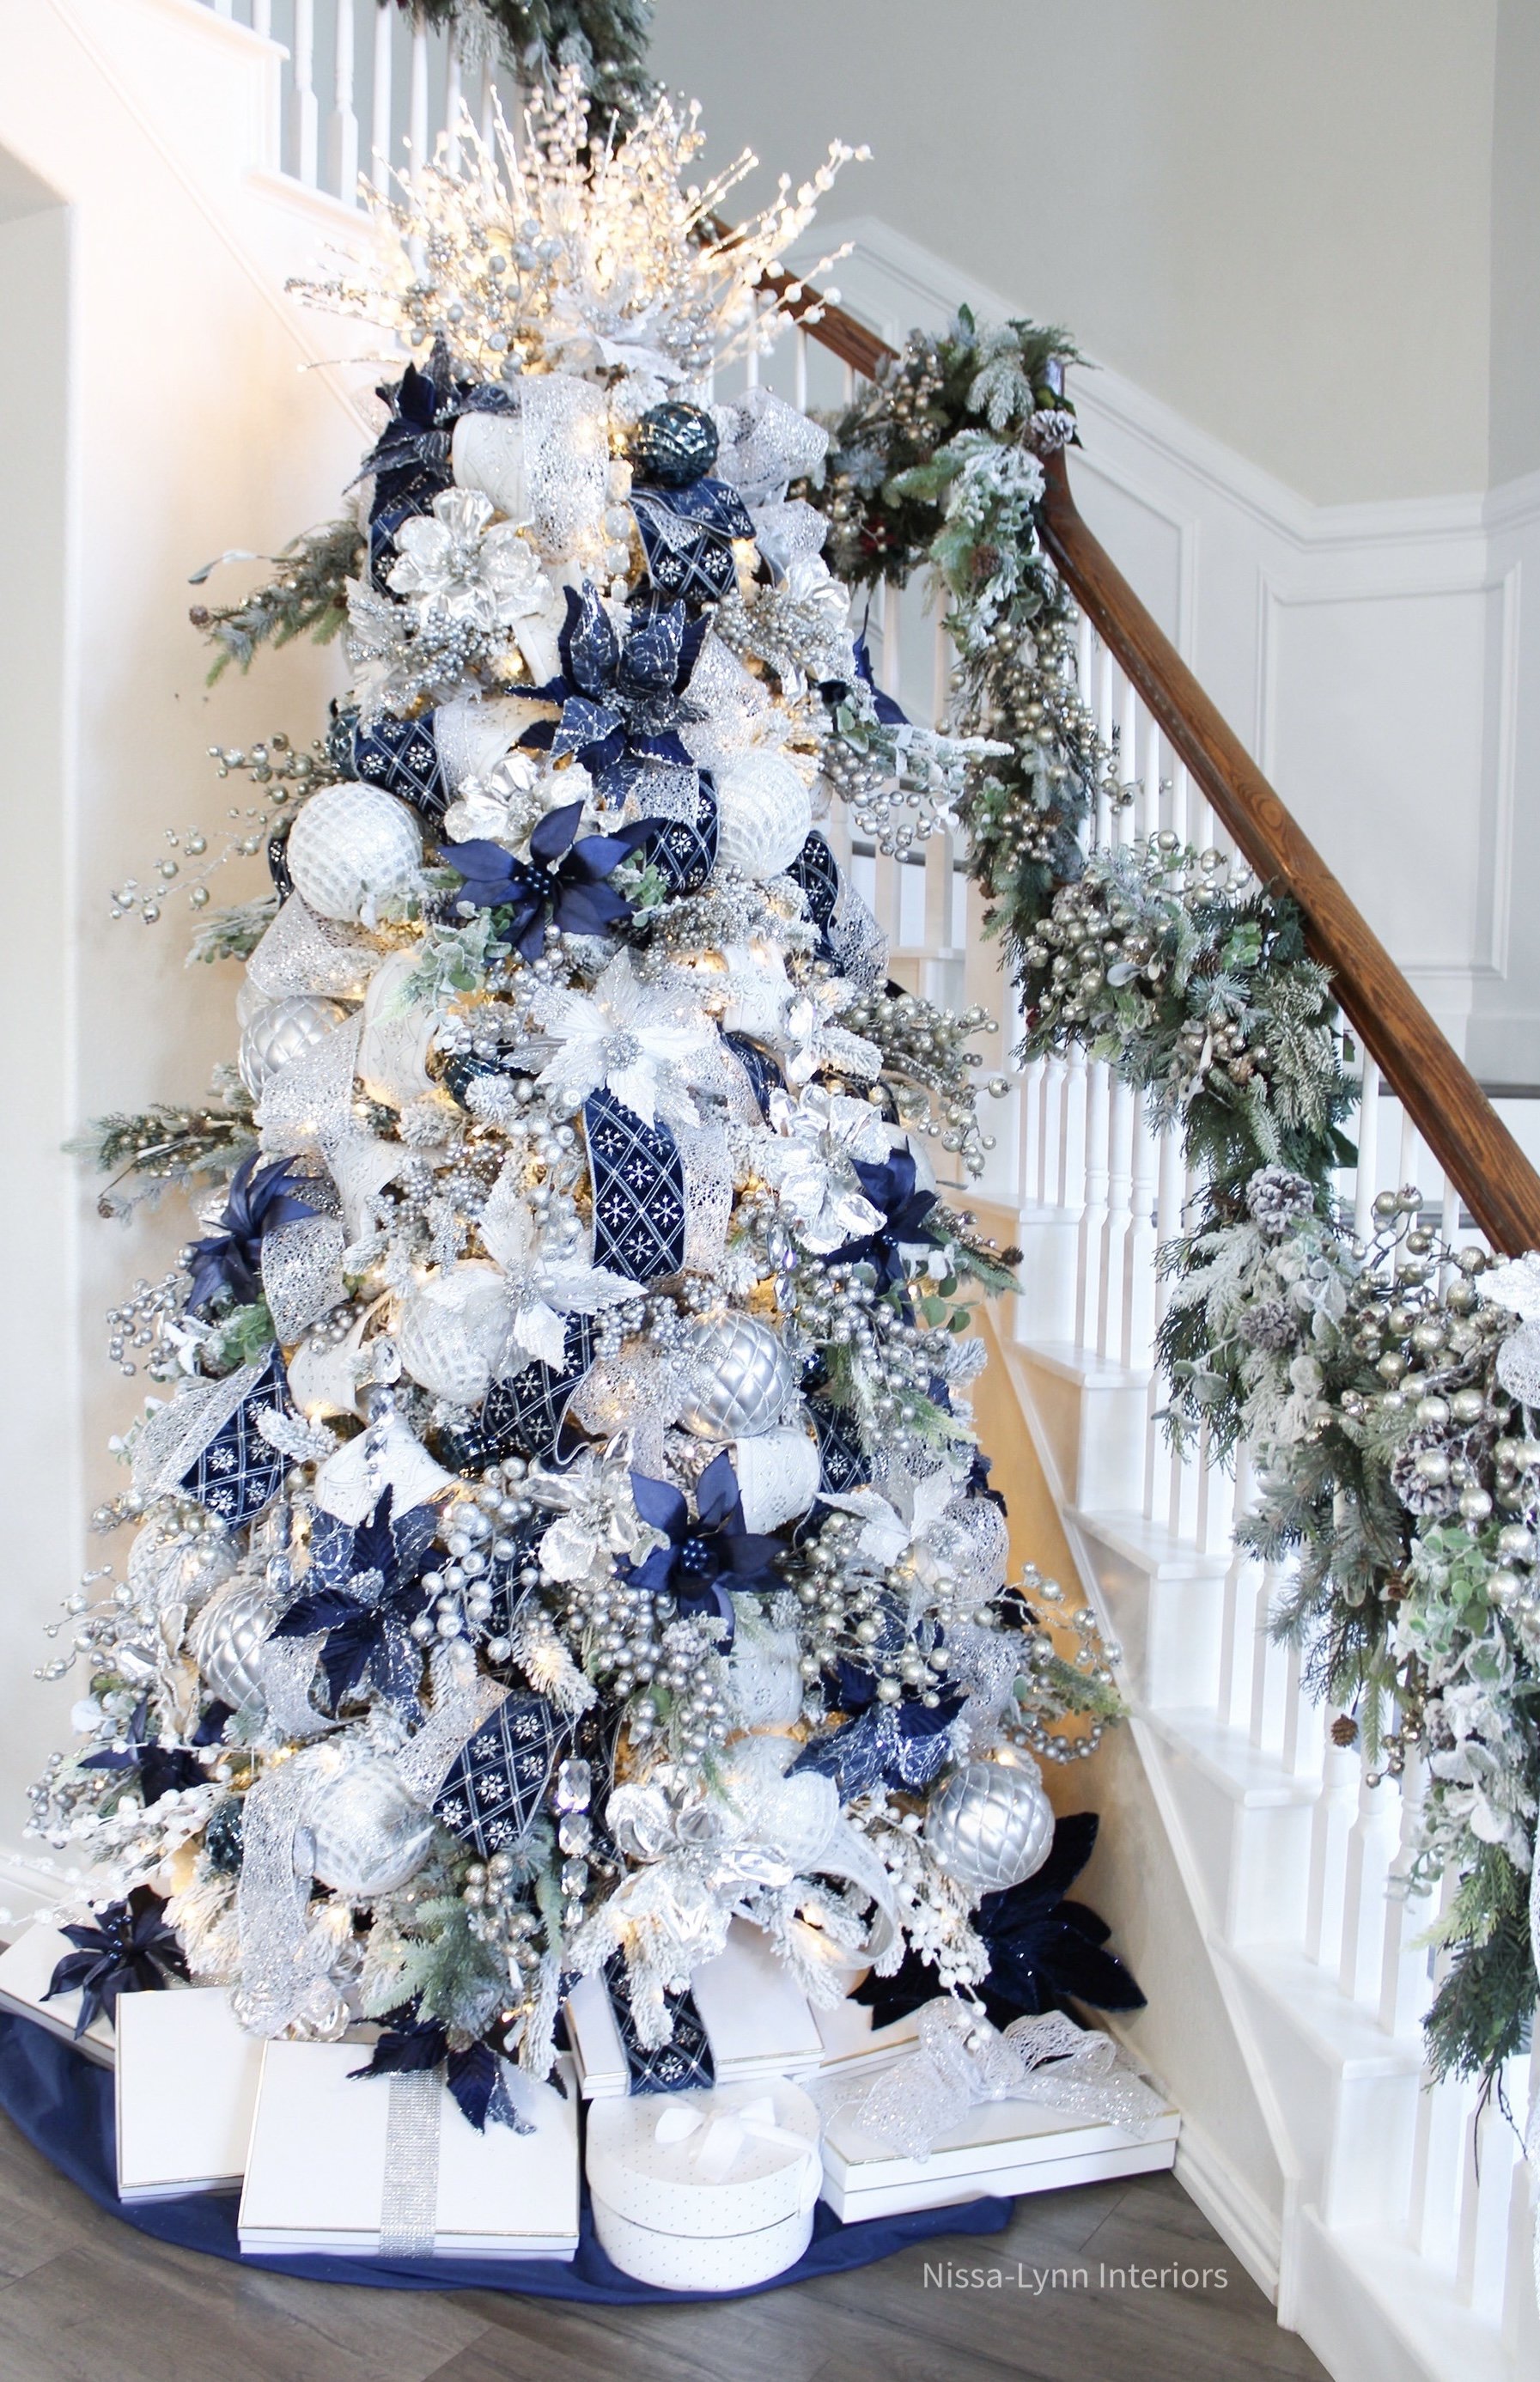
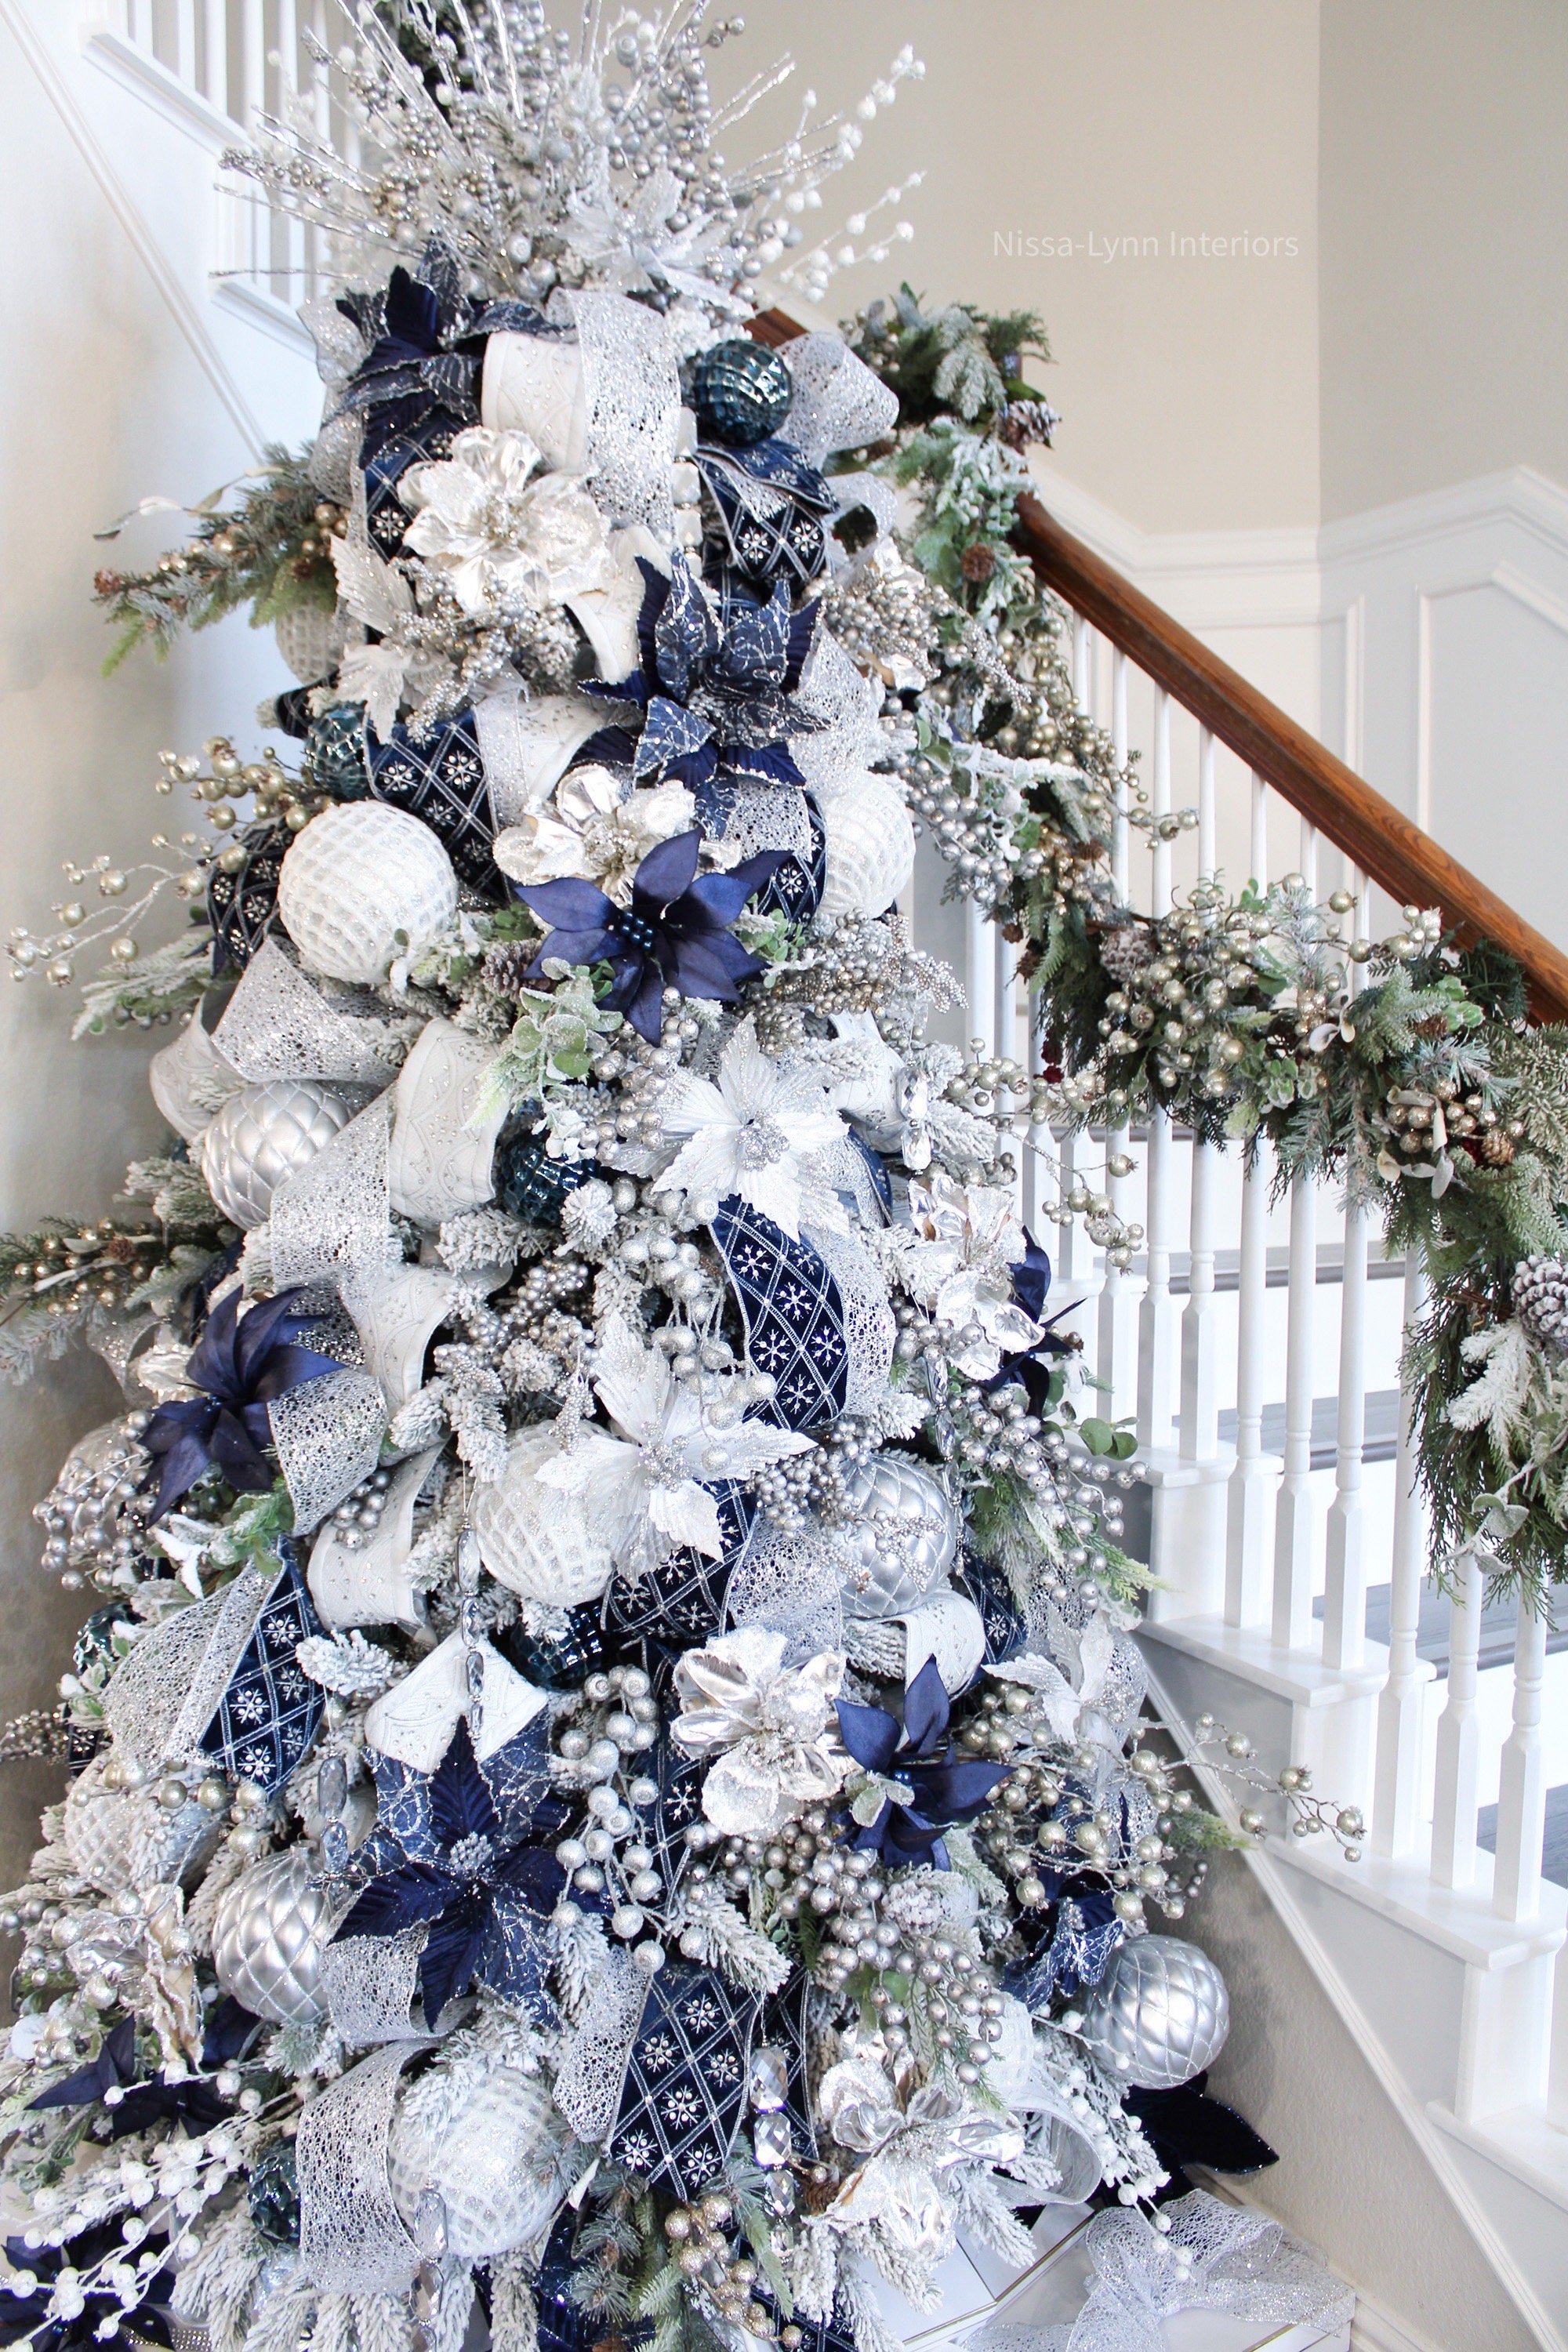
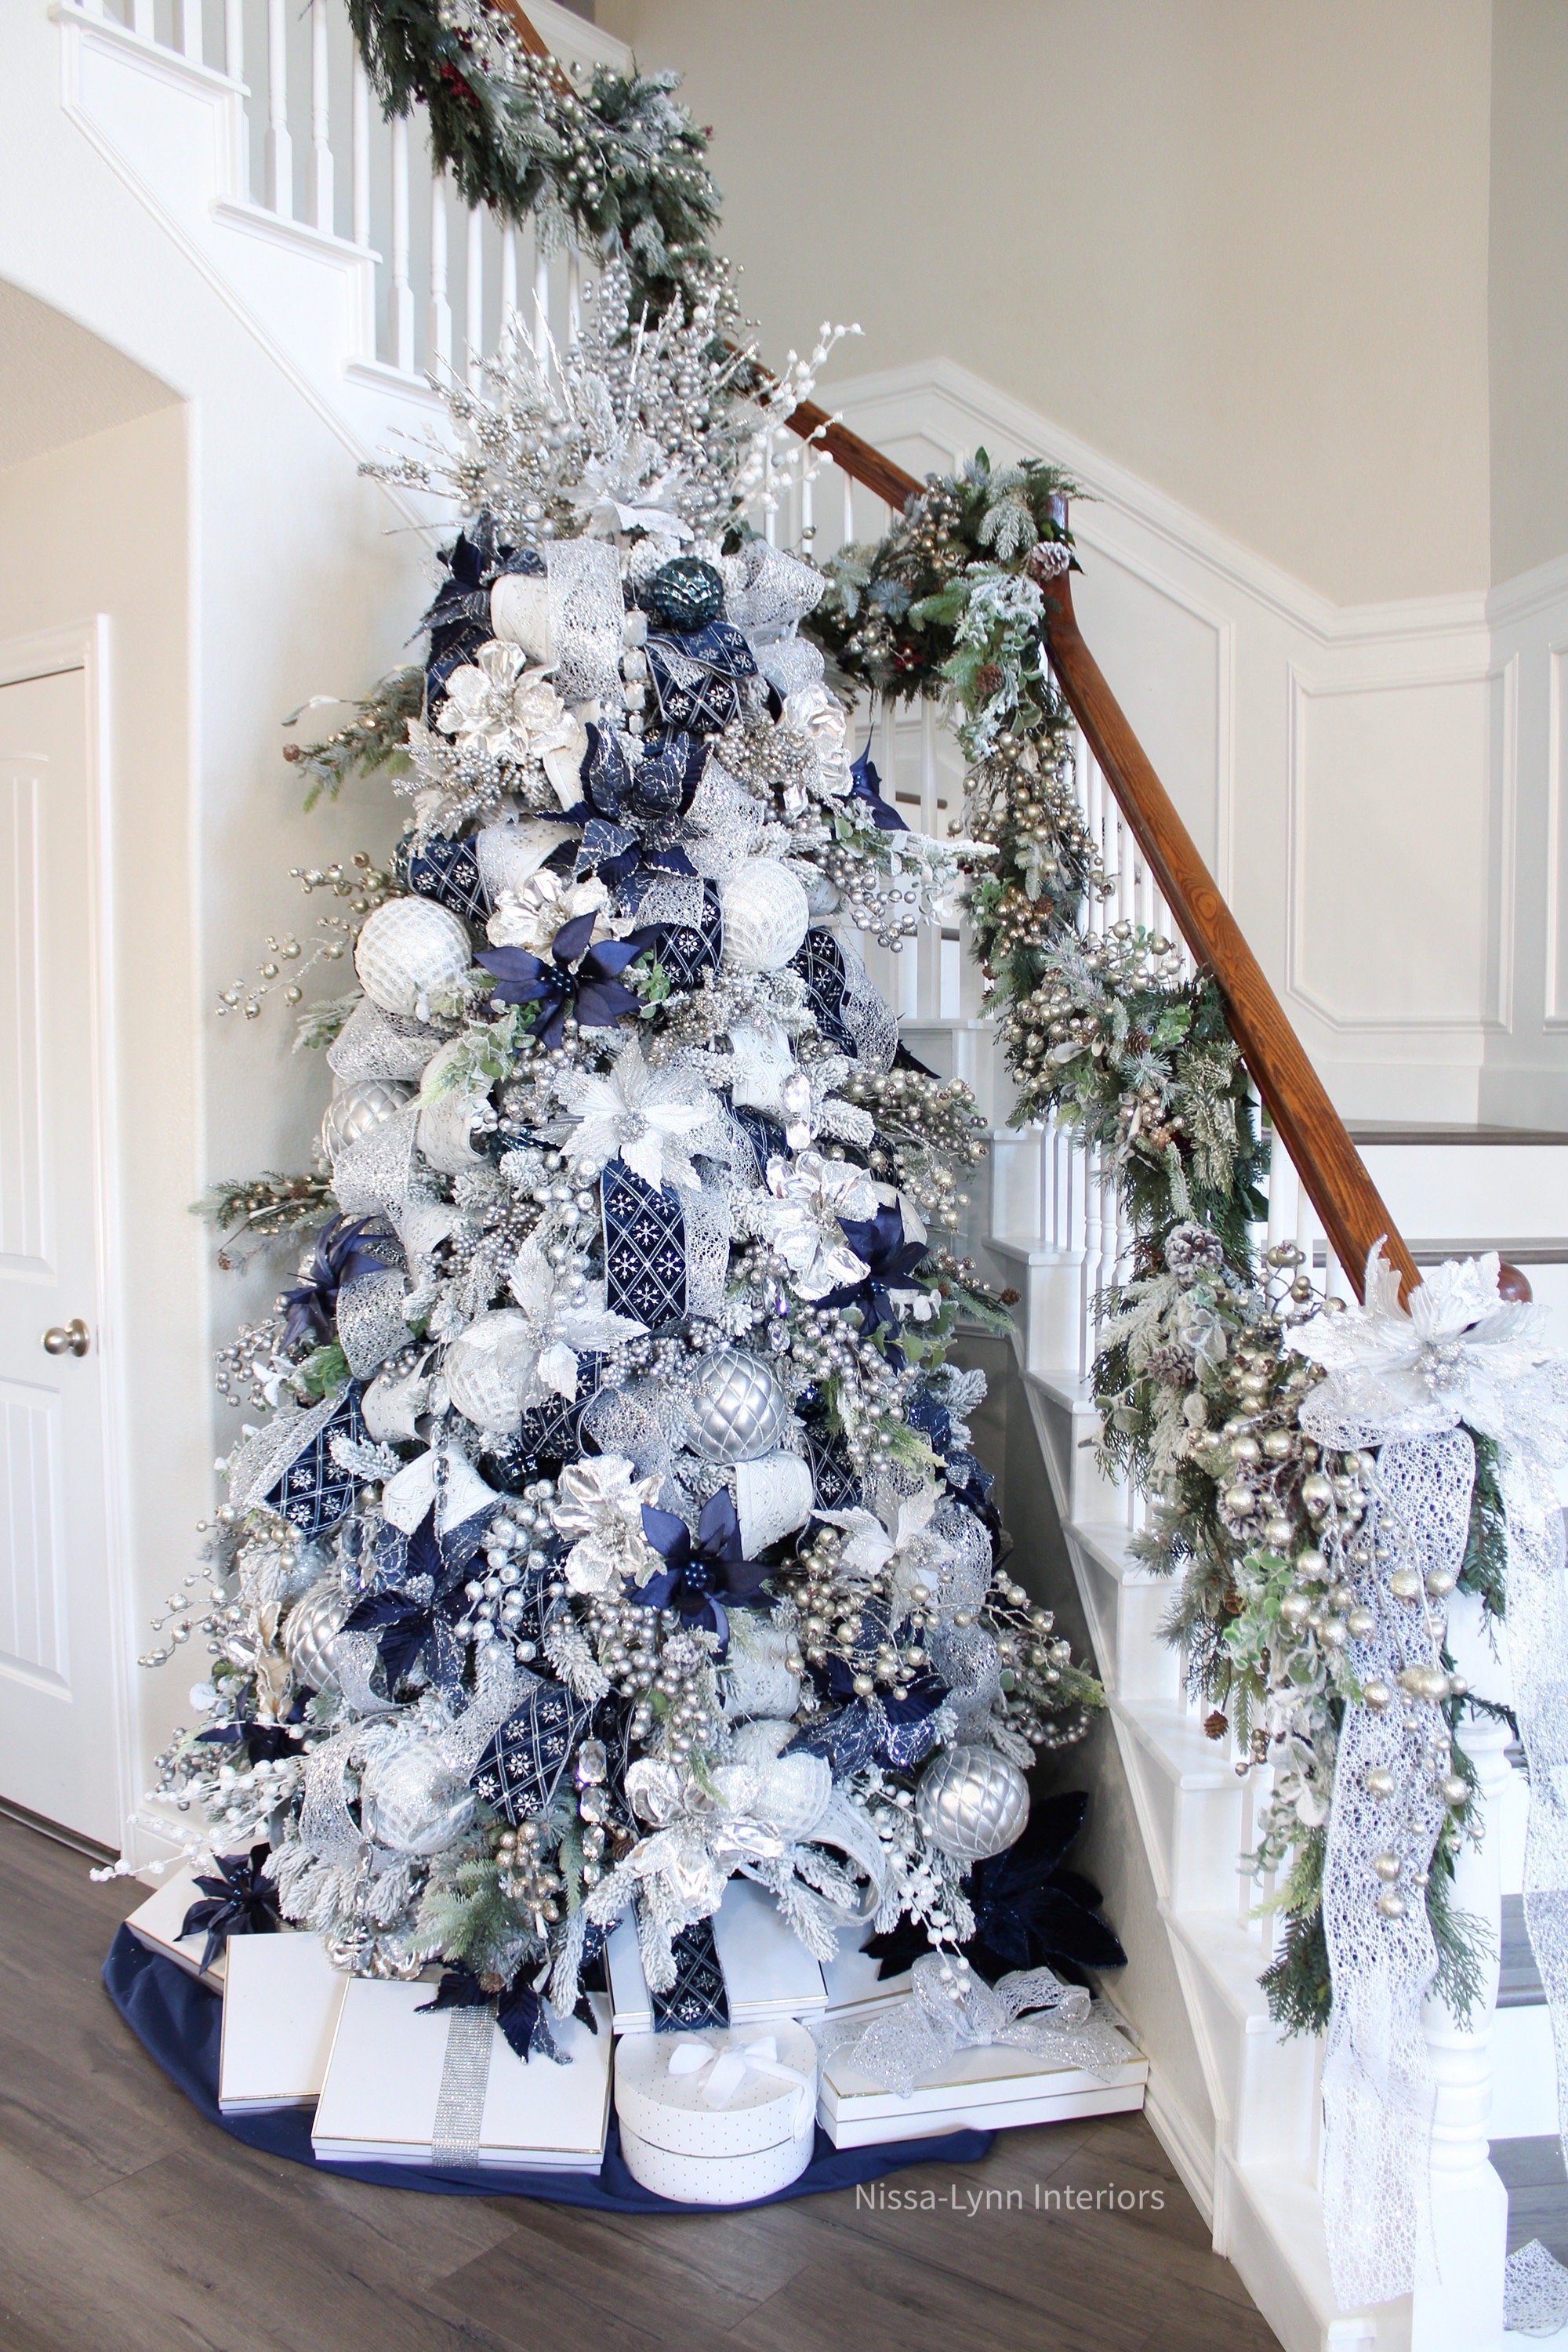
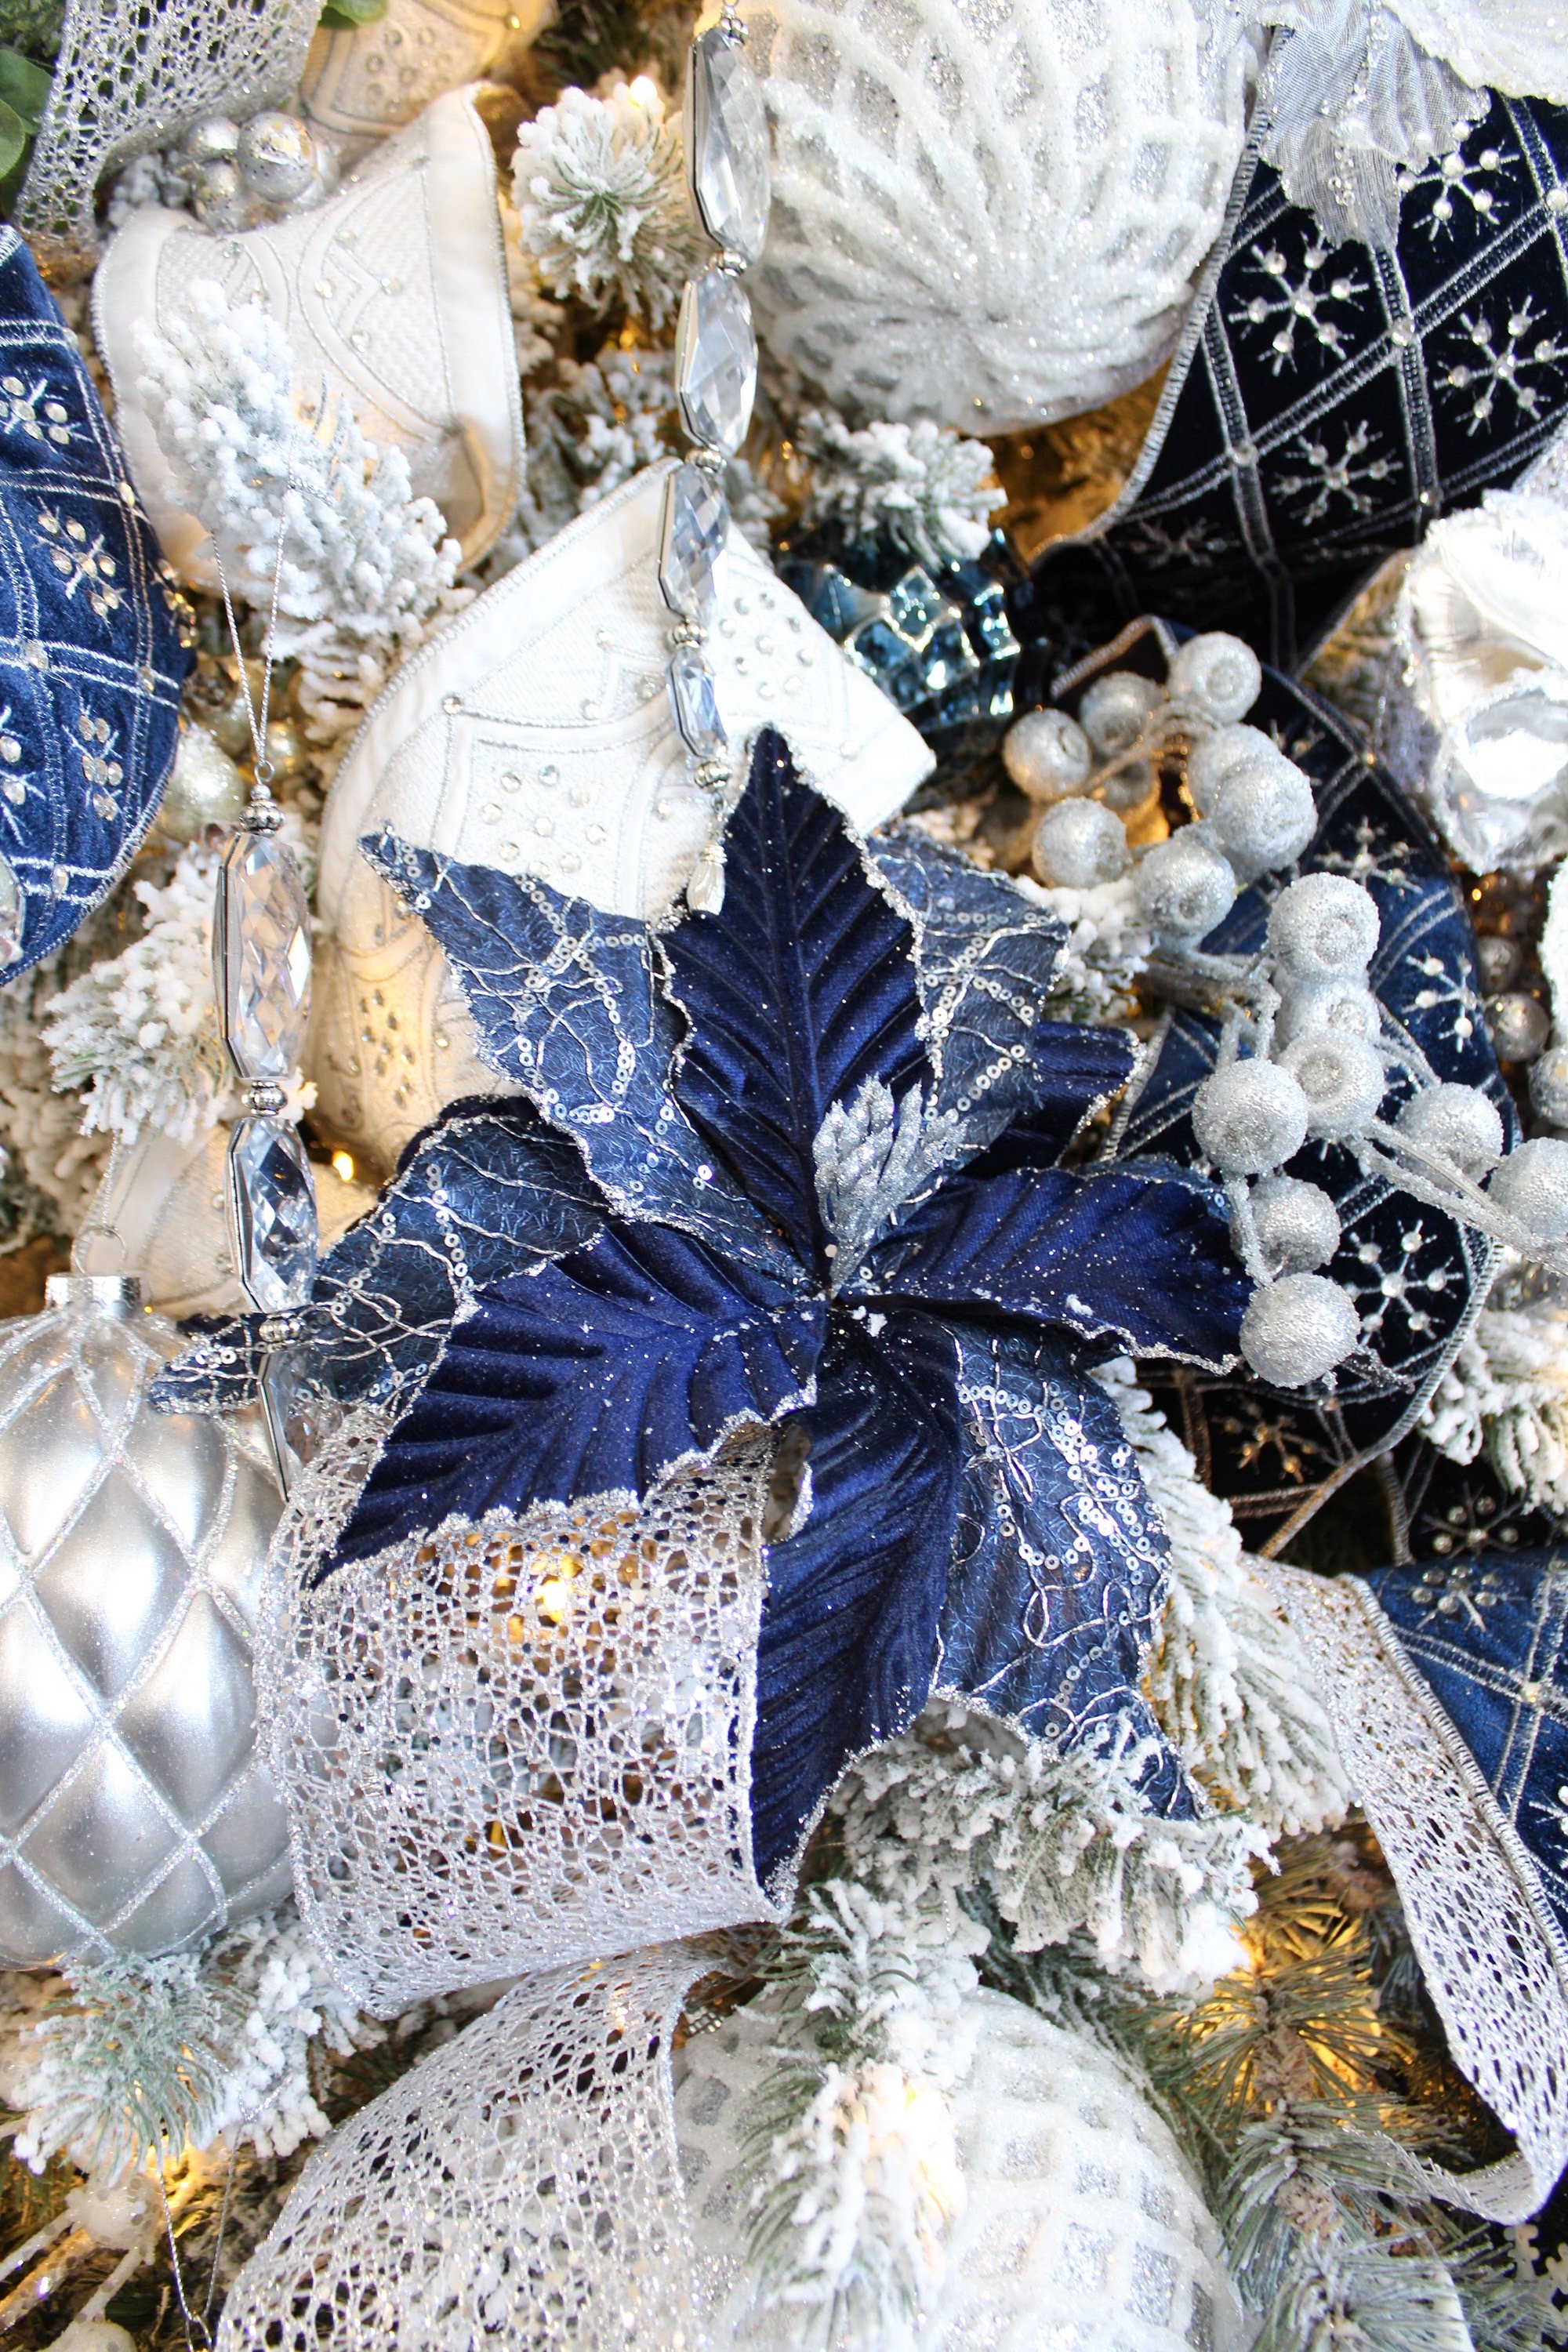
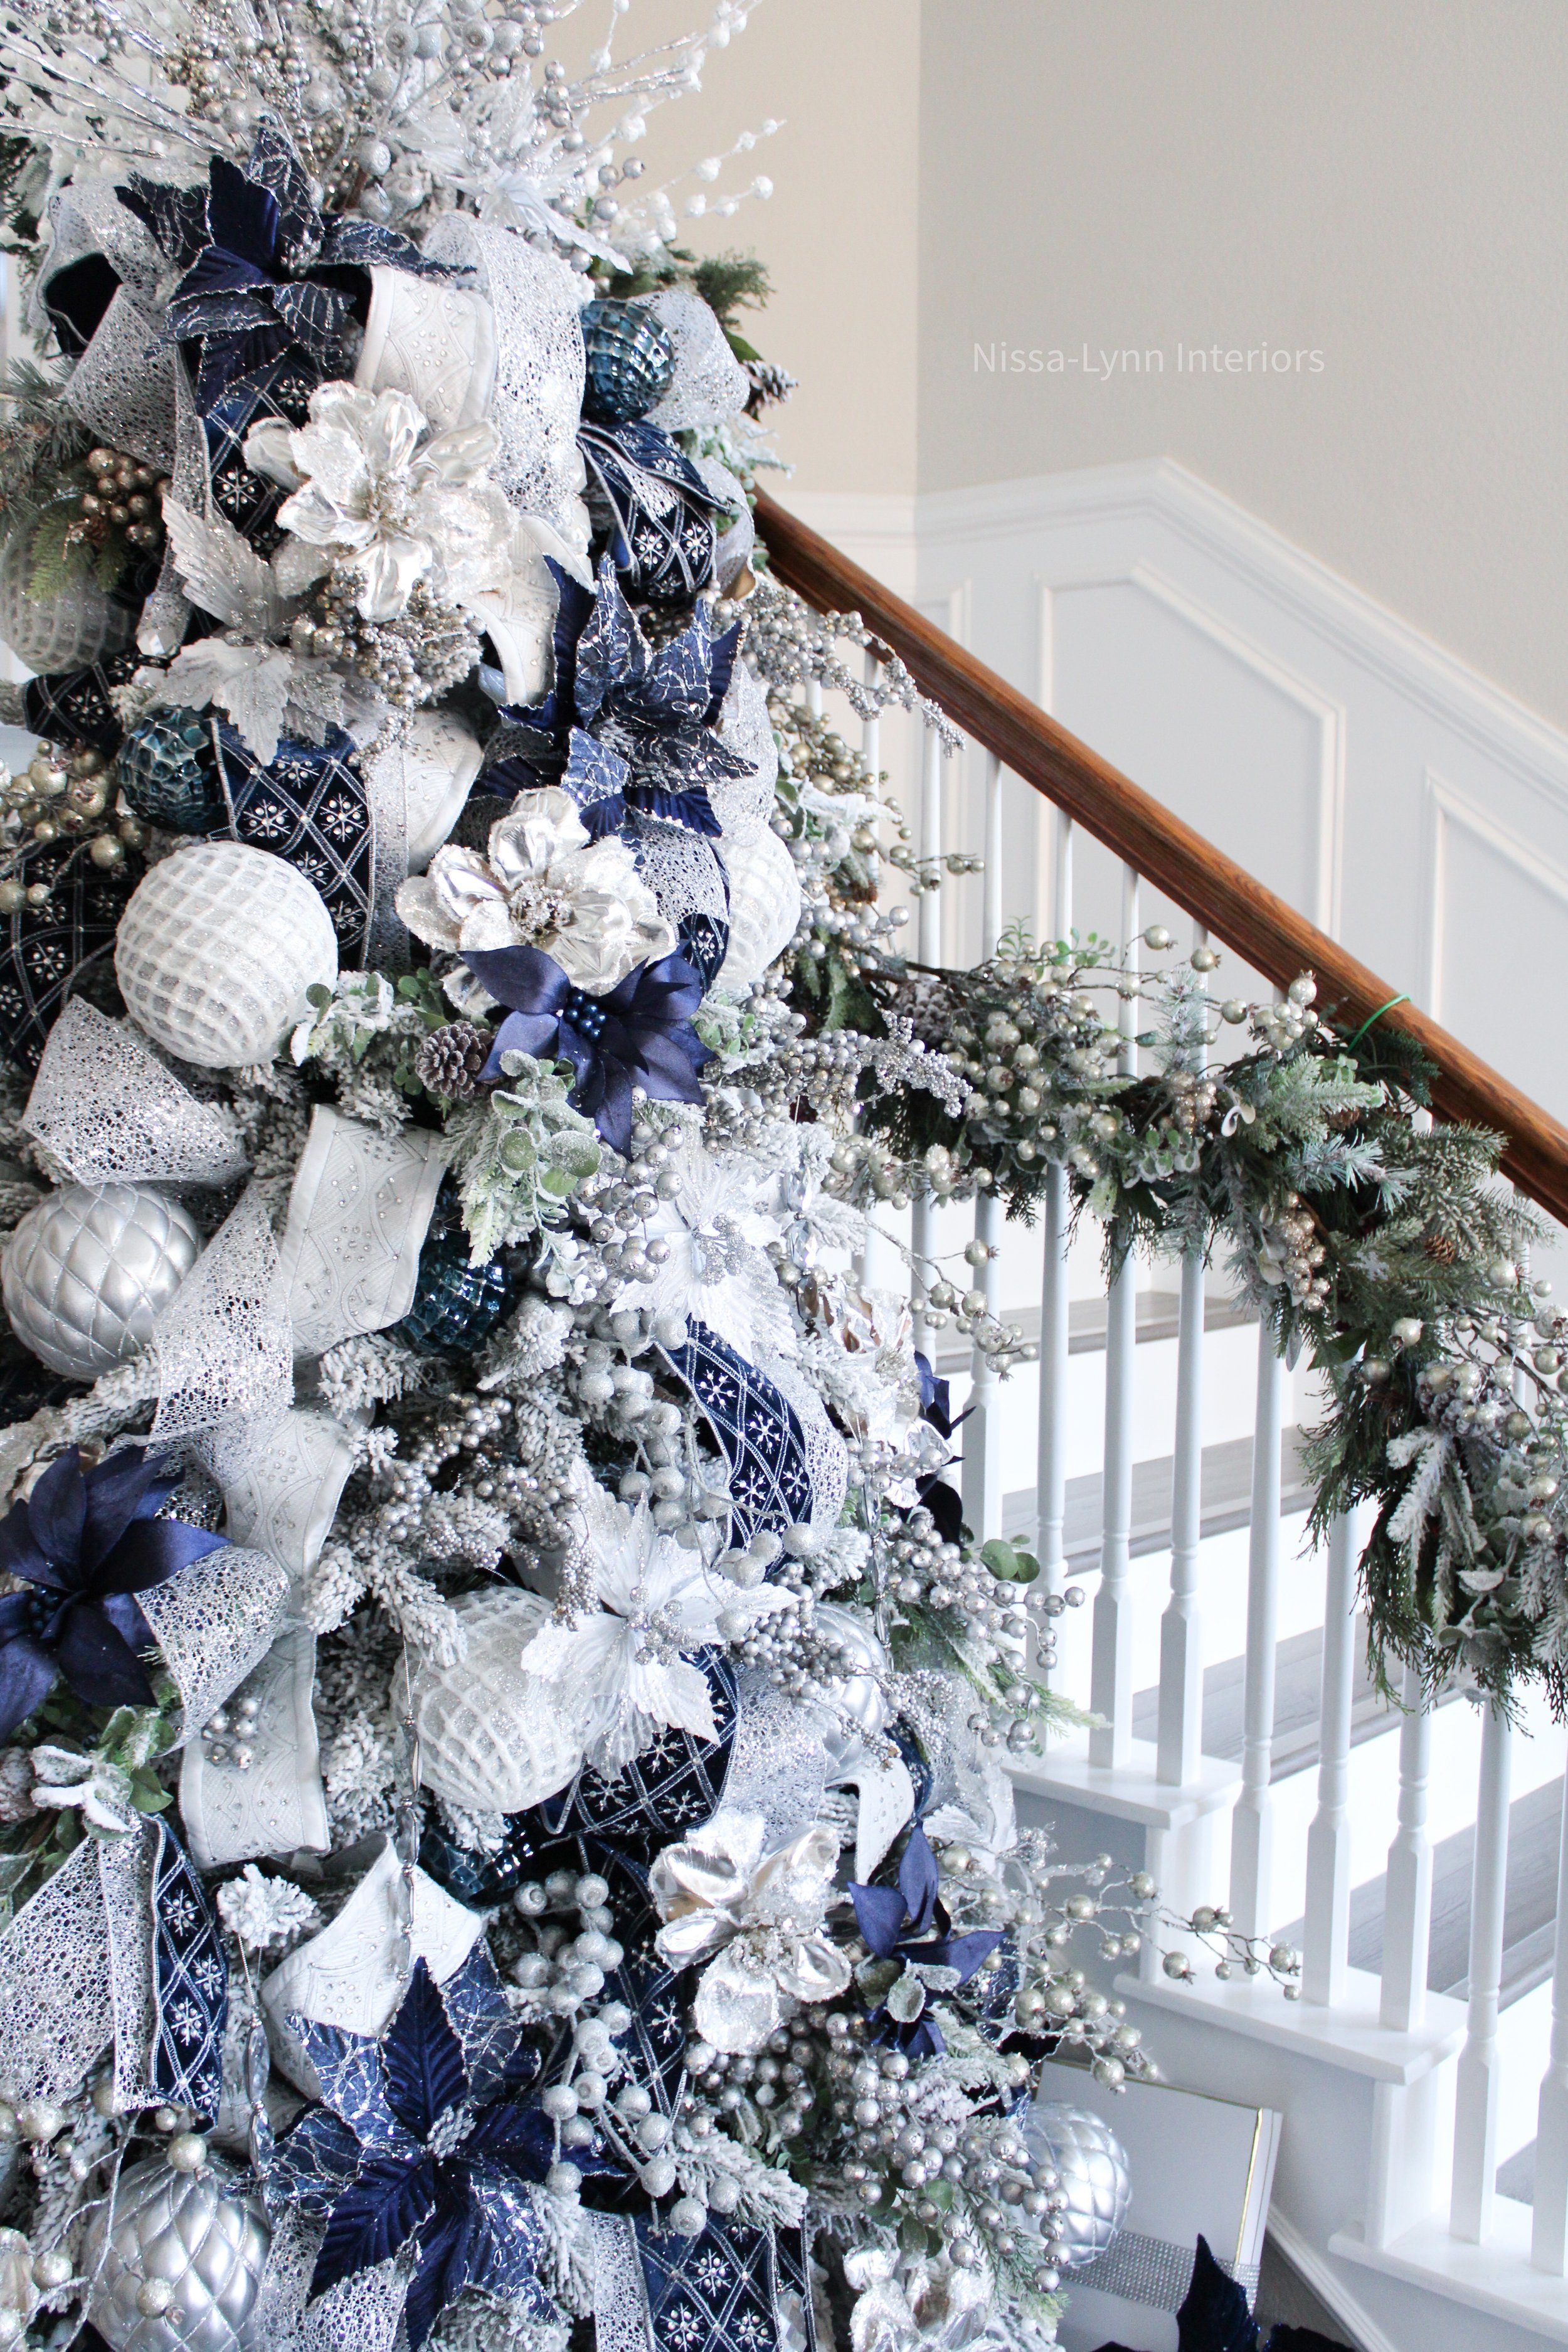
I knew I wanted to go for a regal look with luxurious Christmas ribbon and Christmas flowers adorned with silver and gold ornaments. I have always loved silver and gold trees and when I saw the navy flowers at the Decorator’s Warehouse store, I knew instantly I wanted to combine the two looks of silver and gold with navy accents to create an elegant Christmas tree with lots of sparkle and shine!

My love for elegant Christmas trees started when I was a little girl and frequently visited Macy’s department store on 33rd street in Manhattan, NYC. I remember being in awe of all the large shining Christmas ornaments, lights, and stunning ribbon. The department store felt like a palace.
Drawing upon those memories, I used silver, gold, and navy to bring my regal Christmas tree to life!✨

To  get started, I made fourteen clusters (groupings) with one flocked and champagne crabapple spray, a poinsettia stem and white Christmas flower. I then wrapped the stems around each other to secure them. Next I applied my navy blue velet Chrstimas ribbon in 2 ½ feet strips throughout the tree and added the larger balls. I placed in two different types: The Silver/White Christmas ornament and the 15 CM Glitter ball. After that I added tree different types of flowers - two white and one navy blue, along with a small navy blue ornament for an addition pop of the navy blue color. I also added the crystals to give the Christmas tree an extra dose of glam! The final step was to add several different sparkle sprays.

To simply:

  1. Make clusters.

  2. Add ribbon to Christmas tree. 

  3. Add two different types of large ornaments.

  4. Add four types of flowers and small ornaments.

  5. Add sprays to fill in any gaps or holes.

Click here for all the sources for my Christmas tree! Plus you can use code NISSALYNNINTERIORS at checkout for 10% off your purchase at Decorator’s Warehouse

 I hope you enjoyed my new regal tree. Check some of my friends’ beautiful Decorator’s Warehouse Christmas trees below!

Transitioning from Nursery to Little Girl's Room

My youngest daughter is growing up so fast! I’ve been meaning to write this post for a long time but life happened and then I forgot about it - until now. 

When our daughter Annalise turned three it was time to take down her crib and put up a twin bed. It was time to transition from nursery to a big girl’s room.

We fun have playing tea party in this cute corner of her room. The chair and tables were given to us 14 years ago with our older daughter’s Kay-Lynn. The table and chairs were originally white, but I spray painted two of the chairs pink for a pop of color.

We fun have playing tea party in this cute corner of her room. The chair and tables were given to us 14 years ago with our older daughter’s Kay-Lynn. The table and chairs were originally white, but I spray painted two of the chairs pink for a pop of color.

I knew I wanted a princess themed room and with a canopy to hang from a crown. I found several beautiful ones at Pottery Barn Kids - but they were way over my budget. So I decided to create my own - with my husband’s help. I found this resin crown at Hobby Lobby. It was originally hot pink so I spray painted it gold to match the blush and gold princess theme. We then screwed the crown into the custom made wood box. My husband built the wooden box from scrap wood in our garage. Then we attached it to the wall. I then added the white chiffon fabric that I bought from my local Joanne’s fabric store and fastened it to the back of the wooden box with rope. I also sewed the bows and made the crib skirt. For the pink edge on the chiffon canopy, I used bias tape The crib bumper and quilt are from Pottery Barn Kids.

My husband and I dressed up this @ikeausa dresser by adding new feet, moldings on the top and bottom, and new mirrored knobs. I also added a glass top for elegance. And do you see that pretty pink dress hanging on the hanger? That was mine from when I was a little girl! I love sentimental pieces - do you?

nursery.jpg
IMG_6424 copy.jpg

As much I loved this cozy corner where I would cuddle up my baby girl, I knew the tufted arm chair had to be removed to make room for a table and chairs that would inspire childhood play.

IMG_6443 copy.jpg

Here is is! Her beautiful grown up princess bed! I knew the exact bedding I wanted and needed for her. I chose Beddy’s in Vintage Blush because it works wonderfully with the existing room decor, paint and throw pillows. (Use can use code NISSALYNN for 15% off your entire purchase at Beddy’s.) I also ordered the gray poka dot minkey blanket from Beddy’s.. I picked up the gold dot and blush throw pillows from Hobby Lobby. The small white monogramed ruffle pillow sham is from Pottery Barn Kids.

My husband added the white trim work on the walls.

My husband added the white trim work on the walls.

Even though Annalise has a big girl room, I still kept these new born photos of her on her dresser.

Even though Annalise has a big girl room, I still kept these new born photos of her on her dresser.

Annalise is loving her new room! She spends hours playing in her new space!

Pink Kitchen.jpg
Playingcake.jpg

You can shop similar items below, or you can click here to shop more decor from this post.

It's a "Spooktackular" Halloween!

When I found out I was going to have family flying into town for Halloween, I was so excited to decorate for this holiday! Every year I’ve always just decorated my living room for Halloween, but this year I wanted to branch out and do a “spooktackular” Halloween tablescape! And I must say, I think it’s my most favorite tablescape ever!

FEEAE1CA-7F46-49D9-9BFA-50CE428298FD.jpeg

With it being halloween, I chose a black and white color scheme, and then added pops of orange. The first thing I did was pull out this black and white striped table runner from my decorating closet and put it on my table.

Then I was on the hunt to find some fun Halloween decor. When I saw this Mackenzie-Childs witch’s hat - I was obsessed! I knew that it had to be the center of the tablescape. After placing it on the table, I wanted the hat to stand up a little taller, so I put the hat on a white tray and then raised it a couple more inches by putting it on a couple wood boards. Then I covered the boards with fabric and fake leaves. Next I added patterned and solid colored pumpkins on either sides of the hat. (The Mackenzie-Childs Courtly Check gets me every time! I just love the black and white whimsical pattern.)

Adjustments.jpeg
89EEB7A1-FB18-4E5F-BB7E-7AF9D1B99FAD.jpeg
03C1F53E-07F4-4389-ADDD-645CC75836DB.jpeg

These glasses are from the Dollar store! Can you believe it? I only needed eight for this table setting, so I bought each glass at a dollar a piece. That was cheaper than buying 2- 6pk glasses at Walmart or Target - I checked!

Tip: When putting together a place setting, think of it as a pyramid. Start with the largest piece on bottom and layer until the smallest piece is on top. I usually start with a placemat, then a charger, dinner plate, salad plate and napkin and napkin holder to finish it off. 😊

F015D9EB-7E1A-447C-B1C8-AA6F64D1363A.jpeg
*These darling bat napkin rings and Sit for a Spell sign are from Krumpets Home Decor. Use code NISSALYNN at checkout for 10% off your entire purchase, plus free shipping on orders $25 or more.

*These darling bat napkin rings and Sit for a Spell sign are from Krumpets Home Decor. Use code NISSALYNN at checkout for 10% off your entire purchase, plus free shipping on orders $25 or more.

FC7DBFD1-FB37-47D9-88F8-41A4037C7160.jpeg
1B511797-FB43-4B02-9330-F5ACC9ECCB3D.jpeg
I wanted to throw this photo in for fun. This is my Halloween decorated living room.

I wanted to throw this photo in for fun. This is my Halloween decorated living room.

I hope you have an amazing Halloween! I hope it’s a day filled with fun and laughter.

You can easily shop my Halloween tablescape by clicking on the products photos below.

Three Key Pieces for a Simple Bedroom Refresh!

I decided my bedroom needed a small refresh, and my goal was to do it with only a couple of new pieces! I needed a new mattress, bed and nightstands. I knew with those three items alone, they could make a huge change to my master bedroom

BD763EEA-CD61-4075-A1C8-12106B0D6853.jpeg

To start this refresh, I began with the essential part of any bedroom - the bed and mattress! I’ve have the same bed and mattress for almost nine years. My old mattress was causing my back to ache, so I knew I wanted a firmer mattress. BedInABox was the answer! I’ve been sleeping on my new BedInABox mattress for about a month now, and I can honestly say that my body feels more rested!

We have the Tranquillium in king size, and I love the 12", multilayer firm, foam construction. It makes such a difference in my sleep! And to save money - use code NISSALYNN20 for an additional $20 off! #ad

We have the Tranquillium in king size, and I love the 12", multilayer firm, foam construction. It makes such a difference in my sleep! And to save money - use code NISSALYNN20 for an additional $20 off! #ad

My prior bed was a well loved four poster bed that I bought at Goodwill. We brought it home and my husband replaced a couple of the slats and spray painted it in satin white. Then I distressed it with sand paper to make it look shabby chic. I loved it! (It’s so amazing what you can do with spray paint!) But over the last year, the bed has shown significant wear and tear, and the wood frame started to break - so it was time for a new one. 

IMG_6958.jpeg

The traditional four poster bed was so large, that it seemed take over our entire bedroom, plus the poles were the first thing you noticed when you walked into the room. I decided I wanted a French country bed with a large tufted headboard. The Realyn King Panel bed from Living Spaces was the answer! 

625CEF22-DD30-4C09-980B-AB34B4E0E723.jpeg

I need to tell you about Living Spaces, because it is a furniture store unlike any other! In my local Living Spaces store, in Frisco, Texas, they have four, 2000 sq ft homes built inside the store to showcase their beautiful furniture. This also helps give you decorating and furniture placement ideas. Such a great concept!

FCA511DC-7173-4A75-A3B8-B17A846B81AC.jpeg

After changing up the bed and mattress, new nightstands were next. I wanted to mix styles and add more of a modern looking nightstand to go along with the French bed, so I ordered two night stands from the Presby collection at Living Spaces. The Presby nightstands are great because they have lots of storage and an USB outlet. Plus, I love the pull out piece to hold my lap top. I highly recommend them!

C1748CC6-2B2E-4827-8DAE-5E1631C50FC2.jpeg
1547C087-7978-4DB9-8900-29980E56E0CB.jpeg

I kept the same bedding and accessories but moved the decorative bench from my office and placed it at the foot of my bed. I also moved my ginger jars from living room to the nightstands. 

301D544C-ECB4-4C1E-8780-C2E0B0E00981.jpeg

Don’t be afraid to move accessories or accent furniture in your home. It can give a space new life and save you money! 

So remember, next time you want to redo a room, you don’t have to change everything, just change a couple pieces and then that room will take on a completely new look!

Let's Talk About Pillows!

Tired of the current color scheme in you home?  

Pillows are one of the easiest and least expensive ways to change the feel of 
an entire room!

IMG_9036lighter copy.jpg

Here we have two shots of the same living room. They both have the same
furniture, rug and window treatments, same white tray and white candle sticks. I just changed out the pillows and the florals! Now the room has an entirely different feel!

rugsusapost.jpg

Mix and Match

Mix and matching fabrics and different textures is a fantastic way to create an interesting look. It also looks more professional and custom - like you had direction from a decorator or designer. Here I have a navy block design pillow from Chloe and Olive a linen fabric paired with pillow from Home Goods in a polyester fabric.


Remember pillows don’t always have to match perfectly. Below is a fuzzy leopard print from Home Goods paired with a chiffon rose patterned pillow from H&M. Totally different styles and fabrics (one heavy, the other light), and yet, they compliment each other perfectly!

IMG_9128.jpg

Inserts

Most pillows are sold just as pillow covers. So you will need to purchase the inserts for the covers. I have found that inserts at Pottery Barn are a little more expensive then other places, but they do last much longer! You are paying for quality! I've also used cheaper inserts from Ikea. They're great on the budget at around $7.00 an insert. Below are some Ikea pillows and inserts. Pillows from discount stores, such as Home Goods, Ross, Walmart, and Target normally
come with the inserts included.


IMG_9148.jpg

3-D Elements

Another fun to dress up your pillows is with 3-D elements. Beads, tassels, buttons, rhinestones, and sequence all add texture and visual interest to the pillow - and to the piece of furniture it's being displayed on. See how the broach in the photo below, adds elegance to the gray ribbon. Without it, the the pillow wouldn't look half as fancy!

You can add elements yourself to any existing pillow with by hand sewing the item on. or using a glue gun.

IMG_9135.jpg

Zippers

When choosing a pillow color, you might want to take into consideration the zipper. Most pillows have a dress zipper (right photo below). It does the trick, but if you're constantly switching out pillow covers, or if the pillow is being laid on a lot, the zipper can fall apart pretty easy. However, pillows with a YKK zipper (right photo below,) such as these from 
Chloe and Olive, are much more durable! Some pillows don’t have a zipper at all but an “envelope” closure instead. Where the fabric folds over top of teach other.

IMG_9117.jpg
IMG_9116.jpg
IMG_9031story22.jpg

Holiday Pillows

Pillows are the especially perfect for decorating for the holidays! In fact, it seems almost every home decor retailer has a line of holiday pillows now! Pier 1, Target, Pottery Barn, and Home Goods, are just a few of my favorite places to buy holiday pillow goodness! Boutiques and specialty home decor stores are other places to get one of a kind pillows that the masses don't have. Krumpet's Home Decor is one of my favorite online home decor stores for holiday goodies.

It's been fun sharing my thoughts and experience on pillows with you, now go out and have some fun some shopping!

5 Tips for Arranging Fresh Flowers!

 Fresh flowers make any space beautiful! They're one of my favorite things to photograph. However, sometimes they can be tricky to to arrange right, so I always ask my daughter Kay-Lynn for advice. (She has her  Texas State Floral Licenseand lots of experience!)

Below are Kay-Lynn's TOP 5 TIPS for achieving the perfect fresh flower arrangement.

thumbnail3.jpg

Tip #1

Always rinse flowers first to get any and all pesticides off. Then cut off 1/4 to 1/2 inch off the flower stems, but only after you’ve planned and visualized what your arrangement will look like.


thumbnail.jpg
post2.jpg

Tip #2

If you're using floral foam. Let it soak for ten minutes before putting flowers in. Water foam every few days.

IMG_8516.jpg

Tip #3

Use chicken wire horizontally at the top of the vase to keep your flowers in place. This will help prevent the flowers from flopping down.

IMG_5203post.jpg

Tip #4

Drop pennies into the bottom of the vase to help the flowers stay fresh longer.

IMG_7425post.jpg

Tip #5

Place largest flowers first, then fill in with the smaller flowers and greenery. Make sure to keep looking all around the arrangement for balance and even placement.

IMG_7385p.jpg

Thanks for stopping friends! 

Hopefully these tips come in handy next time you have fresh flowers!

Picking Out the Perfect Gray Paint

Everyone year towards the end of summer, I start getting an itch to redecorate, or fix up things in our home. So today my husband and I went to Lowes and picked up some paint for some touch ups around the house. We're touching up walls before we start some new small DIY house projects (Don't worry - I'll share those in the coming weeks as we work on them.)

a91c816ede6d5ac431002bb0d270350c.jpg

A great place to start is gathering suggestions from family and friends who have already painted with gray colors. Pinterest and the internet are also other great ways to aid in your search. And, of course there is always the old fashion to pick a paint color - going down to the hardware store and looking at paint cards, then bringing them home and placing samples on the walls.

However, grays paint tends to be a lot trickier than other paint colors. This is because gray paint is not a true "color," but more a "tint." This means it starts with a black color base and is gradually mixed with white to lighten it up. It does not have true primary colors in it like other paint colors. Because it's more of a pigment, gray paint tends to easily look different in different lighting. I had a client who loved Amazing Gray by Sherwin Williams. It looked fantastic in her living room, which had lots of windows, but looks mossy green in her hall way. I've seen gray paints show all sorts of undertones like green, purple, blue or even pink undertones! It all depends on the lighting and windows.

The best was to avoid undertones is to buy a sample can (They run any where from $2.98 to $6.50.) Then paint several LARGE areas in your home in several different places that have different lighting. A small painted area will not give you the true color. This is because a small swatch can be influenced by the existing paint color already on the wall.

(*Also note, never use the rest of the sample paint in the container for more than just the sample. Sample cans, because they're just samples, don't have a finishing protect agent in the paint, and therefore the paint will come off easy.)

Another way to test out gray paint, is to paint it on a medium size paper approximately 12'x18' inches, and hold it up to the wall. This helps to see what the gray will look like with out the existing paint color influencing it.

I hope this information helps on your quest for the perfect gray! I'll be sharing all paint color in my home in my next


Shopping Tips for Finding the Perfect Home Decor!

While out shopping, I saw this lantern and I knew it was exactly what I needed for the table by my stairs. It's always so exciting to find something your looking for!

Shopping for accessories can be overwhelming! Especially when you're pacing through the isles of  stores like Homes Goods or Hobby Lobby. Below are a few tips to help you sort through the hundreds of décor pieces to find your the right home accents for your home!

IMG_7467 copy.jpg

1. First, comb through Instagram, magazines, Pinterest, and online photos of rooms you like. 

2. Ask yourself: Do you like modern, traditional, or more rustic home décor styles? 

3. Decide what colors and styles you're drawn to. How do those colors and styles make you feel? Is there a certain store you just love and want to your home to look like?

4. Save pictures you love and look closely at how they decorated the details in the room. What did they put on that coffee table? What type of rug did they use on the floor? What kinds of colors did they use in their pillows? 

5. Then before you go to the stores, decide what specific items your going to look for, using your saved pictures as inspiration. It will cut down on time.

6. Know your budget. Decide if you rather spend money on several less expensive items or put all your money towards a piece that you absolutely love!

Happy Shopping!

Dollar Store Wreath Tutorial

I LOVE Valentine's Day so much, and sometimes I just wish I could go into stores and buy everything that is heart shaped, red, pink, blush etc! (I have to constrain myself - especially at Target.) This year I wanted make a Valentines Day wreath- but I didn't want to spend a lot of time or money. So I took this Boxwood Wreath I bought at Target a couple years ago and transformed it!

To update this on wreath on the cheap, I went to Dollar Tree and bought three packages of heart picks at a $1.00 per package. I broke the sticks in half and stuck them in the grapevine part of the wreath. Next I added some Valentine's Day ribbon, (also purchased at the dollar store,) and made a bow. Now it's ready to hang on my front door! And it only took me ten minuets start to finish! 

IMG_8478cut.jpg

Step #1

IMG_8454.jpg

Step #2

IMG_8456.jpg

Step #3

IMG_8464.jpg

Step #4

IMG_8466.jpg

Step #5

IMG_8461.jpg

Step #6

IMG_8474.jpg

Step #7

Now it’s ready to hang from the top of a door. Or you can make a bow instead, and hook the back the grapevine wreath to a Command hook or nail.

IMG_8477.jpg
IMG_8478.jpg

Santa Clause is Coming to Town!

I'm super excited to share with you what I call my winter white living room! I received so many wonderful compliments about my living room, as well as lots of positive questions about how I decorated this space. But the best compliment of all was having this photo featured on several of Better Homes and Gardens social media sites! Thank you for the love!

I'm to happy to share all the details with y'all!

The darling Santa Clause Decor came from http://www.krumpetshome.com Their Santa Clause collection is so magical!

The darling Santa Clause Decor came from http://www.krumpetshome.com Their Santa Clause collection is so magical!

Design Tip:  It's important to get some classic decor pieces that you love and fit your personal style.  This will save you money because you could refinish or repurpose those pieces in the future for an  to updated look - instead of buying new. My coffee table of 12 years is a great example. It's solid wood with a classic design. I've painted it several times to update it - instead of buying new!

Christmas Tree Detail
This year I had the privilege of receiving a 9 foot Flocked Christmas tree from King of Christmas. It gave me a whole new direction for decorating my living room! Since my flocked tree is such a natural beauty I chose to keep the decor simple and stately. I opted for larger round ornaments rather than many small ones. 

When decorating my tree the first thing I do is put on the ribbon. I cut about 5-6 foot strips, a little longer than the length of the tree. Then I start from the top and tuck about ever 3-6 inches it into the center of the tree - making it "bubble out." I repeat these streps until I reach the bottom of the tree. Then I cut 12 inch strips of another patterned ribbons and place those around the tree to fill in empty spaces.  I add sprigs of frosted sticks and silver was stems throughout. For a tree skirt I just added white fabric and an old white curtain I had in my decorator closet! Crazy huh? 

post58.jpg
blog66.jpg
IMG_7935 copy.jpg
IMG_7952 copy.jpg
The Santa Claus boxes under the tree were a new addition this year! They were sent to me by a darling home decor shop called Krumpets Home Decor. The white candle sticks on the hearth I've had forever! I bought them from Hobby Lobby 8 years ago when…

The Santa Claus boxes under the tree were a new addition this year! They were sent to me by a darling home decor shop called Krumpets Home Decor. The white candle sticks on the hearth I've had forever! I bought them from Hobby Lobby 8 years ago when they were black. I painted them white to give them a fresh new look.

Garland and Wreath

I purchased the garland on my fireplace about five years ago from Hobby Lobby. (I also have the same garland on my stairs.) The garland was originally just green. I added flocked pieces or stems, to brighten it up and give it an updated snowy look. 

blo5.jpg
blog77.jpg

Mantle Decor


The mecury glass vases and candles sticks, and cathedral mirror, are part of my everyday decor and are up on my mantle year round. Most times I like to mix holiday decor with my everyday decor. I also change out my Christmas signs as find new ones.

IMG_8342.jpg
blog2.jpg

Here are the references to where my decor is from:

Silver trees - Home Goods.

Large Decorative Truck Figurine came from Target.   

Decorative white deer - ZGallerie. 

Believe Sign- Kirklands

Mercury Glass- At Home